您好,登錄后才能下訂單哦!
您好,登錄后才能下訂單哦!
小編給大家分享一下Python xlwings如何插入Excel圖片,相信大部分人都還不怎么了解,因此分享這篇文章給大家參考一下,希望大家閱讀完這篇文章后大有收獲,下面讓我們一起去了解一下吧!
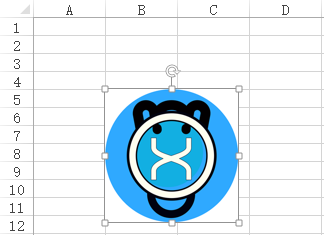
測試圖片

使用相對路徑插入會報錯(確認路徑正確無誤)
import xlwings as xw

wb = xw.Book()
sht = wb.sheets['Sheet1']
sht.pictures.add('1.jpg') # 使用相對路徑會報錯
wb.save('test.xlsx')
wb.close()
File "<COMObject <unknown>>", line 5, in AddPicture
pywintypes.com_error: (-2147352567, '發生意外。', (0, None, '未找到指定文件。', None, 0, -2146827284), None)
改為絕對路徑即可成功插入
import os
import xlwings as xw

wb = xw.Book()
sht = wb.sheets['Sheet1']
# sht.pictures.add('1.jpg') # 使用相對路徑會報錯
sht.pictures.add(os.path.join(os.getcwd(), '1.jpg'))
wb.save('test.xlsx')
wb.close()
函數原型add(image, link_to_file=False, save_with_document=True, left=0, top=0, width=None, height=None, name=None, update=False)
import os
import xlwings as xw

wb = xw.Book()
sht = wb.sheets['Sheet1']
fileName = os.path.join(os.getcwd(), '1.jpg')
sht.pictures.add(fileName, left=sht.range('B5').left, top=sht.range('B5').top, width=100, height=100)
wb.save('test.xlsx')
wb.close()指定圖片位置為B5單元格的左上角,圖片像素為100×100

新建Excel文件test.xlsx,設置列寬20行高100

import os
import xlwings as xw

wb = xw.Book('test.xlsx') # 打開已存在的Excel文件
sht = wb.sheets['Sheet1']
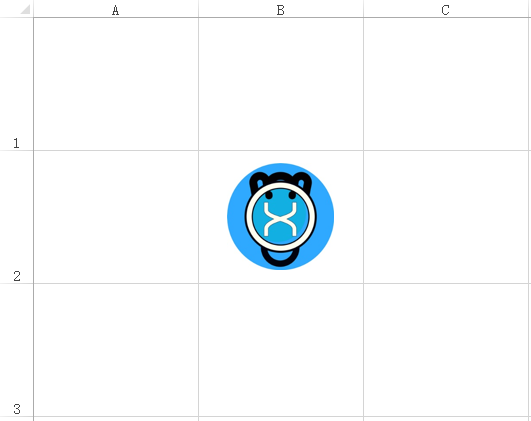
rng = sht.range('B2') # 目標單元格
fileName = os.path.join(os.getcwd(), '1.jpg')
width, height = 80, 80 # 指定圖片大小
left = rng.left + (rng.width - width) / 2 # 居中
top = rng.top + (rng.height - height) / 2
sht.pictures.add(fileName, left=left, top=top, width=width, height=height)
wb.save()
wb.close()
智能居中插入
1.jpg
寬 × 高 = 188 × 282

2.jpg
寬 × 高 = 200 × 153

import os
import xlwings as xw
from PIL import Image


def add_center(sht, target, filePath, match=False, width=None, height=None, column_width=None, row_height=None):
  '''Excel智能居中插入圖片

  優先級:match > width & height > column_width & row_height
  建議使用column_width或row_height,定義單元格最大寬或高

  :param sht: 工作表
  :param target: 目標單元格,字符串,如'A1'
  :param filePath: 圖片絕對路徑
  :param width: 圖片寬度
  :param height: 圖片高度
  :param column_width: 單元格最大寬度,默認100像素,0 <= column_width <= 1557.285
  :param row_height: 單元格最大高度,默認75像素,0 <= row_height <= 409.5
  :param match: 絕對匹配原圖寬高,最大寬度1557.285,最大高度409.5
  '''
  unit_width = 6.107 # Excel默認列寬與像素的比
  rng = sht.range(target) # 目標單元格
  name = os.path.basename(filePath) # 文件名
  _width, _height = Image.open(filePath).size # 原圖片寬高
  NOT_SET = True # 未設置單元格寬高
  # match
  if match: # 絕對匹配圖像
    width, height = _width, _height
  else: # 不絕對匹配圖像
    # width & height
    if width or height:
      if not height: # 指定了寬,等比計算高
        height = width / _width * _height
      if not width: # 指定了高,等比計算寬
        width = height / _height * _width
    else:
      # column_width & row_height
      if column_width and row_height: # 同時指定單元格最大寬高
        width = row_height / _height * _width # 根據單元格最大高度假設寬
        height = column_width / _width * _height # 根據單元格最大寬度假設高
        area_width = column_width * height # 假設寬優先的面積
        area_height = row_height * width # 假設高優先的面積
        if area_width > area_height:
          width = column_width
        else:
          height = row_height
      elif not column_width and not row_height: # 均無指定單元格最大寬高
        column_width = 100
        row_height = 75
        rng.column_width = column_width / unit_width # 更新當前寬度
        rng.row_height = row_height # 更新當前高度
        NOT_SET = False
        width = row_height / _height * _width # 根據單元格最大高度假設寬
        height = column_width / _width * _height # 根據單元格最大寬度假設高
        area_width = column_width * height # 假設寬優先的面積
        area_height = row_height * width # 假設高優先的面積
        if area_width > area_height:
          height = row_height
        else:
          width = column_width
      else:
        width = row_height / _height * _width if row_height else column_width # 僅設了單元格最大寬度
        height = column_width / _width * _height if column_width else row_height # 僅設了單元格最大高度
  assert 0 <= width / unit_width <= 255
  assert 0 <= height <= 409.5
  if NOT_SET:
    rng.column_width = width / unit_width # 更新當前寬度
    rng.row_height = height # 更新當前高度
  left = rng.left + (rng.width - width) / 2 # 居中
  top = rng.top + (rng.height - height) / 2
  try:
    sht.pictures.add(filePath, left=left, top=top, width=width, height=height, scale=None, name=name)
  except Exception: # 已有同名圖片,采用默認命名
    pass


if __name__ == '__main__':
  wb = xw.Book()
  sht = wb.sheets['Sheet1']
  filePath = os.path.join(os.getcwd(), '1.jpg')
  filePath3 = os.path.join(os.getcwd(), '2.jpg')

  add_center(sht, 'A1', filePath) # 默認值
  add_center(sht, 'B2', filePath3) # 默認值
  add_center(sht, 'C3', filePath, match=True) # 絕對匹配圖片寬高
  add_center(sht, 'D4', filePath, width=100) # 圖片寬度為100像素
  add_center(sht, 'E5', filePath, height=100) # 圖片高度為100像素
  add_center(sht, 'F6', filePath, width=100, height=100) # 圖片高度為100像素
  add_center(sht, 'G7', filePath, column_width=100) # 單元格最大寬度為100像素
  add_center(sht, 'H8', filePath, row_height=100) # 單元格最大寬度為100像素
  add_center(sht, 'I9', filePath, column_width=100, row_height=100) # 單元格最大高度或寬度為100像素
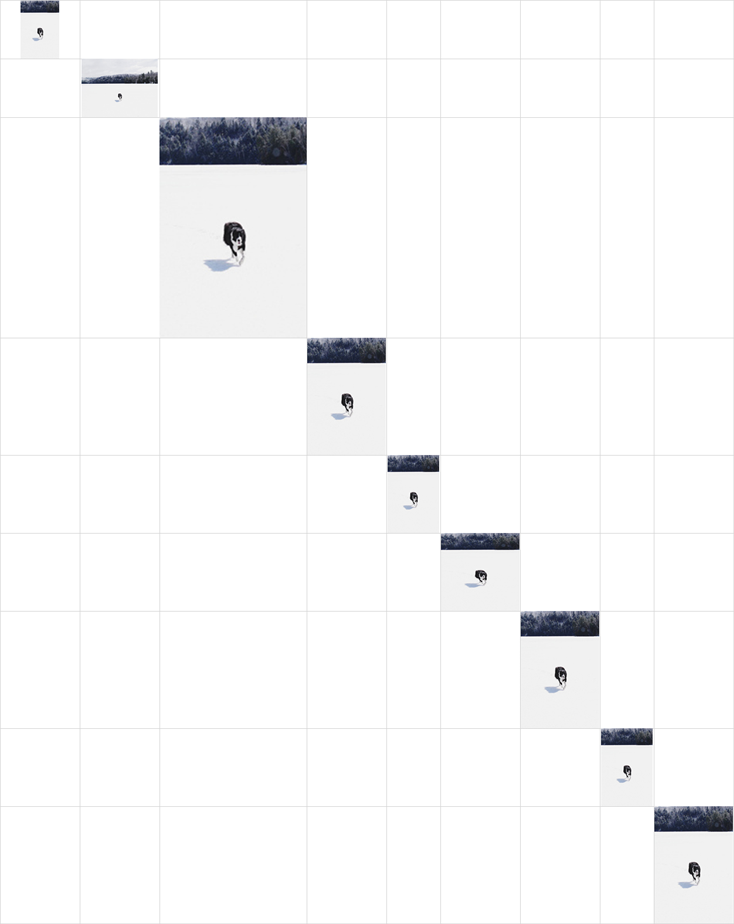
效果

unit_width = 6.107 # Excel默認列寬與像素的比
這個值估計與不同機器、分辨率有關,在5.7-6.2之間
報錯 pywintypes.com_error: (-2147352567, '發生意外。', (0, None, '未找到指定文件。', None, 0, -2146827284), None)
對路徑使用os.path.abspath()
以上是“Python xlwings如何插入Excel圖片”這篇文章的所有內容,感謝各位的閱讀!相信大家都有了一定的了解,希望分享的內容對大家有所幫助,如果還想學習更多知識,歡迎關注億速云行業資訊頻道!
免責聲明:本站發布的內容(圖片、視頻和文字)以原創、轉載和分享為主,文章觀點不代表本網站立場,如果涉及侵權請聯系站長郵箱:is@yisu.com進行舉報,并提供相關證據,一經查實,將立刻刪除涉嫌侵權內容。