您好,登錄后才能下訂單哦!
您好,登錄后才能下訂單哦!
這篇文章主要介紹如何輕松集成新版Elasticsearch7.9中文搜索到Laravel7項目,文中介紹的非常詳細,具有一定的參考價值,感興趣的小伙伴們一定要看完!
只需五步驟:
1.啟動 集成ik中文分詞插件的Elasticsearch7.9 Docker鏡像
2.Laravel7 配置 Scout
3.配置 Model模型
4.導入數據
5.搜索

搜索范圍
文章內容
標題
標簽
結果權重
出現關鍵詞數量
出現關鍵詞次數
搜索頁面
高亮顯示
分詞顯示
結果分頁
主要是博客剛好想做個搜索,順便就整理成文章
Laravel + Elasticsearch 很多前輩都寫過教程和案例,但是隨著Elasticsearch和laravel的版本升級 以前的文章很多都不適用新版本的,建議大家使用任何開源項目時應該過一遍文檔以當前使用的版本文檔為主,教程為輔
Elasticsearch 7.9
Laravel 7
elasticsearch-analysis-ik v7.9
ik 中文分詞插件
elasticsearch 官方文檔
ik中文分詞插件的Elasticsearch$ docker pull ar414/elasticsearch-7.9-ik-plugin
本地映射到docker容器內,防止docker重啟數據丟失
$ mkdir -p /data/elasticsearch/data
$ mkdir -p /data/elasticsearch/log
$ chmod -R 777 /data/elasticsearch/data
$ chmod -R 777 /data/elasticsearch/log
docker run -d -p 9200:9200 -p 9300:9300 -e "discovery.type=single-node" -v /data/elasticsearch/data:/var/lib/elasticsearch -v /data/elasticsearch/log:/var/log/elasticsearch ar414/elasticsearch-7.9-ik-plugin
$ curl http://localhost:9200{
  "name" : "01ac21393985",  "cluster_name" : "docker-cluster",  "cluster_uuid" : "h8L336qcRb2i1aydOv04Og",  "version" : {
    "number" : "7.9.0",    "build_flavor" : "default",    "build_type" : "docker",    "build_hash" : "a479a2a7fce0389512d6a9361301708b92dff667",    "build_date" : "2020-08-11T21:36:48.204330Z",    "build_snapshot" : false,    "lucene_version" : "8.6.0",    "minimum_wire_compatibility_version" : "6.8.0",    "minimum_index_compatibility_version" : "6.0.0-beta1"
}, "tagline" : "You Know, for Search"}curl -X POST "http://localhost:9200/_analyze?pretty" -H 'Content-Type: application/json' -d'
{
"analyzer": "ik_max_word",
"text": "laravel天下無敵"
}
'{
"tokens" : [
{
"token" : "laravel", "start_offset" : 0, "end_offset" : 7, "type" : "ENGLISH", "position" : 0 }, {
"token" : "天下無敵", "start_offset" : 7, "end_offset" : 11, "type" : "CN_WORD", "position" : 1 }, {
"token" : "天下", "start_offset" : 7, "end_offset" : 9, "type" : "CN_WORD", "position" : 2 }, {
"token" : "無敵", "start_offset" : 9, "end_offset" : 11, "type" : "CN_WORD", "position" : 3 }
]}
Elasticsearch官方有提供 SDK,在 Laravel 項目中可以更加優雅快速的接入 Elasticsearch,Laravel 本身有提供 Scout全文搜索 的解決方案,我們只需將默認的 Algolia 驅動 替換成ElasticSearch驅動。
laravel/scout
matchish/laravel-scout-elasticsearch
$ composer require laravel/scout
$ composer require matchish/laravel-scout-elasticsearch
生成 Scout 配置文件(config/scout.php)
$ php artisan vendor:publish --provider="Laravel\Scout\ScoutServiceProvider"Copied File [\vendor\laravel\scout\config\scout.php] To [\config\scout.php]Publishing complete.
指定 Scout 驅動
第一種:在.env文件中指定(建議)
SCOUT_DRIVER=Matchish\ScoutElasticSearch\Engines\ElasticSearchEngine
第二種:在config/scout.php直接修改默認驅動
'driver' => env('SCOUT_DRIVER', 'algolia')改為'driver' => env('SCOUT_DRIVER', 'Matchish\ScoutElasticSearch\Engines\ElasticSearchEngine')指定Elasticsearch服務IP端口
如果使用docker部署則使用
docker0的IP,Linux通過ifconfig查看
在.env中配置
ELASTICSEARCH_HOST=172.17.0.1:9200
注冊服務config/app.php
'providers' => [
 // Other Service Providers
 \Matchish\ScoutElasticSearch\ElasticSearchServiceProvider::class],
清除配置緩存
$ php artisan config:clear
至此 laravel 已經接入 Elasticsearch

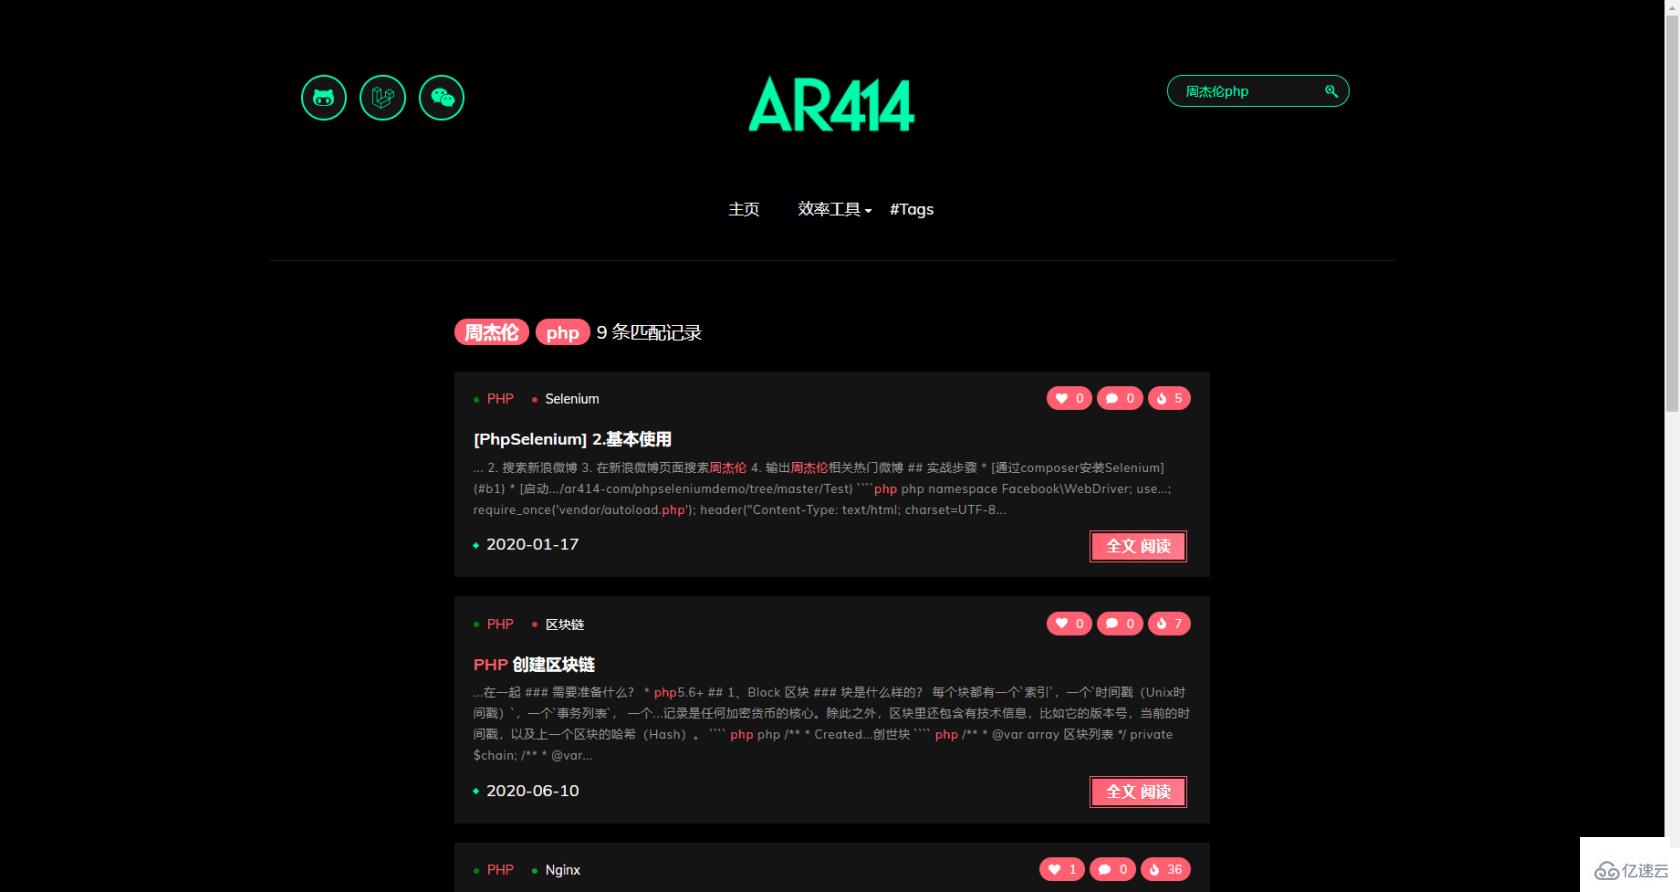
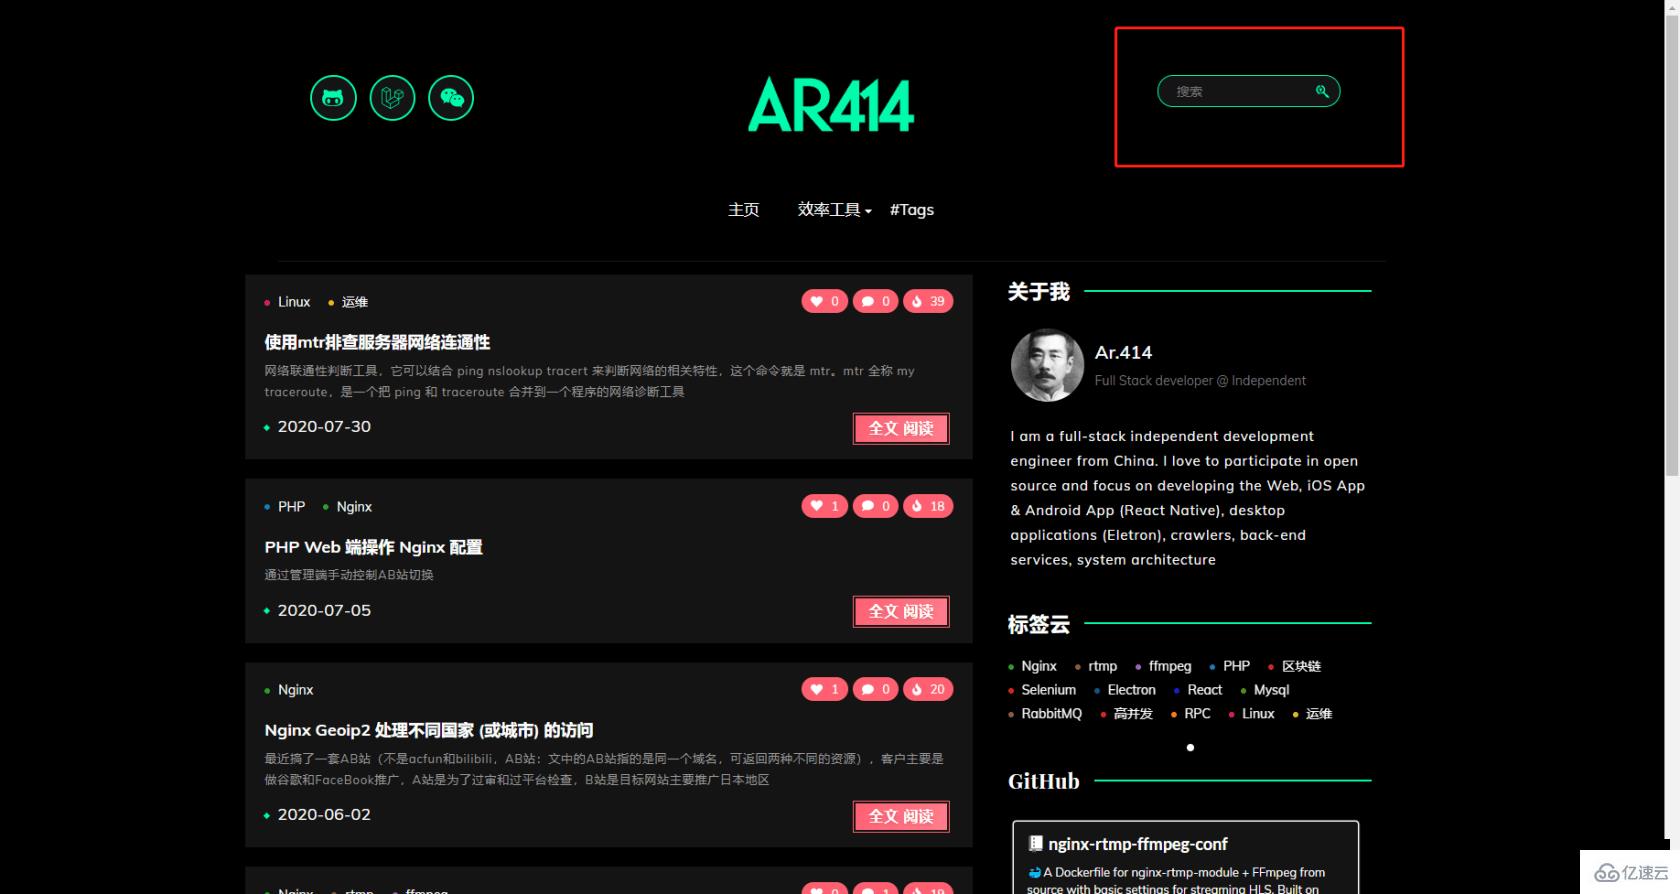
通過博客右上角的搜索框可以搜索到與關鍵詞相關的文章,從以下幾點匹配
文章內容
文章標題
文章標簽
涉及到2張 Mysql表 以及字段
article
title
tags
article_content
content
創建索引配置文件(config/elasticsearch.php)
$ touch config/elasticsearch.php
elasticsearch.php 配置字段映射
<?phpreturn [
 'indices' => [
     'mappings' => [
         'blog-articles' => [
             "properties"=>  [
                 "content"=>  [
                     "type"=>  "text",
                     "analyzer"=>  "ik_max_word",
                     "search_analyzer"=>  "ik_smart"
                 ],
                 "tags"=>  [
                     "type"=>  "text",
                     "analyzer"=>  "ik_max_word",
                     "search_analyzer"=>  "ik_smart"
                 ],
                 "title"=>  [
                     "type"=>  "text",
                     "analyzer"=>  "ik_max_word",
                     "search_analyzer"=>  "ik_smart"
                 ]
             ]
         ]
     ]
 ],];
analyzer:字段文本的分詞器
ik_max_word:ik中文分詞插件提供,對文本進行最大數量分詞laravel天下無敵 -> laravel,天下無敵,天下,無敵
ik_smart: ik中文分詞插件提供,對文本進行最小數量分詞laravel天下無敵 -> laravel,天下無敵
search_analyzer:搜索詞的分詞器
根據具體業務場景選擇(顆粒小占用資源多,一般場景analyzer使用ik_max_word,search_analyzer使用ik_smart):
建議先看一遍 Laravel Scout 使用文檔
引入Laravel Scout
 namespace App\Models\Blog;

 use Laravel\Scout\Searchable;

 class Article extends BlogBaseModel
 {
     use Searchable;
 }
指定索引(剛剛配置文件中的elasticsearch.indices.mappings.blog-articles)
 /**
  * 指定索引
  * @return string
  */
 public function searchableAs()
 {
     return 'blog-articles';
 }
設置導入索引的數據字段
 /**
  * 設置導入索引的數據字段
  * @return array
  */
 public function toSearchableArray()
 {
     return [
         'content' => ArticleContent::query()
             ->where('article_id',$this->id)
             ->value('content'),
         'tags'    => implode(',',$this->tags),
         'title'   => $this->title
     ];
 }
指定 搜索索引中存儲的唯一ID
 /**
  * 指定 搜索索引中存儲的唯一ID
  * @return mixed
  */
 public function getScoutKey()
 {
     return $this->id;
 }

 /**
  * 指定 搜索索引中存儲的唯一ID的鍵名
  * @return string
  */
 public function getScoutKeyName()
 {
     return 'id';
}其實是將數據表中的數據通過Elasticsearch導入到Lucene
Elasticsearch 是 Lucene 的封裝,提供了 REST API 的操作接口
一鍵自動導入: php artisan scout:import
導入指定模型: php artisan scout:import ${model}
$ php artisan scout:import "App\Models\Blog\Article"Importing [App\Models\Blog\Article]Switching to the new index
5/5 [????????????????????????????] 100%[OK] All [App\Models\Blog\Article] records have been imported.
導入失敗,常見原因:
Unresolvable dependency resolving [Parameter #0 [ integer $retries ]] in class Elasticsearch\Transport
解決: 修改配置后,沒有清除配置緩存
invalid_index_name_exception
解決: searchableAs配置錯誤,為索引創建別名后,指定別名
$ curl -XGET http://localhost:9200/blog-articles/_mapping?pretty{
  "blog-articles_1598362919" : {
    "mappings" : {
      "properties" : {
        "__class_name" : {
          "type" : "text",          "fields" : {
            "keyword" : {
              "type" : "keyword",              "ignore_above" : 256            }
          }
        },        "content" : {
          "type" : "text",          "analyzer" : "ik_max_word",          "search_analyzer" : "ik_smart"
        },        "tags" : {
          "type" : "text",          "analyzer" : "ik_max_word",          "search_analyzer" : "ik_smart"
        },        "title" : {
          "type" : "text",          "analyzer" : "ik_max_word",          "search_analyzer" : "ik_smart"
        }
      }
    }
}}創建一個測試命令行
$ php artisan make:command ElasticTest
代碼
<?phpnamespace App\Console\Commands;use App\Models\Blog\Article;use App\Models\Blog\ArticleContent;use Illuminate\Console\Command;use Illuminate\Support\Carbon;class ElasticTest extends Command{
    /**
     * The name and signature of the console command.
     *
     * @var string
     */
    protected $signature = 'elasticsearch {query}';

    /**
     * The console command description.
     *
     * @var string
     */
    protected $description = 'elasticsearch test';

    /**
     * Create a new command instance.
     *
     * @return void
     */
    public function __construct()
    {
        parent::__construct();
    }

    /**
     * Execute the console command.
     *
     * @return mixed
     */
    public function handle()
    {
        //
        $startTime = Carbon::now()->getPreciseTimestamp(3);
        $articles = Article::search($this->argument('query'))->get()->toArray();
        $userTime = Carbon::now()->getPreciseTimestamp(3) - $startTime;
        echo "耗時(毫秒):{$userTime} \n";

        //content在另外一張表中,方便觀察測試 這里輸出
        if(!empty($articles)) {
            foreach($articles as &$article) {
                $article = ArticleContent::query()->where('article_id',$article['id'])->value('content');
            }
        }

        var_dump($articles);

    }}
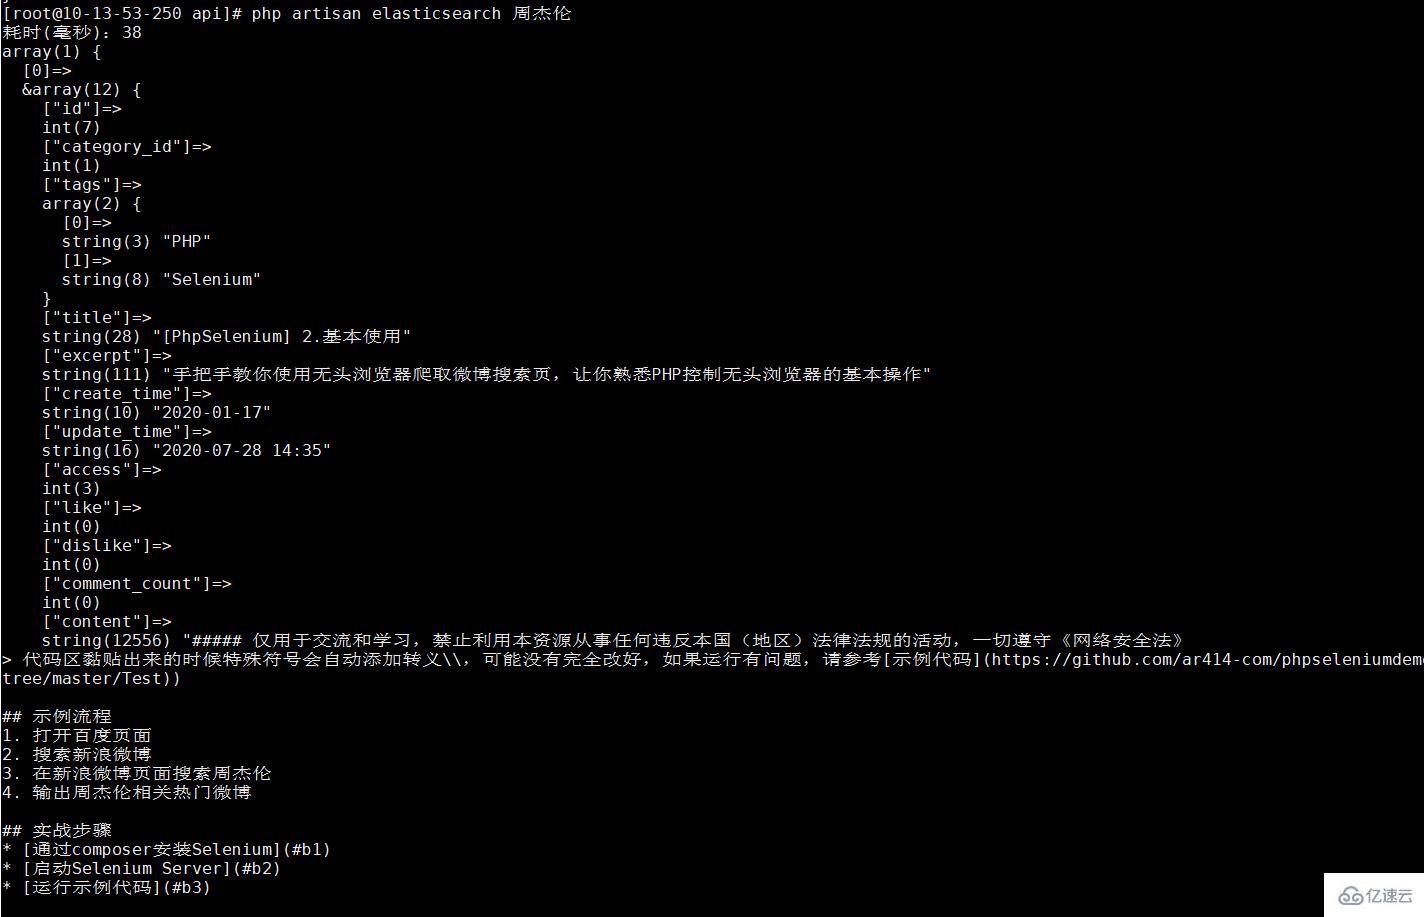
測試
$ php artisan elasticsearch 周杰倫

復雜查詢
例如:自定義高亮顯示
//ONGR\ElasticsearchDSL\Highlight\Highlight ArticleModel::search($query,function($client,$body) {
         $higlight = new Highlight();
         $higlight->addField('content',['type' => 'plain']);
         $higlight->addField('title');
         $higlight->addField('tags');
         $body->addHighlight($higlight);
         $body->setSource(['title','tags']);
         return $client->search(['index' => (new ArticleModel())->searchableAs(), 'body' => $body->toArray()]);
     })->raw();
復雜自定義查詢回調中的$client和$body,可根據這兩個包進行靈活操作
$client 官方 elasticsearch/elasticsearch package(https://packagist.org/packages/elasticsearch/elasticsearch)
$body ongr/elasticsearch-dsl package(https://packagist.org/packages/ongr/elasticsearch-dsl)
以上是“如何輕松集成新版Elasticsearch7.9中文搜索到Laravel7項目”這篇文章的所有內容,感謝各位的閱讀!希望分享的內容對大家有幫助,更多相關知識,歡迎關注億速云行業資訊頻道!
免責聲明:本站發布的內容(圖片、視頻和文字)以原創、轉載和分享為主,文章觀點不代表本網站立場,如果涉及侵權請聯系站長郵箱:is@yisu.com進行舉報,并提供相關證據,一經查實,將立刻刪除涉嫌侵權內容。