您好,登錄后才能下訂單哦!
您好,登錄后才能下訂單哦!
今天就跟大家聊聊有關在Nuxt 中使用nuxt-child組件實現父頁面向子頁面傳值,可能很多人都不太了解,為了讓大家更加了解,小編給大家總結了以下內容,希望大家根據這篇文章可以有所收獲。


自己案例代碼:
pages/parent.vue
<template>
 <div>
 <h3>父組件的頁面的內容</h3>
 <ul>
  <!-- 進行切換子頁面,寫法同vue.js -->
  <li><nuxt-link to='/parent/child'>child</nuxt-link></li>
  <li><nuxt-link to='/parent/child2'>child2</nuxt-link></li>
 </ul>
 <hr>
 <div class="box">
  <p>嵌套子頁面內容區</p>
  <!-- <nuxt-child>標簽在父頁面組件中相當于是子頁面組件的占位符;嵌套中這個不可少 -->
  <nuxt-child keep-alive :foobar="123"></nuxt-child>
 </div>
 </div>
</template>
<script>
export default {

}
</script>
<style scoped>
.box{
 margin-top: 20px;
 padding: 20px;
 border: 2px solid pink;
 border-radius: 5px;
}
</style>
pages/parent/index.vue
<template>
 <div>
 <h3>嵌套子組件中的默認頁面index.vue</h3>
 </div>
</template>
<script>
export default {

}
</script>
<style scoped>

</style>
pages/parent/child.vue
<template>
 <div>
 <h3>嵌套子組件中的頁面child</h3>
 <p>foobar:{{foobar}}</p>
 </div>
</template>
<script>
export default {
 props:['foobar']
}
</script>
<style scoped>

</style>
pages/parent/child2.vue
<template>
 <div>
 <h3>嵌套子組件中的頁面child2</h3>
 <p>foobar:{{foobar}}</p>
 </div>
</template>
<script>
export default {
 props: ['foobar']
}
</script>
<style scoped>

</style>
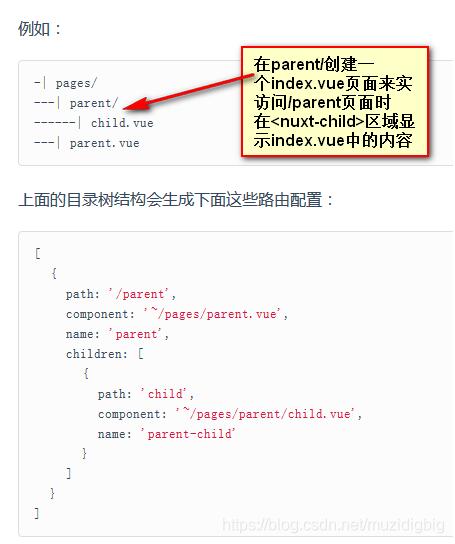
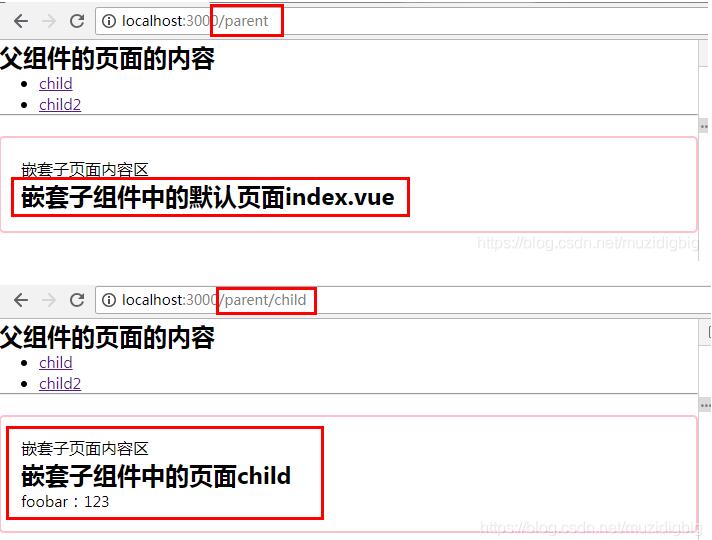
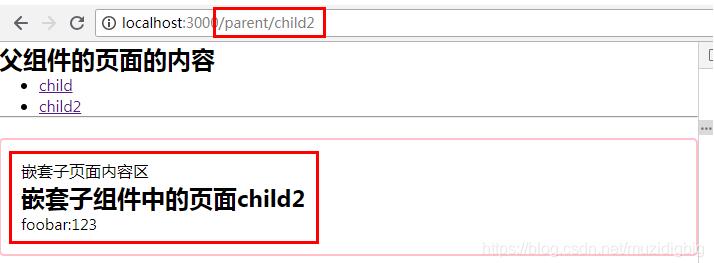
效果如下:


補充知識:nuxt二級路由
耗費了大半天的時間,終于把頁面的二級路由配置好了
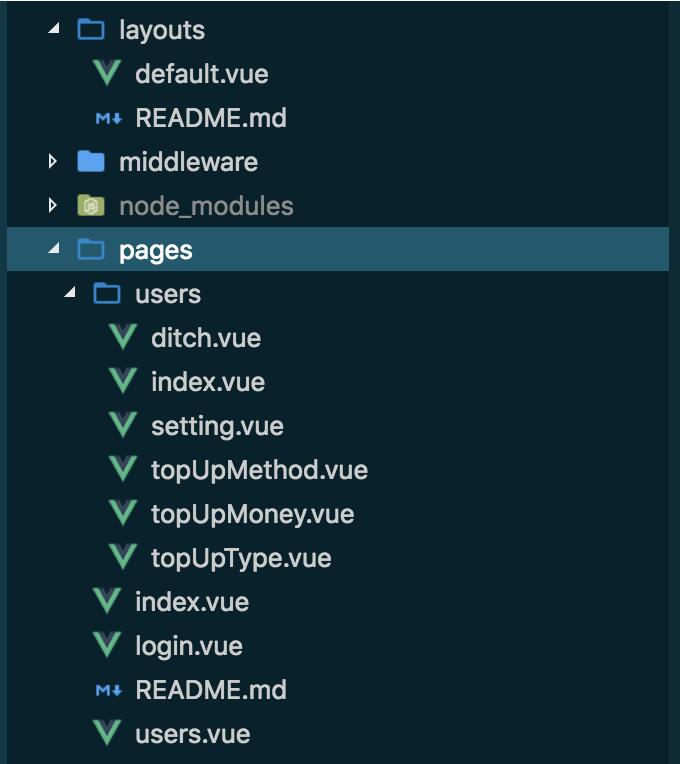
先看我的目錄

如果沒有登陸頁,根本就不用考慮嵌套路由的問題,主要的menu跳轉和<nuxt />可以直接寫到layouts/default.vue中,首頁可以放到pages/index.vue,就可以了。
好了,步入核心的
情景,在中間件middleware/authenticated.js
// 定義了一個中間件, 如果用戶未登錄, 則跳轉登錄頁。
export default function ({
 store,
 redirect
}) {
 if (!store.state.user) {
 return redirect('/login')
 }
}
首先,需要知道,pages/index.vue這個文件必須有,這是給路由'/',定義的頁面,但是我真正的首頁是在user/index.vue
pages/index.vue下
<template>
 <div >

 </div>
</template>

<script>
export default {
 created () {
 console.log(this.$router)
 this.$router.push('/login') // 頁面加載時跳轉
 }
}
</script>
意思是加載二級路由的pages/users.vue頁面
<template>
<div >
<el-container >
<el-header class="theme-bg-color">
<my-head />
</el-header>
<el-container >
<my-side />
<el-main>
<NuxtChild :key="key"/>
</el-main>
</el-container>
</el-container>
</div>
</template>
<script>
import MySide from '~/components/MySide.vue'
import MyHead from '~/components/MyHead.vue'
export default {
components: {
MySide,
MyHead
},
computed: {
key() {
return this.$route.name !== undefined? this.$route.name +new Date(): this.$route +new Date()
}
}
}
</script>注意,在pages/users/index.vue頁面中
export default {
 name: 'users'
}
其他頁面,比如pages/users/ditch.vue頁面中
export default {
 name: 'users-ditch'
}
一定要這樣去寫name,官網上也是這樣說明的。
總結,嵌套路由(二級路由寫法)
一,頁面有個user.vue,文件夾也要有個同名的user;
二,最好有index.vue頁面;
三,name格式。
看完上述內容,你們對在Nuxt 中使用nuxt-child組件實現父頁面向子頁面傳值有進一步的了解嗎?如果還想了解更多知識或者相關內容,請關注億速云行業資訊頻道,感謝大家的支持。
免責聲明:本站發布的內容(圖片、視頻和文字)以原創、轉載和分享為主,文章觀點不代表本網站立場,如果涉及侵權請聯系站長郵箱:is@yisu.com進行舉報,并提供相關證據,一經查實,將立刻刪除涉嫌侵權內容。