溫馨提示×
您好,登錄后才能下訂單哦!
點擊 登錄注冊 即表示同意《億速云用戶服務條款》
您好,登錄后才能下訂單哦!
首先要確認已經配置好react-native的環境。
# 創建一個native應用,SimpleApp,然后進入項目目錄
react-native init SimpleApp
cd SimpleApp


# 通過npm安裝最新版本的react-navigation
npm install --save react-navigation


# 運行程序
react-native run-android
引入Stack Navigator
對于我們的應用程序,我們想要使用堆棧式導航器,因為我們想要一個概念的“堆棧”導航,其中每個新屏幕都放在堆棧頂部,然后從堆棧頂部移除一個屏幕。
 import React from 'react';
import {
 AppRegistry,
 Text,
} from 'react-native';
import { StackNavigator } from 'react-navigation';

class HomeScreen extends React.Component {
 static navigationOptions = {
  title: 'Welcome world',
 };
 render() {
  return <Text>Hello, Navigation!</Text>;
 }
}
const SimpleApp = StackNavigator({
 Home: { screen: HomeScreen },
});

AppRegistry.registerComponent('SimpleApp', () => SimpleApp);
屏幕的title在靜態導航選項中是可配置的,在這里可以設置許多選項來配置導航器中的屏幕顯示。
添加一個新的屏幕
 class ChatScreen extends React.Component {
 static navigationOptions = {
  title: 'Chat with Lucy',
 };
 render() {
  return (
   <View>
    <Text>Chat with Lucy</Text>
   </View>
  );
 }
}
然后在HomeScreen添加一個按鈕,鏈接到ChatScreen
 class HomeScreen extends React.Component {
 static navigationOptions = {
  title: 'Welcome',
 };
 render() {
  const { navigate } = this.props.navigation;
  return (
   <View>
    <Text>Hello, Chat App!</Text>
    <Button
     onPress={() => navigate('Chat')}
     title="Chat with Lucy"
    />
   </View>
  );
 }
最后將添加的兩個頁面添加到StackNavigator中
 const SimpleApp = StackNavigator({
 Home: { screen: HomeScreen },
 Chat: { screen: ChatScreen },
});
在這里,可以傳遞參數,從HomeScreen傳遞
class HomeScreen extends React.Component {
 static navigationOptions = {
  title: 'Welcome',
 };
 render() {
  const { navigate } = this.props.navigation;
  return (
   <View>
    <Text>Hello, Chat App!</Text>
    <Button
     onPress={() => navigate('Chat', { user: 'Lucy' })}
     title="Chat with Lucy"
    />
   </View>
  );
 }
}
ChatScreen接收參數
class ChatScreen extends React.Component {
 // Nav options can be defined as a function of the screen's props:
 static navigationOptions = ({ navigation }) => ({
  title: `Chat with ${navigation.state.params.user}`,
 });
 render() {
  // The screen's current route is passed in to `props.navigation.state`:
  const { params } = this.props.navigation.state;
  return (
   <View>
    <Text>Chat with {params.user}</Text>
   </View>
  );
 }
}
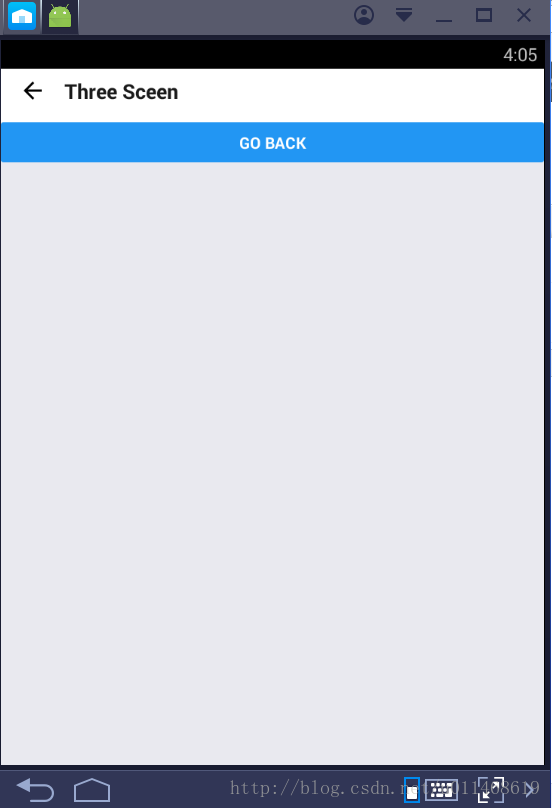
添加第三個頁面,Three.js, ChatScreen跳轉到Three
 import React,{Component} from 'react';
import {
 AppRegistry,
 Text,
 View,
 Button,
} from 'react-native';

class Three extends React.Component {
 static navigationOptions = {
  title: 'Three Sceen',
 };
 render() {
  const { goBack } = this.props.navigation;
  return (
   <Button
    title="Go back"
    onPress={() => goBack()}
   />
  );
 }
}
export default Three;
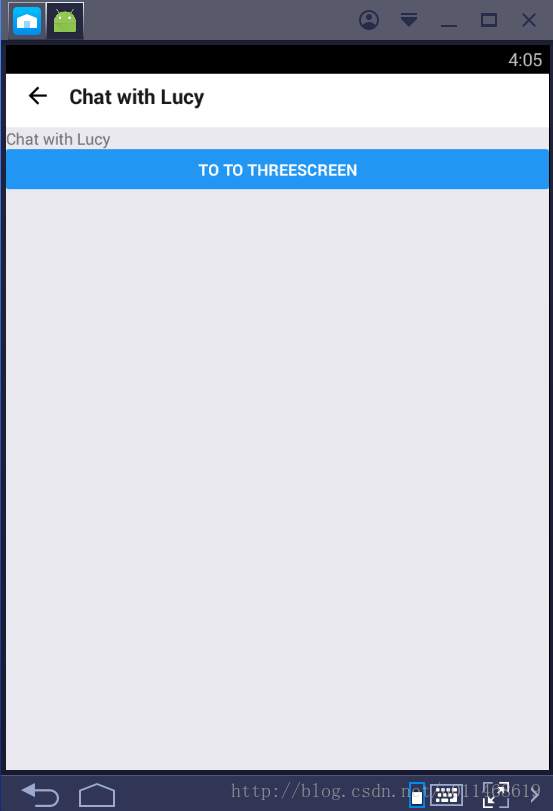
修改ChatScreen的配置
class ChatScreen
extends React.Component {

static navigationOptions = {

title: 'Chat with Lucy',

};

render() {

const { navigate } =
this.props.navigation;

return (

<View>

<Text>Chat with Lucy</Text>

<Button

onPress={() =>
navigate('Three')}

title="to to ThreeScreen"

/>

</View>

);

}

}
最后的結果如下:


最后給出完整代碼
文件 index.android.js
import SimpleApp
from './App';
文件App.js
import React
from 'react';

import {

AppRegistry,

Text,

View,

Button,

} from 'react-native';

import { StackNavigator }
from 'react-navigation';

import ThreeScreen
from './Three.js';


class HomeScreen
extends React.Component {

static navigationOptions = {

title: 'Welcome',

};

render() {

const { navigate } =
this.props.navigation;

return (

<View>

<Text>Hello, Chat App!</Text>

<Button

onPress={() =>
navigate('Chat')}

title="Chat with Lucy"

/>

</View>

);

}

}


class ChatScreen
extends React.Component {

static navigationOptions = {

title: 'Chat with Lucy',

};

render() {

const { navigate } =
this.props.navigation;

return (

<View>

<Text>Chat with Lucy</Text>

<Button

onPress={() =>
navigate('Three')}

title="to to ThreeScreen"

/>

</View>

);

}

}


const SimpleApp =
StackNavigator({

Home: { screen:
HomeScreen },

Chat: { screen:
ChatScreen },

Three: { screen:
ThreeScreen},

});


AppRegistry.registerComponent('SimpleApp', ()
=> SimpleApp);
文件Three.js
import React,{Component}
from 'react';

import {

AppRegistry,

Text,

View,

Button,

} from 'react-native';


class Three
extends React.Component {

static navigationOptions = {

title: 'Three Sceen',

};

render() {

const { goBack } =
this.props.navigation;

return (

<Button

title="Go back"

onPress={() =>
goBack()}

/>

);

}

}

export default
Three;
以上就是本文的全部內容,希望對大家的學習有所幫助,也希望大家多多支持億速云。
免責聲明:本站發布的內容(圖片、視頻和文字)以原創、轉載和分享為主,文章觀點不代表本網站立場,如果涉及侵權請聯系站長郵箱:is@yisu.com進行舉報,并提供相關證據,一經查實,將立刻刪除涉嫌侵權內容。