您好,登錄后才能下訂單哦!
您好,登錄后才能下訂單哦!
本篇內容主要講解“react后端請求數據如何實現”,感興趣的朋友不妨來看看。本文介紹的方法操作簡單快捷,實用性強。下面就讓小編來帶大家學習“react后端請求數據如何實現”吧!
react后端請求數據的實現方法:1、在package.json中配置“ "proxy":"http://localhost:5000"”;2、在src目錄下創建“setupProxy.js”文件;3、調用“setupProxy.js”中配置的功能,代碼如“createProxyMiddleware('/api2',{target:...}”。
react-ajax請求后臺數據方法
"proxy":"http://localhost:5000"
這樣localhost:5000就是我們要代理到的服務器
  getStudentData = () => {
    axios.get('/students').then(
      (result) => { console.log(result.data); },
      (reason) => { console.log(reason); })
  }
獲取localhost:5000中/students的數據
優點:**配置簡單,前端請求資源不需要任何前綴
缺點:**不能配置多個代理服務器
第一步:webpack配置了調用setupProxy.js中配置的功能
setupProxy.js
第二步:配置
//const proxy=require("http-proxy-middleware")   :視頻中請求的包,引用它出現了無法訪問的問題//應該使用以下寫法*******const { createProxyMiddleware } = require("http-proxy-middleware");module.exports=function(app){
    app.use(
        createProxyMiddleware('/api1',{//遇見/api1前綴的請求,就會觸發該代理配置
            target:"http://localhost:5000",//請求轉發給誰
            changeOrigin:true,//控制服務器收到的請求頭中Host字段的值:host就是主機名+端口號
            	//true:后端接收到的host:localhost:5000
            	//false:后端接收到的host:localhost:3000
            	//系統默認為false,一般會設為true
            pathRewrite:{"^/api1":""}//重寫請求路徑(必須要寫)
            //不寫:后臺接收到的請求路徑:/api1/student
            //寫了:后臺請求的路徑:/student
        }),
        createProxyMiddleware('/api2',{
            target:"http://localhost:5001",
            changeOrigin:true,
            pathRewrite:{"^/api2":""}
        }),
    )}
App.jsx
import React, { Component } from 'react'
import Search from './components/Search'
import List from './components/List'
import './App.css'

export default class App extends Component {
state={users:[]}
getSearchResult=(result)=>{
  this.setState({users:result})
}

  render() {
    return (
      <div className="container">
        <Search getSearchResult={this.getSearchResult}/>
        <List users={this.state.users}/>
      </div>
    )
  }
}
Search.jsx
import React, { Component } from 'react'
import axios from 'axios'
import './index.css'
export default class Search extends Component {
search = () => {
//獲取輸入框中的值
const { value } = this.keyWordElement;
//發送請求
axios.get(`/api1/search/users?q=${value}`).then(
result => {
this.props.getSearchResult(result.data.items)
},
reason => {
console.log(reason);
})
}
render() {
return (
<section className="jumbotron">
<h4 className="jumbotron-heading">搜索github用戶</h4>
<div>
<input ref={c => this.keyWordElement = c} type="text" placeholder="enter the name you search" /> <button onClick={this.search}>搜索</button>
</div>
</section>
)
}
}
List.jsx
import React, { Component } from 'react'

import './index.css'
export default class List extends Component {
  render() {
    return (
      <div className="row">
        {this.props.users.map(item=>{
            return    <div key={item.id} className="card">
                <a href={item.html_url} target="_blank">
                  <img src={item.avatar_url} style={{ width: "100px" }} />
                </a>
                <p className="card-text">{item.login}</p>
              </div>
        })}


      </div>
    )
  }
}
PubSubJs:
pub:(publish)發布
sub:(subscribe)訂閱
pubsub-js:就是用來實現發布訂閱的,可以把它看過vue中的eventBus,看作是函數的載體
訂閱方:創建一個函數,并且將這個函數傳給pubsub做托管
var token=PubSub.subscribe("myTopic",myFunction[托管的函數])//token,是當前訂閱函數的唯一id,可以用來取消訂閱
發布方:發布的意思就是通過調用訂閱方指定的函數,實現傳參或執行操作功能
PubSub.publish('myTopic','需要發送給訂閱者的內容')
第一步:添加pubsub-js
yarn add pubsub-js
**第二步:**在組件中導入
import PubSub from 'pubsub-js'
**第三步:**調用PubSub訂閱函數(一般是在componentDidMount鉤子函數中訂閱)
  componentDidMount(){
    this.token=PubSub.subscribe("changeState",this.changeStateObj)
  }
import React, { Component } from 'react'
import PubSub from 'pubsub-js'
import './index.css'
export default class List extends Component {
  state={
    users:[],//拿到的用戶信息
    isFirst:true,//是否第一次訪問
    isLoading:false,//是否正在加載
    err:"",//返回的錯誤信息

  }

  changeStateObj=(msg,value)=>{
    this.setState(value)
  }

  componentDidMount(){
    this.token=PubSub.subscribe("changeState",this.changeStateObj)
  }
  componentWillUnmount(){
    PubSub.unsubscribe(this.token)
  }

  render() {
    let {users,isFirst,isLoading,err}=this.state
    return (
      <div className="row">
        {
          isFirst?<h3>輸入搜索內容搜索用戶</h3>:
          isLoading?<h3>Loading...</h3>:
          err?<h3>{err}</h3>:

          users.map(item=>{
            return    <div key={item.id} className="card">
                <a href={item.html_url} target="_blank">
                  <img src={item.avatar_url} style={{ width: "100px" }} />
                </a>
                <p className="card-text">{item.login}</p>
              </div>
        })}


      </div>
    )
  }
}
import React, { Component } from 'react'
import axios from 'axios'
import './index.css'
import PubSub from 'pubsub-js'
export default class Search extends Component {
search = () => {
//獲取輸入框中的值
const { value } = this.keyWordElement;
PubSub.publish('changeState',{isFirst:false,isLoading:true})
//發送請求
axios.get(`/api1/search/users2?q=${value}`).then(
result => {
PubSub.publish('changeState',{isLoading:false,users:result.data.items})
},
reason => {
PubSub.publish('changeState',{isLoading:false,err:reason.message})
})
}
render() {
return (
<section className="jumbotron">
<h4 className="jumbotron-heading">搜索github用戶</h4>
<div>
<input ref={c => this.keyWordElement = c} type="text" placeholder="enter the name you search" /> <button onClick={this.search}>搜索</button>
</div>
</section>
)
}
}
import React, { Component } from 'react'
import Search from './components/Search'
import List from './components/List'
import './App.css'

export default class App extends Component {


  render() {
    return (
      <div className="container">
        <Search />
        <List/>
      </div>
    )
  }
}
xhr:xmlHttpRequest:傳統的ajax
jQuery:封裝了xhr
axios:封裝了xhr
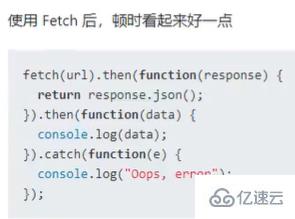
**fetch(取來)?*window內置的,不用借用第三方庫,直接使用
缺點:目前不是很好用,沒有請求發送攔截器

缺點:兼容性不高
優點:沒有用xhr,不用安裝第三方庫,原生

let getData=async()=>{
	try{
        let result=await fetch(url);
        let data=await result.json();
    }catch(error){
        console.log('請求錯誤',error)
    }
}
到此,相信大家對“react后端請求數據如何實現”有了更深的了解,不妨來實際操作一番吧!這里是億速云網站,更多相關內容可以進入相關頻道進行查詢,關注我們,繼續學習!
免責聲明:本站發布的內容(圖片、視頻和文字)以原創、轉載和分享為主,文章觀點不代表本網站立場,如果涉及侵權請聯系站長郵箱:is@yisu.com進行舉報,并提供相關證據,一經查實,將立刻刪除涉嫌侵權內容。