您好,登錄后才能下訂單哦!
您好,登錄后才能下訂單哦!
這篇文章主要講解了“react-router-dom入門使用實例分析”,文中的講解內容簡單清晰,易于學習與理解,下面請大家跟著小編的思路慢慢深入,一起來研究和學習“react-router-dom入門使用實例分析”吧!
單頁WEB應用(single page web application , SPA)。整個應用只有一個完整的頁面。點擊頁面的鏈接不會刷新頁面,只會做頁面的局部更新數據都需要通過ajax請求獲取,并在前端異步展現。
1. 什么是路由?
一個路由就是一個映射關系(key:value)
key為路徑,value可能是function 或 component
2. 路由分類
后端路由:
理解:value是 function ,用來處理客戶端提交的請求。
注冊路由:router.get(path, function(request,response))
工作過程:當node 接收到一個請求時,根據請求路徑找到匹配的路由,調用路由中的函數來處理請求,返回響應數據。
前端路由:
瀏覽器端路由 ,value 是 component,用于展示頁面內容;
注冊路由:<Router path="/test” component={Test}>
工作過程:當瀏覽器的 path 變為 /test時,當前路由組件就會變為 Test 組件
前端路由依靠的是瀏覽器的BOM對象中的history,也就是瀏覽器的歷史記錄(history)。
但我們一般不直接操作BOM身上的history,而是借助history.js去操作BOM。
history模式的路由:
<script type="text/javascript" src="https://cdn.bootcss.com/history/4.7.2/history.js"></script>
<script type="text/javascript">
  let history = History.createBrowserHistory() //方法一,直接使用H5推出的history身上的API
</script>
hash模式的路由:(地址欄中帶有 # 號)
<script type="text/javascript" src="https://cdn.bootcss.com/history/4.7.2/history.js"></script>
<script type="text/javascript">
  let history = History.createHashHistory() //方法二,hash值(錨點)
</script>
瀏覽器的歷史記錄(history)是一個棧的結構。
瀏覽器的歷史記錄(history)是一個棧的結構。
瀏覽器的歷史記錄(history)是一個棧的結構。
重要是事情說三遍。
每當執行push操作時,都是將path推入棧頂,瀏覽器也自動顯示棧頂的內容。
function push(path) {  // path:/test1
  history.push(path)
  return false
}
此時棧中有著至少兩條數據,棧底是:localhost:5500,棧頂是剛剛push進來的 localhost:5500/test1
瀏覽器會顯示棧頂路徑對應的路由界面。
執行瀏覽器的回退操作其實就是將棧頂的 “/test1”出棧。
而執行replace操作時,是將目前棧頂的元素替換。
function replace(path) {  // path: /test2
  history.replace(path)
}
若原棧頂是 /test1,執行replace后則將棧頂的 /test1替換為 /test2,且顯示的是 /test2 的路由界面。
監聽路由發生變化
history.listen(location => {
  console.log('請求路由路徑變化了', location)
})
路由實現頁面回退(將棧頂元素出棧)
history.goBack()
路由實現頁面前進(將棧外元素推入棧頂)
history.goForward()
react的一個插件庫
專門用來實現一個SPA應用
基于 React 的項目基本都會用到此庫。
下載react-router-dom
npm install react-router-dom@5
yarn add react-router-dom@5
??注意,本文講解的是react-router-dom@5.3.3版本

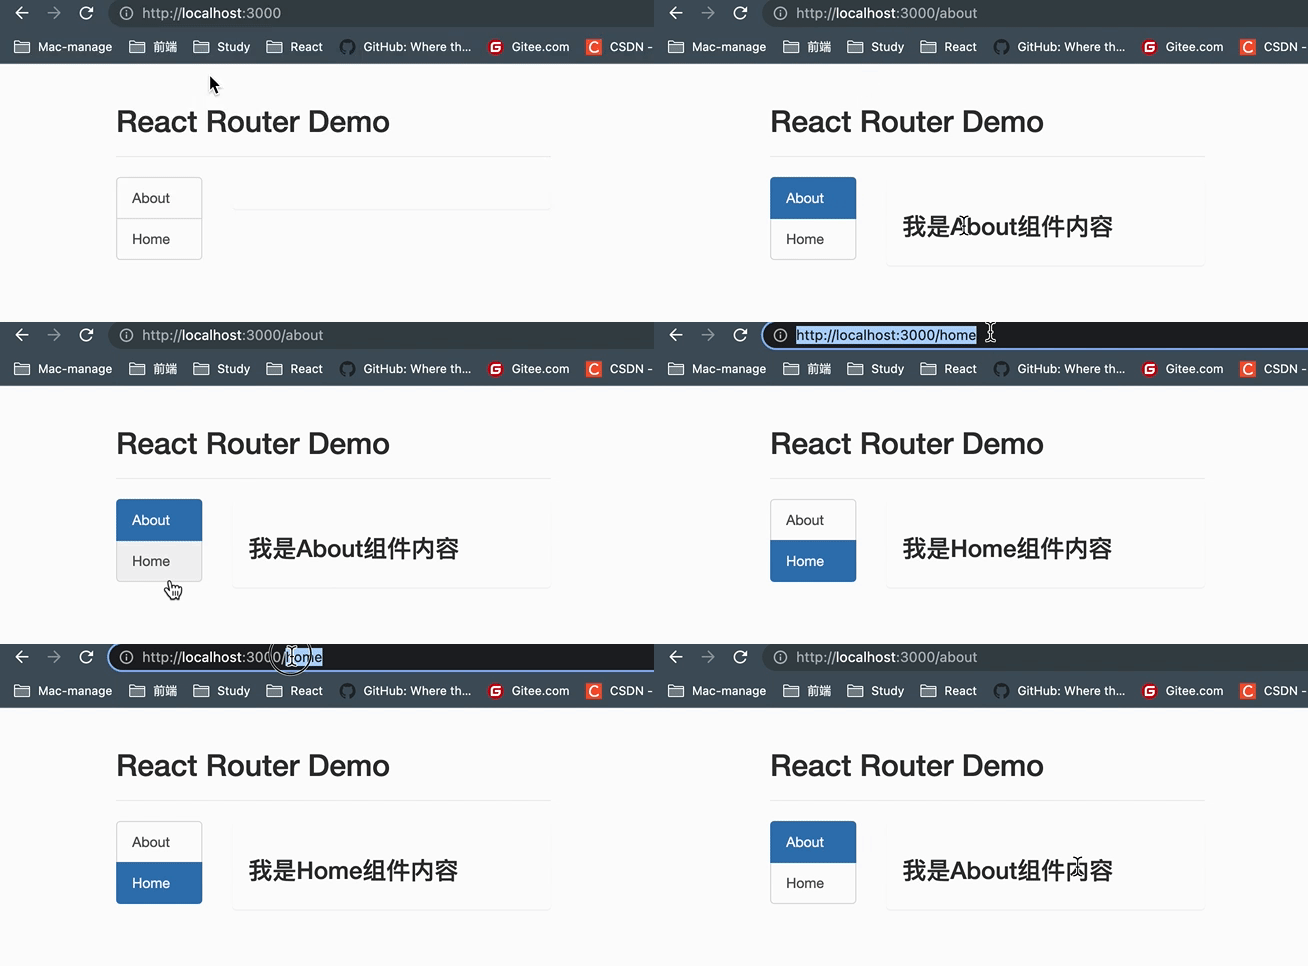
要實現圖中案例,首先要先實現:(編寫路由鏈接)
點擊按鈕實現路徑跳轉(也就是點擊About,路徑變為:localhost:3000/about)
然后實現:(注冊路由)
路徑變化后自動匹配響應的路由組件。(也就是路徑為:/about時,自動匹配About組件)
import React, { Component } from 'react'
import { NavLink, Route } from 'react-router-dom'
import Home from './pages/Home'  // Home是路由組件
import About from './pages/About'  // About是路由組件
import Header from './components/Header'  // Header是一般組件
export default class App extends Component {
  render() {
    return (
      <div>
        <div className="row">
          <div className="col-xs-offset-2 col-xs-8">
            <Header />
          </div>
        </div>
        <div className="row">
          <div className="col-xs-2 col-xs-offset-2">
            <div className="list-group">
              {/* 原生html中靠<a>跳轉不同的頁面 */}
              {/* <a href="./about.html" rel="external nofollow"  className="list-group-item">About</a>
              <a href="./home.html" rel="external nofollow"  className="list-group-item">Home</a> */}

              {/* 在React中靠路由鏈接實現切換組件—-編寫路由鏈接 */}
              <NavLink className="list-group-item" to="/about">About</NavLink>
              <NavLink className="list-group-item" to="/home">Home</NavLink>
            </div>
          </div>
          <div className="col-xs-6">
            <div className="panel">
              <div className="panel-body">
                {/* 注冊路由 */}
                <Route path="/about" component={About} />
                <Route path="/home" component={Home} />
              </div>
            </div>
          </div>
        </div>
      </div>
    )
  }
}
這么寫的話腳手架會報一個錯誤:

原因是,要在<NavLink>標簽以及<Route>標簽外面用<Router>標簽包裹起來。
我們可以在index.js中完成這個需求:
// index.js
import React from 'react';
import ReactDOM from 'react-dom/client';
import { BrowserRouter as Router } from 'react-router-dom'
import App from './App';

const root = ReactDOM.createRoot(document.getElementById('root'));
root.render(
  <React.StrictMode>
    <Router>
      <App />
    </Router>
  </React.StrictMode>
);
將整個App組件用Router標簽包裹起來,這樣就不會有報錯啦。
路由組件與一般組件的不同:
路由組件放在 pages 文件夾中,一般組件放在 components 文件夾中;
路由組件使用:
import Home from './pages/Home'  // Home是路由組件
<Route path="/home" component={Home} />
一般組件使用:
import Header from './components/Header'  // Header是一般組件
<Header />
一般組件只要沒傳遞props,那么組件的內部的this.props就一定為空。
哪怕沒給路由組件傳遞props屬性,路由組件內部的this.props并不為空。
原因是:路由組件會收到路由器自動傳遞給路由組件的props。

不加switch:
<div className="panel-body">
  {/* 注冊路由 */}
  <Route path="/about" component={About} />
  <Route path="/home" component={Home} />
  <Route path='/home' component={Demo} />
</div>
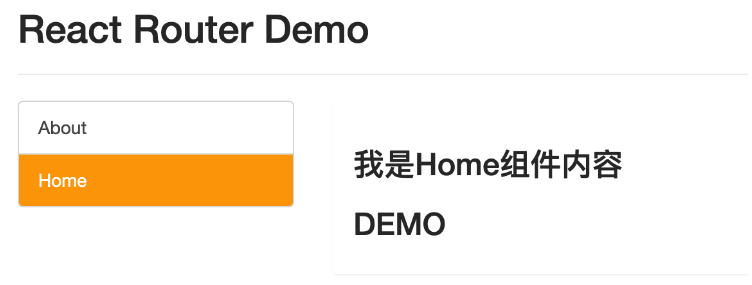
注冊路由時,不使用switch,兩個組件同時匹配/home路徑。
此時兩個組件內容都會展示。
原因是:
注冊路由時,與路徑相匹配的路由組件都會展示,都會一一匹配。
使用switch:
<div className="panel-body">
  {/* 注冊路由 */}
  <Switch>
    <Route path="/about" component={About} />
    <Route path="/home" component={Home} />
    <Route path='/home' component={Demo} />
  </Switch>
</div>
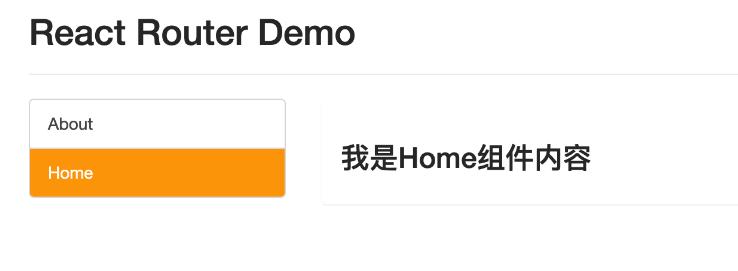
注冊路由時,在外圍包裹一組 Switch 標簽,可以讓路由實現單一匹配,也就是說,/home路徑匹配到Home組件之后就不會再向下繼續匹配了。這樣的好處是,提高了路由匹配效率,如果不添加 Switch 標簽,react路由會同一個路徑查找多次,但是添加了 Switch 標簽后,react路由只要查找到第一個與路徑匹配的組件(如本例中的Home組件)就會結束查找,提高效率。
感謝各位的閱讀,以上就是“react-router-dom入門使用實例分析”的內容了,經過本文的學習后,相信大家對react-router-dom入門使用實例分析這一問題有了更深刻的體會,具體使用情況還需要大家實踐驗證。這里是億速云,小編將為大家推送更多相關知識點的文章,歡迎關注!
免責聲明:本站發布的內容(圖片、視頻和文字)以原創、轉載和分享為主,文章觀點不代表本網站立場,如果涉及侵權請聯系站長郵箱:is@yisu.com進行舉報,并提供相關證據,一經查實,將立刻刪除涉嫌侵權內容。