溫馨提示×
您好,登錄后才能下訂單哦!
點擊 登錄注冊 即表示同意《億速云用戶服務條款》
您好,登錄后才能下訂單哦!
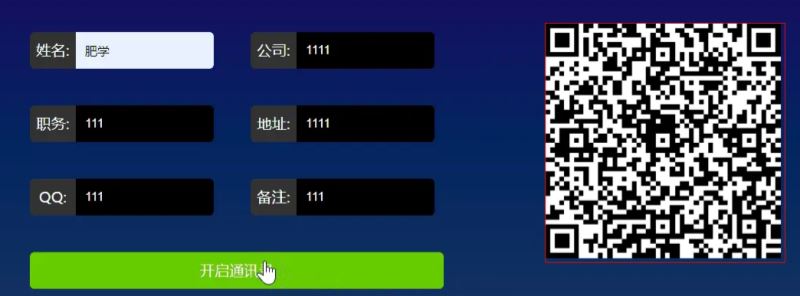
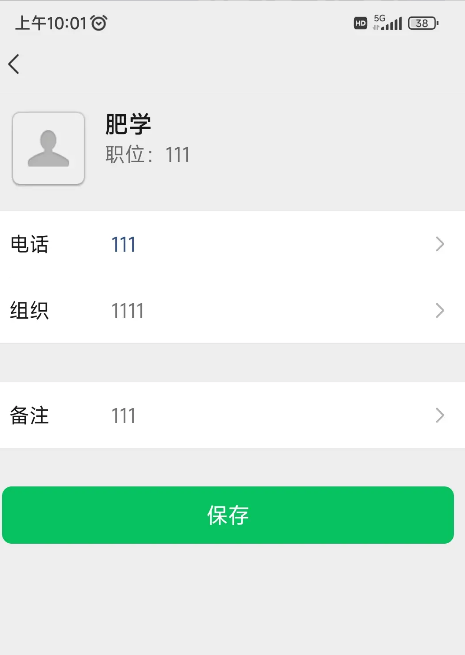
這篇文章主要介紹“基于JS怎么實現二維碼名片生成”的相關知識,小編通過實際案例向大家展示操作過程,操作方法簡單快捷,實用性強,希望這篇“基于JS怎么實現二維碼名片生成”文章能幫助大家解決問題。


這里用到了一個二維碼生成庫qrcode.js下面是簡單介紹:
//初始化QRCode對象
var qrcode = new QRCode(document.getElementById("qrcode"));
//也可以在初始化QRCode對象,傳入更多參數
var qrcode = new QRCode(document.getElementById("qrcode"),{
width: 128,
height: 128,
colorDark : "#000000",
colorLight : "#ffffff",
correctLevel : QRCode.CorrectLevel.H
});
//需要生成二維碼的字符串
qrcode.makeCode("http://www.leixuesong.cn");
//清除二維碼
qrcode.clear();
var qrcode = new QRCode("qrcode");
function makeCode () {
var elText = document.getElementById("text");
if (!elText.value) {
alert("Input a text");
elText.focus();
return;
}
qrcode.makeCode(elText.value);
}
makeCode();
$("#text").
on("blur", function () {
makeCode();
}).
on("keydown", function (e) {
if (e.keyCode == 13) {
makeCode();
}
});*{/* 通配符: 選擇到所有的標簽元素 */
margin:0;/*外邊距*/
padding:0;/*內邊距*/
}
body{/* 標簽選擇器 */
background-image: linear-gradient(#1e045f, #032561, #183661);
background-position:center top;/*背景定位:左右 上下*/
}
.content{
width:950px;
margin:auto;
}
#wrap{/* # id選擇器*/
float:left;
width:480px;/* 寬度 */
height:280px;/* 高度 */
/*background:#933;*/
margin:100px;
}
#wrap p{/*混合選擇器*/
float:left;
width:200px;
height:40px;
border-radius:5px;/*圓角屬性*/
color:#fff;/*文字的顏色*/
margin:20px 20px;
overflow:hidden;/*超出隱藏*/
text-align:center;
line-height:40px;
}
#wrap p span{/*行內元素 : 設置寬高無效*/
/*display:block;塊元素占一行*/
float:left;
width:50px;
height:40px;
background:#333;
/*text-align:center;文本左右居中*
line-height:40px;/*行高*/
}
#wrap p input{
float:left;
width:150px;
height:40px;
border:0;
background:#000;
color:#fff;
outline:none;/*輪廓*/
text-indent:10px;/*首行縮進*/
}
#qrcode{
float:left;/*左浮動:與父元素的左端對齊 依次的往右端顯示*/
width:260px;
height:260px;
border:1px solid red;/*邊框線:寬度 類型(實心) 顏色*/
margin-top:110px;/*上外邊距100px*/
}
p#btn{/*選擇器選擇到越詳細優先級越高*/
width:450px;
background:#6c0;
cursor:pointer;/*鼠標手的形狀*/
}var name='', company='',job='',adress='',moblie='',desc='';
//特效思維:什么元素 觸發 什么事件 實現 什么效果
$("#btn").click(function(){//點擊實現什么功能
//alert("注意點,你點到我了")
//獲取值
name = "FN:" + $("#name").val() + "\n";//獲取值
company = "ORG:" + $("#company").val() + "\n";
job = "TITLE:" + $("#job").val() + "\n";
adress = "WORK:" + $("#adress").val() + "\n";
moblie = "TEL:" + $("#moblie").val() + "\n";
desc = "NOTE:" + $("#desc").val() + "\n";
var info ="BEGIN:VCARD\n" + name + company + job + adress + moblie + desc + "END:VCARD";
//console.log(info);//在控制臺輸出
//生成二維碼
var qrcode = new QRCode("qrcode");
qrcode.makeCode(info);
});關于“基于JS怎么實現二維碼名片生成”的內容就介紹到這里了,感謝大家的閱讀。如果想了解更多行業相關的知識,可以關注億速云行業資訊頻道,小編每天都會為大家更新不同的知識點。
免責聲明:本站發布的內容(圖片、視頻和文字)以原創、轉載和分享為主,文章觀點不代表本網站立場,如果涉及侵權請聯系站長郵箱:is@yisu.com進行舉報,并提供相關證據,一經查實,將立刻刪除涉嫌侵權內容。