您好,登錄后才能下訂單哦!
您好,登錄后才能下訂單哦!
這篇文章主要介紹了釘釘小程序web-view怎么內嵌H5頁面并實現通信的相關知識,內容詳細易懂,操作簡單快捷,具有一定借鑒價值,相信大家閱讀完這篇釘釘小程序web-view怎么內嵌H5頁面并實現通信文章都會有所收獲,下面我們一起來看看吧。
在管理端新建頁面,同時在釘釘頁面使用web-view引入,需要后端配合傳入合適的token。
釘釘頁面引入
<template>
	<view class="">
            <web-view id="web-view-1" :src="`http://10.10.5.231:9529/myNetwork?x-token=${token}`"></web-view>
	</view>
</template>H5頁面使用dd.postMessage()進行消息發送,并使用 dd.navigateTo()進行頁面的跳轉。
<template>
  <div>
   <el-button @click="handleToDT" >返回并發送消息</el-button>
  </div>
</template>
<script>
export default {
  data() {
    return {
    }
  },
  created() {
    var userAgent = navigator.userAgent
    if (userAgent.indexOf('AlipayClient') > -1) {
      // 支付寶小程序的 JS-SDK 防止 404 需要動態加載,如果不需要兼容支付寶小程序,則無需引用此 JS 文件。
      document.writeln('<script src="https://appx/web-view.min.js"' + '>' + '<' + '/' + 'script>')
    },
      methods: {
        handleToDT() {
              // 網頁向小程序 postMessage 消息
              dd.postMessage({ name: '測試web-view' })
              setTimeout(()=>{
                dd.navigateTo({ url: '/pages/index/myNetwork/index' })
              },500)
        },
    }
  },
  </script>
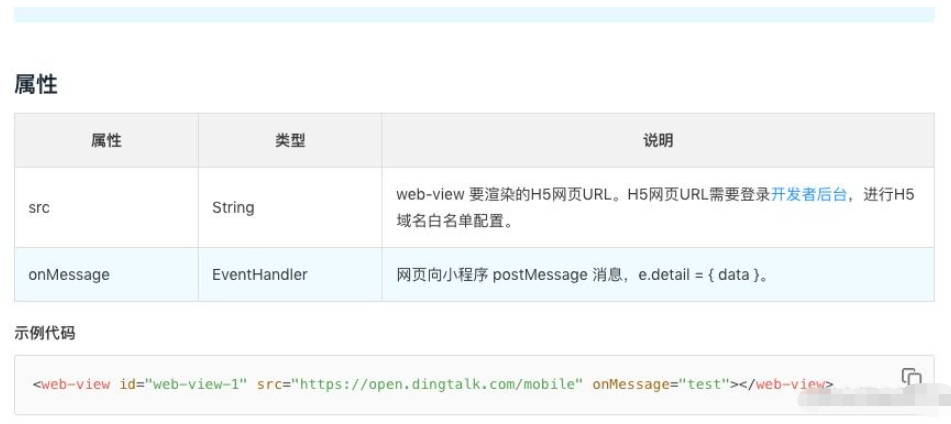
釘釘頁面使用@message進行消息的接受,但很坑的是,文檔上接收方法為onMessage,但uniapp中需要改為@message才能接收到消息。

<template>
	<view class="">
		<web-view id="web-view-1" :src="`http://10.10.5.231:9529/myNetwork?x-token=${token}`" @message="test"></web-view>
	</view>
</template>

<script>
	export default {
		data() {
			return {
				webViewContext: '',
				token: uni.getStorageSync('x-token')
			}
		},
		onLoad(e){

		  },
		methods: {
			test(e){
				console.log(e)
			}
		},

	}
</script>

<style>
</style>釘釘頁面創建實例,并調用this.webViewContext.postMessage()方法發送消息
<template>
	<view class="">
		<web-view id="web-view-1" :src="`http://10.10.5.231:9529/myNetwork?x-token=${token}`" @message="test"></web-view>
	</view>
</template>

<script>
	export default {
		data() {
			return {
				webViewContext: '',
				token: uni.getStorageSync('x-token')
			}
		},
		onLoad(e){
		    this.webViewContext = dd.createWebViewContext('web-view-1');
		  },
		methods: {
			test(e){
				this.webViewContext.postMessage({'sendToWebView': '1'});
			}
		},

	}
</script>

<style>
</style>
H5頁面在mounted中使用dd.onMessage接收消息
  mounted() {
    // 接收來自小程序的消息。
    dd.onMessage = function(e) {
      console.log(e); //{'sendToWebView': '1'}
    }
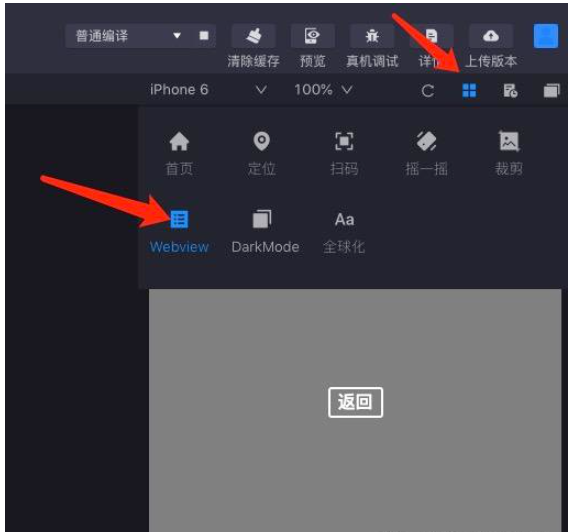
},釘釘頁面在控制臺查看數據即可 H5數據調試控制臺開啟方式


釘釘頁面(即uniapp編寫頁面)
<template>
	<view class="">
		<web-view id="web-view-1" :src="`http://10.10.5.231:9529/myNetwork?x-token=${token}`" @message="test"></web-view>
	</view>
</template>

<script>
	export default {
		data() {
			return {
				webViewContext: '',
				token: uni.getStorageSync('x-token')
			}
		},
		onLoad(e){
		    this.webViewContext = dd.createWebViewContext('web-view-1');
		  },
		methods: {
			test(e){
				console.log(e)
				this.webViewContext.postMessage({'sendToWebView': '1'});
			}
		},

	}
</script>

<style>
</style>
H5頁面(即掛載到管理端頁面)
<template>
  <div>
      <el-button @click="handleToDT" >返回并發送消息</el-button>
  </div>
</template>

<script>
export default {
  data() {
    return {
    }
  },
  created() {
    var userAgent = navigator.userAgent
    if (userAgent.indexOf('AlipayClient') > -1) {
      // 支付寶小程序的 JS-SDK 防止 404 需要動態加載,如果不需要兼容支付寶小程序,則無需引用此 JS 文件。
      document.writeln('<script src="https://appx/web-view.min.js"' + '>' + '<' + '/' + 'script>')
    }
  },
  mounted() {
    // 接收來自小程序的消息。
    dd.onMessage = function(e) {
      console.log(e); //{'sendToWebView': '1'}
    }
  },
  methods: {

    handleToDT() {
      // javascript
      // 網頁向小程序 postMessage 消息
      dd.postMessage({ name: '測試web-view' })
      setTimeout(()=>{
        dd.navigateTo({ url: '/pages/index/myNetwork/index' })
      },500)
    },

  }
}
</script>

<style lang="scss" scoped>
</style>
關于“釘釘小程序web-view怎么內嵌H5頁面并實現通信”這篇文章的內容就介紹到這里,感謝各位的閱讀!相信大家對“釘釘小程序web-view怎么內嵌H5頁面并實現通信”知識都有一定的了解,大家如果還想學習更多知識,歡迎關注億速云行業資訊頻道。
免責聲明:本站發布的內容(圖片、視頻和文字)以原創、轉載和分享為主,文章觀點不代表本網站立場,如果涉及侵權請聯系站長郵箱:is@yisu.com進行舉報,并提供相關證據,一經查實,將立刻刪除涉嫌侵權內容。