您好,登錄后才能下訂單哦!
您好,登錄后才能下訂單哦!
這篇“Vue.Draggable怎么實現交換位置”文章的知識點大部分人都不太理解,所以小編給大家總結了以下內容,內容詳細,步驟清晰,具有一定的借鑒價值,希望大家閱讀完這篇文章能有所收獲,下面我們一起來看看這篇“Vue.Draggable怎么實現交換位置”文章吧。
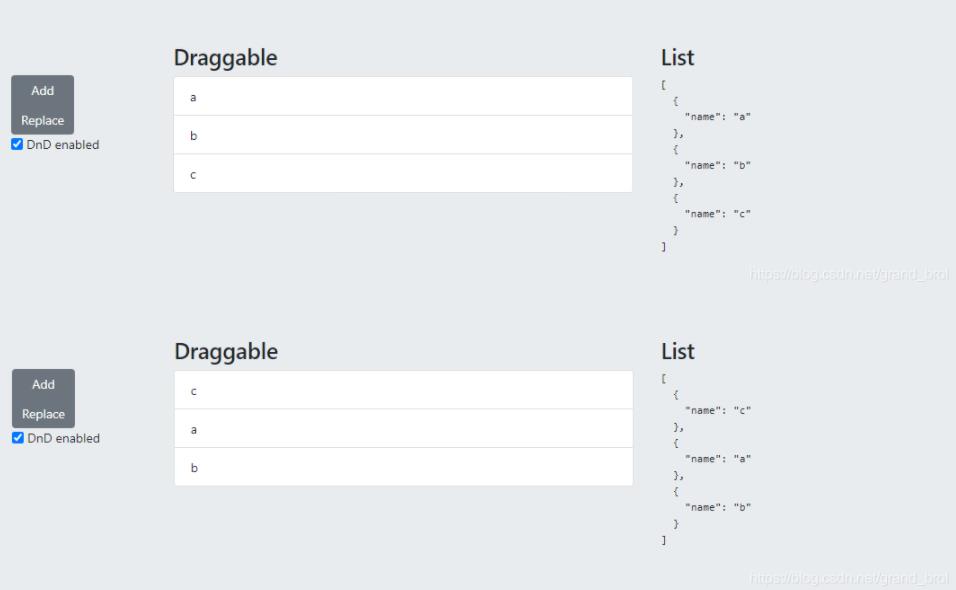
如下圖:
c拖拽到a的位置,表現為c插入到a的前面。所以變為了cab。

需求
實現交換而非插入及上圖要變成(cba)
實現方式
想要阻止它插入是不可能,我們只能等它插入結束后對我們想要的元素進行操作。比如拿到頭和尾部兩個索引。交換他們在數組中的位置。需要注意的是,因為拖拽時已經改變數組里面元素的位置了,因此我們需要在拖拽前copy一個和原數組一樣的數組。
實現步驟
1、 選擇一個適合自己的方法,需要能夠獲得開始索引和結束索引
end,sort,update都可以

2、深拷貝
copyList(){
   this.copyList=this.list.slice(0)
}
3、通過索引來操作copyList數組位置
const item=this.copyList[oldIndex]
this.copyList.splice(oldIndex, 1, this.copyList[newIndex]);
this.copyList.splice(newIndex, 1, item);
4、將copyList賦值給list,并在結尾處獲得新的拷貝的copyList
this.list=this.copyList
this.copyList = this.list.slice(0);
全部代碼
import draggable from "@/vuedraggable";
let id = 1;
export default {
  name: "simple",
  display: "Simple",
  order: 0,
  components: {
    draggable,
  },
  data() {
    return {
      enabled: true,
      list: [{ name: "a" }, { name: "b" }, { name: "c" }],
      dragging: false,
      index: 0,
      copyList: [],
    };
  },
  computed: {
    draggingInfo() {
      return this.dragging ? "under drag" : "";
    },
  },
  created() {
    this.copyList = this.list.slice(0);
  },
  methods: {
    add: function () {
      this.list.push({ name: "Juan " + id, id: id++ });
    },
    replace: function () {
      this.list = [{ name: "Edgard", id: id++ }];
    },
    end({ oldIndex, newIndex }) {
      const item = this.copyList[oldIndex];
      this.copyList.splice(oldIndex, 1, this.copyList[newIndex]);
      this.copyList.splice(newIndex, 1, item);
      this.list = this.copyList;
      this.copyList = this.list.slice(0);
    },
  }
};
<draggable
:list="list"
:disabled="!enabled"
class="list-group"
ghost-class="ghost"
:move="checkMove"
@end="end"
@sort="sort"
@update="update"
@start="start"
>
<div class="list-group-item" v-for="element in list" :key="element.name">{{ element.name }}</div>
</draggable>以上就是關于“Vue.Draggable怎么實現交換位置”這篇文章的內容,相信大家都有了一定的了解,希望小編分享的內容對大家有幫助,若想了解更多相關的知識內容,請關注億速云行業資訊頻道。
免責聲明:本站發布的內容(圖片、視頻和文字)以原創、轉載和分享為主,文章觀點不代表本網站立場,如果涉及侵權請聯系站長郵箱:is@yisu.com進行舉報,并提供相關證據,一經查實,將立刻刪除涉嫌侵權內容。