您好,登錄后才能下訂單哦!
您好,登錄后才能下訂單哦!
這篇文章主要介紹了基于Unity3D如何實現3D照片墻效果,具有一定借鑒價值,感興趣的朋友可以參考下,希望大家閱讀完這篇文章之后大有收獲,下面讓小編帶著大家一起了解一下。
Unity3D不僅僅可以開發游戲,還有非常多的開發方向,秉承著興趣為先,將可以使用Unity制作的各種應用案例,分享如何進行開發,如何實現,希望大家可以在感興趣的地方,學習到自己想要學習的東西。
今天就來實現一個3D照片墻的效果。
我對于這個項目的構思就是照片是3D的,可以滑動,然后使用DoTween插件去做動畫平滑移動。
OK,那就正式開始。
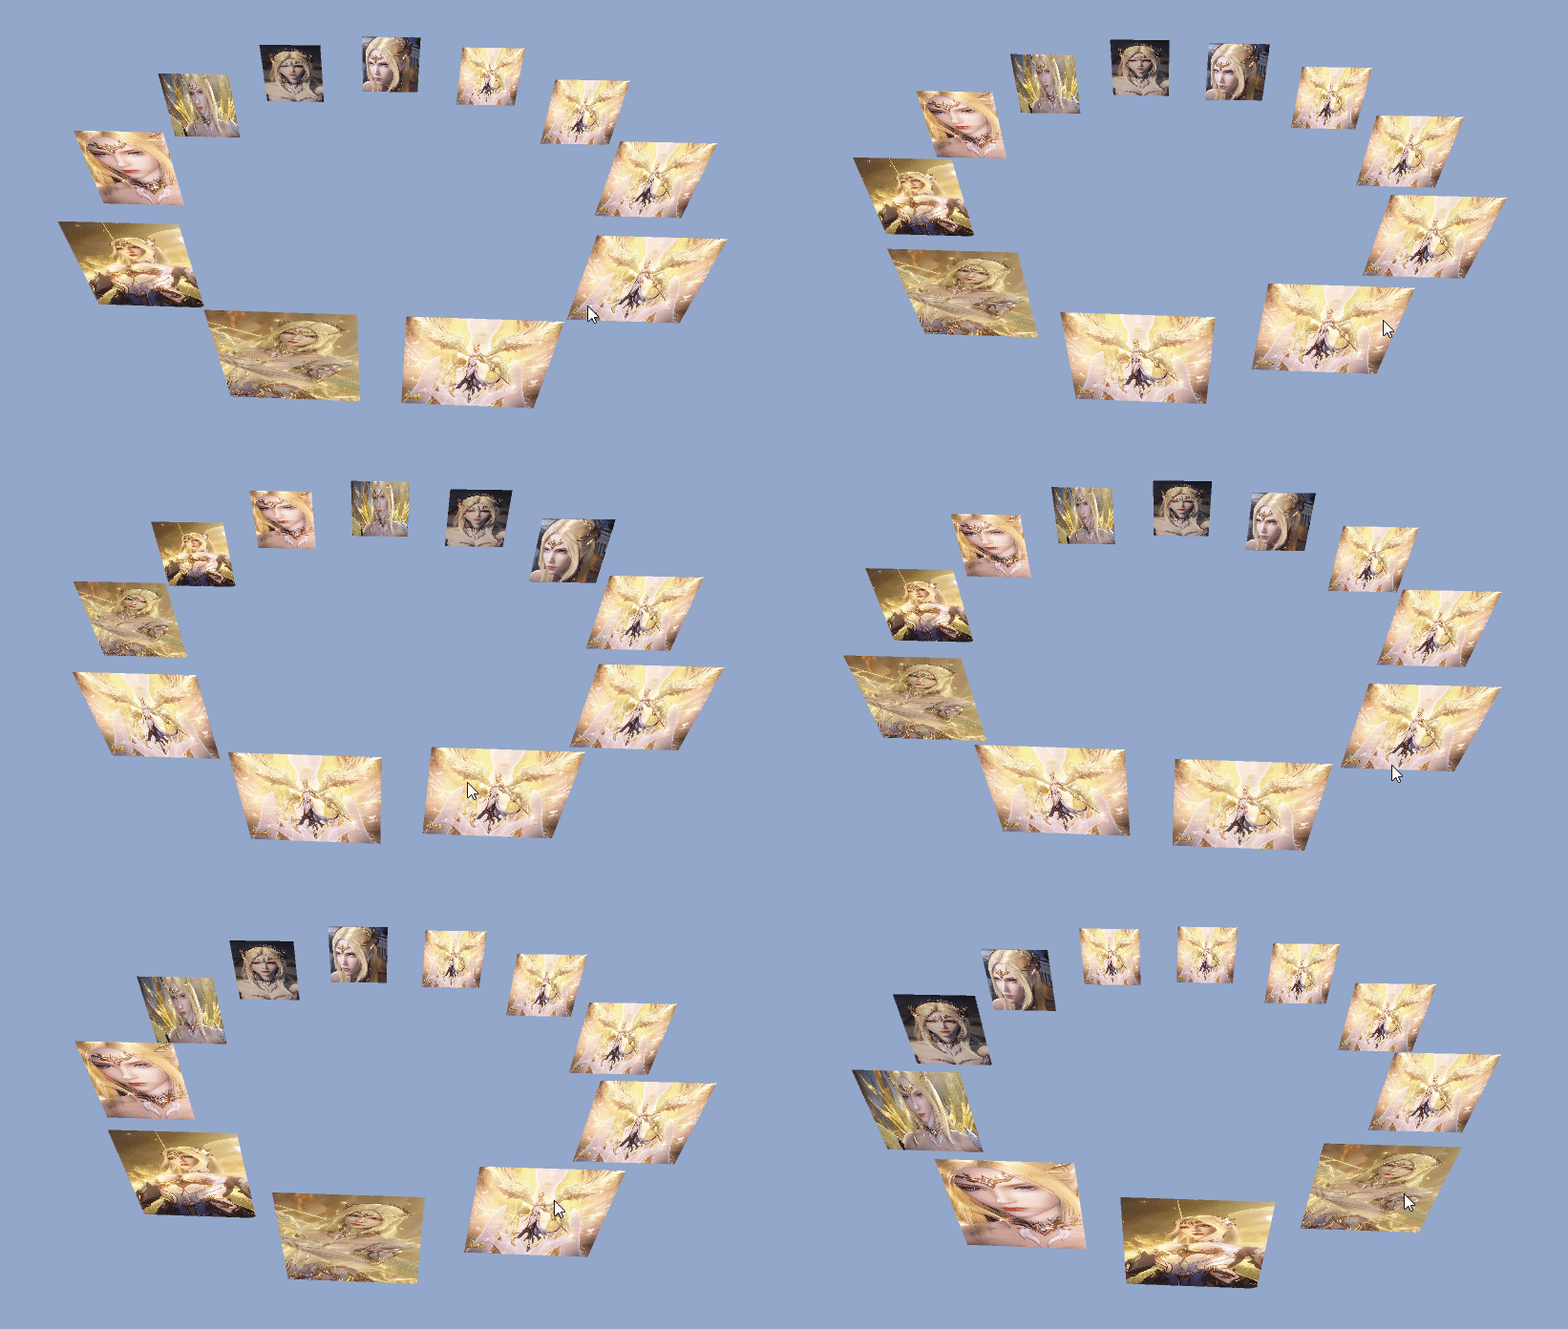
先看一下效果圖:
新建項目,我使用的版本是Unity3D 2019.4.7f1,模板選用3D:
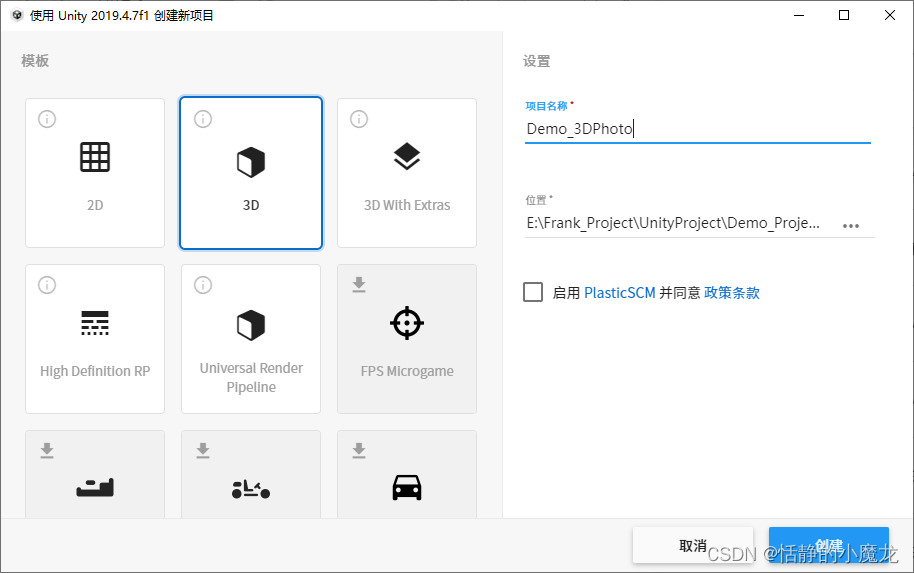
(1)導入DoTween插件。
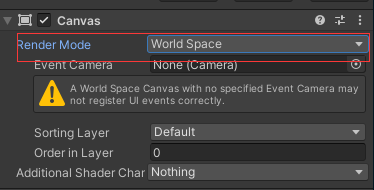
(2)新建Canvas,設置參數:
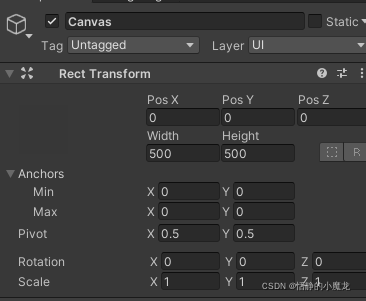
設置Canvas的坐標到0,0,0:
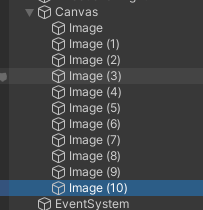
(3)在Canvas新建N個Image:
(4)設置Main Camera的屬性:
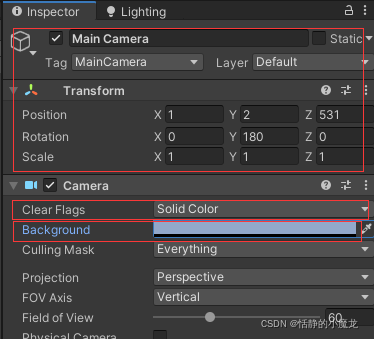
設置完的樣子:
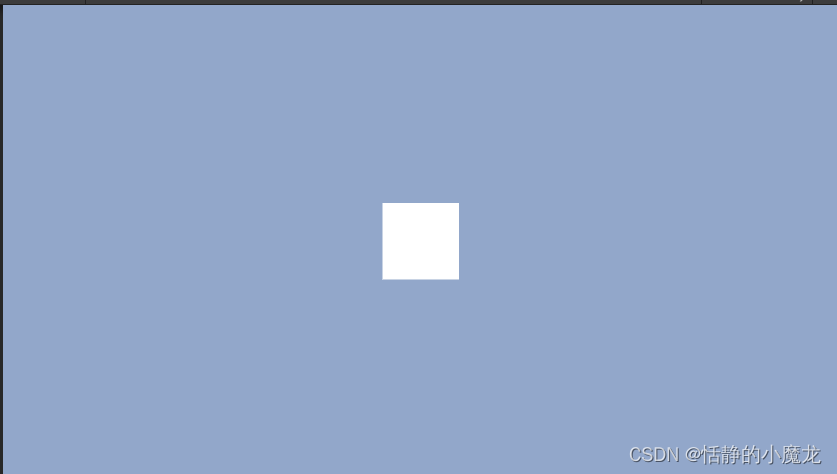
反正就是讓Image在屏幕中間就可以了。
(5)新建腳本UIRotate.cs,雙擊打開腳本,編輯代碼:
using DG.Tweening;
using UnityEngine;
using UnityEngine.EventSystems;

public class UIRotate : MonoBehaviour
{
    private int halfSize;
    private GameObject[] gameObjects;
    /// <summary>
    /// 圓半徑
    /// </summary>
    private int r = 300;
    /// <summary>
    /// 相間角度
    /// </summary>
    private int angle;

    private void Start()
    {
        //初始化數組
        var childCount = transform.childCount;
        //計算出中點
        halfSize = (childCount - 1) / 2;
        //求出圓內角度
        angle = 360 / childCount;
        //初始
        gameObjects = new GameObject[childCount];
        for (var i = 0; i < childCount; i++)
        {
            gameObjects[i] = transform.GetChild(i).gameObject;
            SetPosition(i);
            SetDeepin(i);
        }
    }

    /// <summary>
    /// 設置物體位置
    /// </summary>
    private void SetPosition(int index)
    {
        float x = 0;
        float z = 0;
        if (index < halfSize)
        {
            int id = halfSize - index;
            x = r * Mathf.Sin(angle * id);
            z = -r * Mathf.Cos(angle * id);
        }
        else if (index > halfSize)
        {
            int id = index - halfSize;
            x = -r * Mathf.Sin(angle * id);
            z = -r * Mathf.Cos(angle * id);
        }
        else
        {
            x = 0;
            z = -r;
        }
        Tweener tweener = gameObjects[index].GetComponent<RectTransform>().DOLocalMove(new Vector3(x, 0, z), 1);
    }

    private void SetDeepin(int index)
    {
        //計算圖片深度也就是z軸的距離,離攝像機的遠近
        int deepin = 0;
        if (index < halfSize)
        {
            deepin = index;
        }
        else if (index > halfSize)
        {
            deepin = gameObjects.Length - (1 + index);
        }
        else
        {
            deepin = halfSize;
        }
        gameObjects[index].GetComponent<RectTransform>().SetSiblingIndex(deepin);
    }
}
(6)將UIRotate.cs腳本附到Canvas對象上,運行程序:

(7)添加左右拖動代碼,繼續修改UIRotate.cs代碼:
using DG.Tweening;
using UnityEngine;
using UnityEngine.EventSystems;

public class UIRotate : MonoBehaviour
{
    private int halfSize;
    private GameObject[] gameObjects;
    /// <summary>
    /// 圓半徑
    /// </summary>
    private int r = 300;
    /// <summary>
    /// 相間角度
    /// </summary>
    private int angle;

    private void Start()
    {
        //初始化數組
        var childCount = transform.childCount;
        //計算出中點
        halfSize = (childCount - 1) / 2;
        //求出圓內角度
        angle = 360 / childCount;
        //初始
        gameObjects = new GameObject[childCount];
        for (var i = 0; i < childCount; i++)
        {
            gameObjects[i] = transform.GetChild(i).gameObject;
            SetPosition(i);
            SetDeepin(i);
        }
    }

    /// <summary>
    /// 設置物體位置
    /// </summary>
    private void SetPosition(int index)
    {
        float x = 0;
        float z = 0;
        if (index < halfSize)
        {
            int id = halfSize - index;
            x = r * Mathf.Sin(angle * id);
            z = -r * Mathf.Cos(angle * id);
        }
        else if (index > halfSize)
        {
            int id = index - halfSize;
            x = -r * Mathf.Sin(angle * id);
            z = -r * Mathf.Cos(angle * id);
        }
        else
        {
            x = 0;
            z = -r;
        }
        Tweener tweener = gameObjects[index].GetComponent<RectTransform>().DOLocalMove(new Vector3(x, 0, z), 1);
    }

    private void SetDeepin(int index)
    {
        //計算圖片深度也就是z軸的距離,離攝像機的遠近
        int deepin = 0;
        if (index < halfSize)
        {
            deepin = index;
        }
        else if (index > halfSize)
        {
            deepin = gameObjects.Length - (1 + index);
        }
        else
        {
            deepin = halfSize;
        }
        gameObjects[index].GetComponent<RectTransform>().SetSiblingIndex(deepin);
    }

    /// <summary>
    /// 向左滑動
    /// </summary>
    public void OnLeftDrag()
    {
        var length = gameObjects.Length;
        for (var i = 0; i < length; i++)
        {
            var temp = gameObjects[i];
            gameObjects[i] = gameObjects[length - 1];
            gameObjects[length - 1] = temp;
        }
        for (var i = 0; i < length; i++)
        {
            SetPosition(i);
            SetDeepin(i);
        }
    }

    /// <summary>
    /// 向右滑動
    /// </summary>
    public void OnRightDrag()
    {
        var length = gameObjects.Length;
        for (var i = 0; i < length-1; i++)
        {
            var temp = gameObjects[i];
            gameObjects[i] = gameObjects[i+1];
            gameObjects[i+1] = temp;
        }
        for (var i = 0; i < length; i++)
        {
            SetPosition(i);
            SetDeepin(i);
        }
    }

    private Vector2 touchFirst = Vector2.zero;//手指開始按下的位置
    private Vector2 touchSecond = Vector2.zero;//手指拖動的位置

    void OnGUI()
    {
        if (Event.current.type == EventType.MouseDown)
        {
            touchFirst = Event.current.mousePosition;//記錄開始按下的位置
        }
        if (Event.current.type == EventType.MouseUp)
        {
            touchSecond = Event.current.mousePosition;//記錄拖動的位置
            if (touchSecond.x < touchFirst.x)
            {
                OnLeftDrag();//向左滑動
            }

            if (touchSecond.x > touchFirst.x)
            {
                OnRightDrag();//向右滑動
            }
            touchFirst = touchSecond;
        }
    }
}
運行程序:
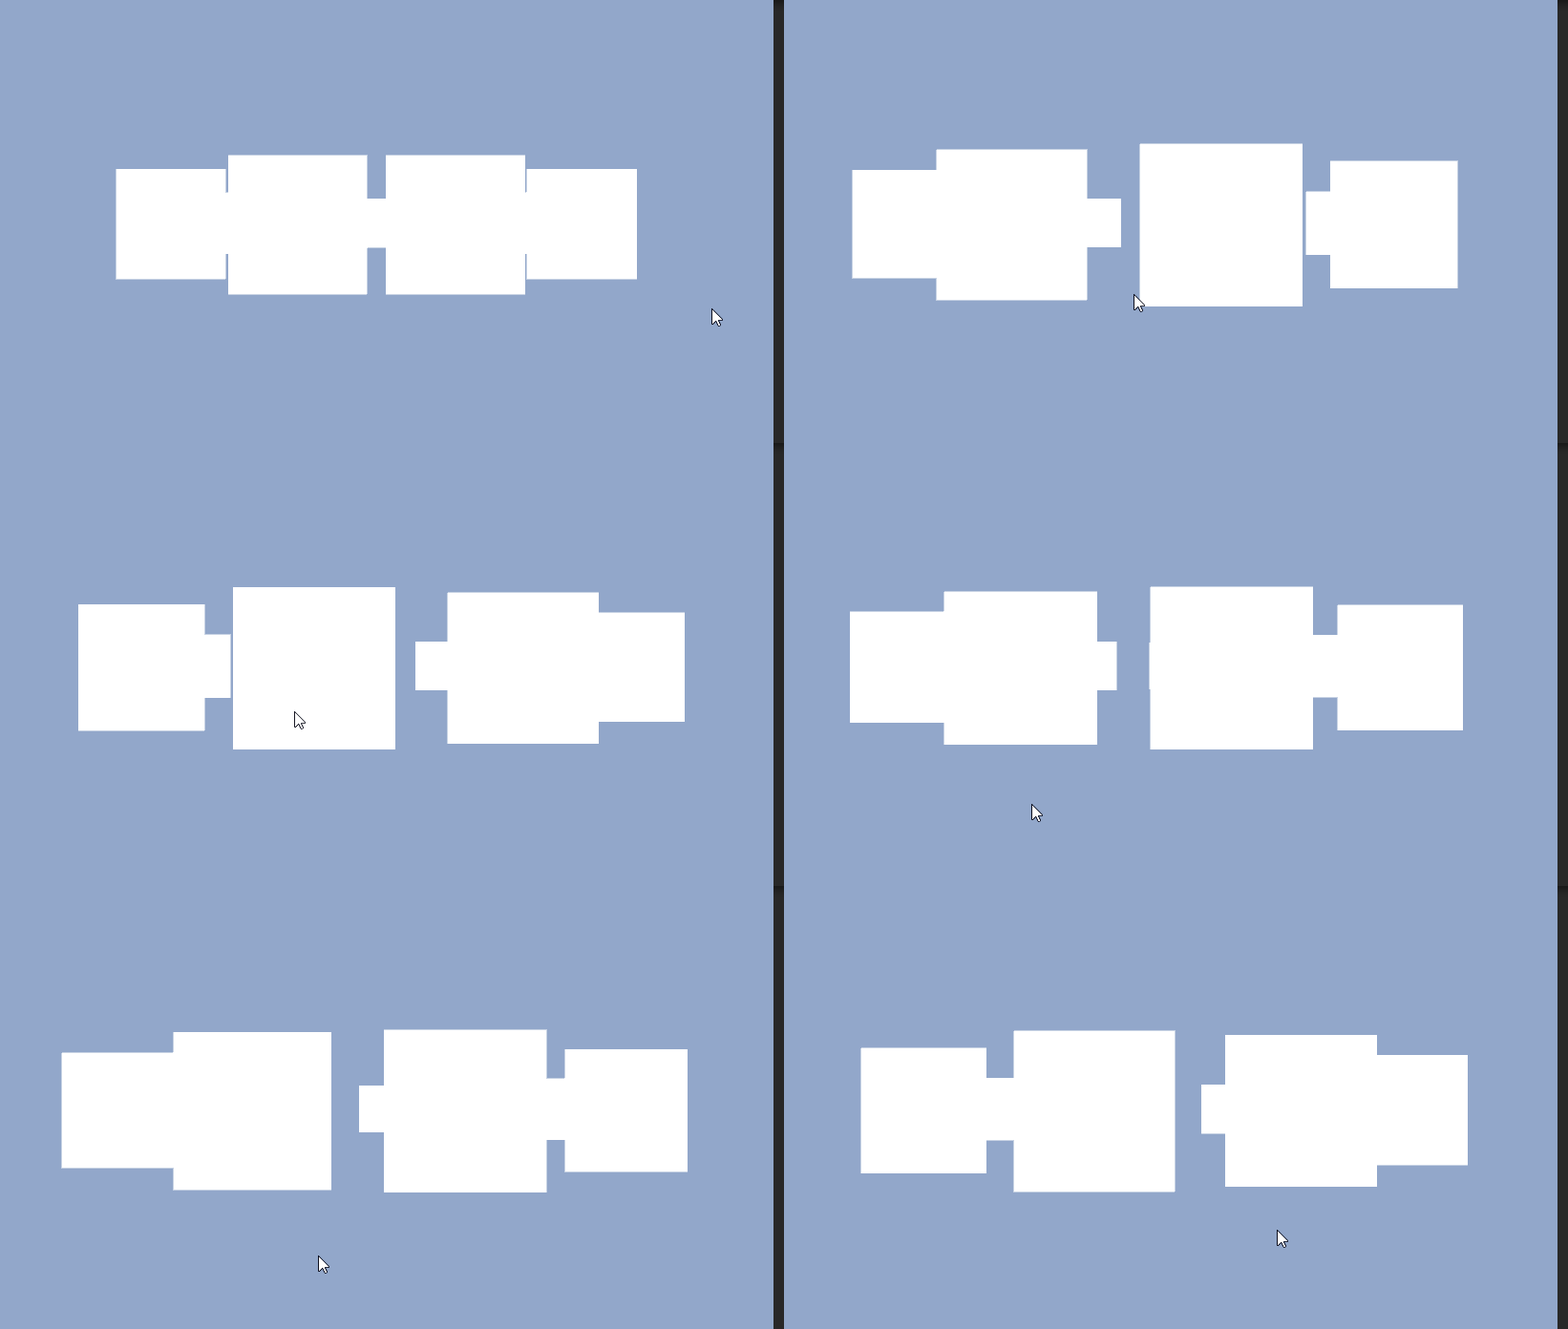
(8)導入照片最后試一下:
感謝你能夠認真閱讀完這篇文章,希望小編分享的“基于Unity3D如何實現3D照片墻效果”這篇文章對大家有幫助,同時也希望大家多多支持億速云,關注億速云行業資訊頻道,更多相關知識等著你來學習!
免責聲明:本站發布的內容(圖片、視頻和文字)以原創、轉載和分享為主,文章觀點不代表本網站立場,如果涉及侵權請聯系站長郵箱:is@yisu.com進行舉報,并提供相關證據,一經查實,將立刻刪除涉嫌侵權內容。