您好,登錄后才能下訂單哦!
您好,登錄后才能下訂單哦!
這篇“CentOS6.3下源碼安裝LAMP運行環境的方法”文章的知識點大部分人都不太理解,所以小編給大家總結了以下內容,內容詳細,步驟清晰,具有一定的借鑒價值,希望大家閱讀完這篇文章能有所收獲,下面我們一起來看看這篇“CentOS6.3下源碼安裝LAMP運行環境的方法”文章吧。
一、簡介
什么是lamp
lamp是一種web網絡應用和開發環境,是linux, apache, mysql, php/perl的縮寫,每一個字母代表了一個組件,每個組件就其本身而言都是在它所代表的方面功能非常強大的組件。
lamp這個詞的由來最早始于德國雜志“c't magazine”,michael kunze在1990年最先把這些項目組合在一起創造了lamp的縮寫字。這些組件并不是開始就設計為一起使用的,但是,這些軟件都是開源的,可以很方便的隨時獲得并免費使用,這就導致了這些組件經常在一起使用。這些組件的兼容性也在不斷完善,為了改善不同組件之間的協作,已經創建了某些擴展功能,在一起的應用情形變得非常普便,因而成為目前最流行的web應用基礎架構。
lamp的組件
平臺由四個組件組成,呈分層結構,每一層都提供了整個架構的一個關鍵部分:
linux:linux 處在最底層,提供操作系統。它的靈活性和可定制化的特點意味著它能夠產生一種高度定制的平臺,讓其它組件在上面運行。其它組件運行于linux 之上,但是并不一定局限于 linux,也可以在 microsoft windows, mac os x 或 unix上運行。
apache:apache位于第二層,它是一個web 服務平臺,提供可讓用戶獲得 web 頁面的機制。apache 是一款功能強大、穩定、可支撐關鍵任務的web服務器,internet 上超過 50% 的網站都使用它作為 web 服務器。
mysql:mysql 是最流行的開源關系數據庫管理系統,是lamp的數據存儲端。在 web 應用程序中,所有帳戶信息、產品信息、客戶信息、業務數據和其他類型的信息都存儲于數據庫中,通過 sql 語言可以很容易地查詢這些信息。
php/perl:perl是一種靈活的語言,特別是在處理文本要素的時候,這種靈活性使perl很容易處理通過cgi接口提供的數據,靈活地運用文本文件和簡單數據庫支持動態要素。php 是一種被廣泛應用的開放源代碼的多用途腳本語言,它可嵌入到 html中,尤其適合 web 開發。可以使用 php 編寫能訪問 mysql 數據庫中的數據和 linux 提供的一些特性的動態內容。
二、系統環境
系統平臺:centos release 5.8 (final)
apache版本:httpd-2.2.9.tar.gz
mysql 版本:mysql-5.0.41.tar.gz
php版本:php-5.2.6.tar.gz
三、安裝前準備
1、庫文件準備
在安裝php之前,應先安裝php5需要的最新版本庫文件,例如libxml2、libmcrypt以及gd2庫等文件。安裝gd2庫是為了讓php5支 持gif、png和jpeg圖片格式,所以在安裝gd2庫之前還要先安裝最新的zlib、libpng、freetype和jpegsrc等庫文件。而且中間還會穿插安裝一些軟件,讀者可以按照本節提供的順序安裝。
autoconf-2.61.tar.gz
freetype-2.3.5.tar.gz
gd-2.0.35.tar.gz
jpegsrc.v6b.tar.gz
libmcrypt-2.5.8.tar.gz
libpng-1.2.31.tar.gz
libxml2-2.6.30.tar.gz
zlib-1.2.3.tar.gz
zendoptimizer-3.2.6-linux-glibc21-i386.tar.gz
phpmyadmin-3.0.0-rc1-all-languages.tar.gz
2、安裝gcc、gcc-c++編譯器
用gcc -v 命令檢查安裝時使用的編譯工作是否存在
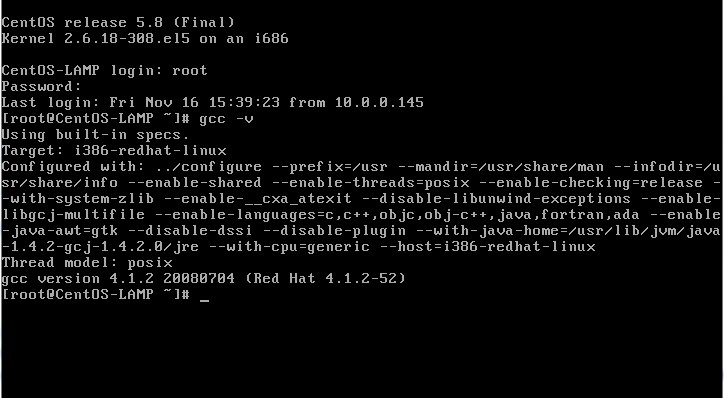
如系統未安裝,在系統聯網的情況下使用yum install gcc和yum install gcc-c++安裝
3、卸載默認的低版本環境
目前發行的linux操作系統版本中,如果選擇默認全部安裝,就已經安裝了lamp環境,但是版本相對都比較低。我們可以再安裝一個lamp環境和原來的并存,但是這樣做沒有必要,因為同時只能開啟一個lamp環境。所要我們要在安裝之前,先應檢查一下系統中是否已經安裝了低版本的環境,如果已經安裝過了,停止原來的服務運行,或者把原來的環境卸載掉。
a. 卸載apache
# rpm -qa | grep httpd
說明:檢查是否安裝了httpd軟件包

# rpm -e httpd-2.2.3-63.el5.centos --nodeps
說明:卸載軟件包, --nodeps 如果有連帶關系,也強制卸載
# cd /etc/httpd/
# rm -rf *
說明:到原來的apache安裝目錄下,將其所有的安裝目錄和文件都刪掉
b. 卸載mysql
# rpm -qa | grep mysql
# rpm -e mysql-5.0.77-4.el5_4.2 --nodeps
說明:卸載mysql
c. 卸載php
# rpm -qa | grep php
# rpm -e php-common-5.1.6-27.el5 --nodeps
# rpm -e php-ldap-5.1.6-27.el5 --nodeps
# rpm -e php-cli-5.1.6-27.el5 --nodeps
# rpm -e php-5.1.6-27.el5 --nodeps
說明:卸載php
4、關閉selinux,清空防火墻規則
5、使用ssh shell將windows下的13個源碼包上傳到/usr/local/src
6、解包
編寫一個shell腳本tar.sh進行解包。
#!/bin/sh cd /usr/local/srcls *.tar.gz > ls.list for tar in `cat ls.list` dotar -zxvf $tardone
執行腳本tar.sh進行解包
7、將源碼包*.tar.gz全都刪除

四、安裝lamp
1、安裝libxml2
# cd /usr/local/src/libxml2-2.6.30
# ./configure --prefix=/usr/local/libxml2
# make && make install
2、安裝libmcrypt
# cd /usr/local/src/libmcrypt-2.5.8
# ./configure --prefix=/usr/local/libmcrypt
# make && make install
3、安裝zlib
# cd /usr/local/src/zlib-1.2.3
# ./configure
# make && make install
4、安裝libpng
# cd /usr/local/src/libpng-1.2.31
# ./configure --prefix=/usr/local/libpng
# make && make install
5、安裝jpeg6
這個軟件包安裝有些特殊,其它軟件包安裝時如果目錄不存在,會自動創建,但這個軟件包安裝時需要手動創建。
# mkdir /usr/local/jpeg6
# mkdir /usr/local/jpeg6/bin
# mkdir /usr/local/jpeg6/lib
# mkdir /usr/local/jpeg6/include
# mkdir -p /usr/local/jpeg6/man/man1
# cd /usr/local/src/jpeg-6b
# ./configure --prefix=/usr/local/jpeg6/ --enable-shared --enable-static
# make && make install
6、安裝freetype
# cd /usr/local/src/freetype-2.3.5
# ./configure --prefix=/usr/local/freetype
# make
# make install
7、安裝autoconf
# cd /usr/local/src/autoconf-2.61
# ./configure
# make && make install
8、安裝gd庫
# cd /usr/local/src/gd-2.0.35
# ./configure \
--prefix=/usr/local/gd2/ \
--enable-m4_pattern_allow \
--with-zlib=/usr/local/zlib/ \
--with-jpeg=/usr/local/jpeg6/ \
--with-png=/usr/local/libpng/ \
--with-freetype=/usr/local/freetype/
# make
出現錯誤:
make[2]: *** [gd_png.lo] error 1
make[2]: leaving directory `/usr/local/src/gd-2.0.35'
make[1]: *** [all-recursive] error 1
make[1]: leaving directory `/usr/local/src/gd-2.0.35'
make: *** [all] error 2

分析:這個問題是因為gd庫中的gd_png.c這個源文件中包含png.h時,png.h沒有找到導致的。
解決:
在編譯文件里
# vi gd_png.c
將include “png.h” 改成 include “/usr/local/libpng/include/png.h”

其中/usr/local/libpng/為libpng安裝路徑。
# make install
9、安裝apache
# cd /usr/local/src/httpd-2.2.9
# ./configure \
--prefix=/usr/local/apache2 \
--sysconfdir=/etc/httpd \
--with-z=/usr/local/zlib \
--with-included-apr \
--enable-so \
--enable-deflate=shared \
--enable-expires=shared \
--enable-rewrite=shared \
--enable-static-support
# make && make install
10、配置apache
啟動apache
# /usr/local/apache2/bin/apachectl start
關閉apache
# /usr/local/apache2/bin/apachectl stop
查看80端口是否開啟
# netstat -tnl|grep 80
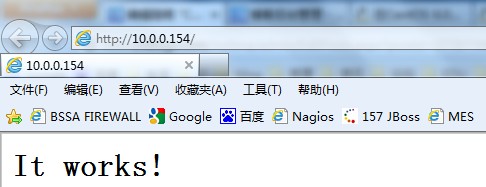
訪問apache服務器
添加自啟動
# echo "/usr/local/apache2/bin/apachectl start" >> /etc/rc.d/rc.local
11、安裝mysql
添加一個mysql標準組
# groupadd mysql
添加mysql用戶并加到mysql組中
# useradd -g mysql mysql
# cd /usr/local/src/mysql-5.0.41
# ./configure \
--prefix=/usr/local/mysql/ \
--with-extra-charsets=all
出現錯誤:
checking for tgetent in -lncurses... no
checking for tgetent in -lcurses... no
checking for tgetent in -ltermcap... no
checking for tgetent in -ltinfo... no
checking for termcap functions library... configure: error: no curses/termcap library found

分析:缺少ncurses安裝包
解決:
# yum install ncurses-devel
# make && make install
12、配置mysql
創建mysql數據庫服務器的配置文件
# cp support-files/my-medium.cnf /etc/my.cnf
用mysql用戶創建授權表,創建成功后,會在/usr/local/mysql目錄下生成一個var目錄
# /usr/local/mysql/bin/mysql_install_db --user=mysql
將文件的所有屬性改為root用戶
# chown -r root /usr/local/mysql
將數據目錄的所有屬性改為mysql用戶
# chown -r mysql /usr/local/mysql/var
將組屬性改為mysql組
# chgrp -r mysql /usr/local/mysql
啟動數據庫
# /usr/local/mysql/bin/mysqld_safe --user=mysql &
查看3306端口是否開啟
# netstat -tnl|grep 3306
簡單的測試
# /usr/local/mysql/bin/mysqladmin version
查看所有mysql參數
# /usr/local/mysql/bin/mysqladmin variables
設置mysql開機自啟動
# cp /usr/local/src/mysql-5.0.41/support-files/mysql.server /etc/rc.d/init.d/mysqld
# chown root.root /etc/rc.d/init.d/mysqld
# chmod 755 /etc/rc.d/init.d/mysqld
# chkconfig --add mysqld
# chkconfig --list mysqld
# chkconfig --levels 245 mysqld off
13、mysql安全性設置
沒有密碼可以直接登錄本機服務器
# /usr/local/mysql/bin/mysql -u root
查看mysql用戶權限信息
mysql> select * from mysql.user;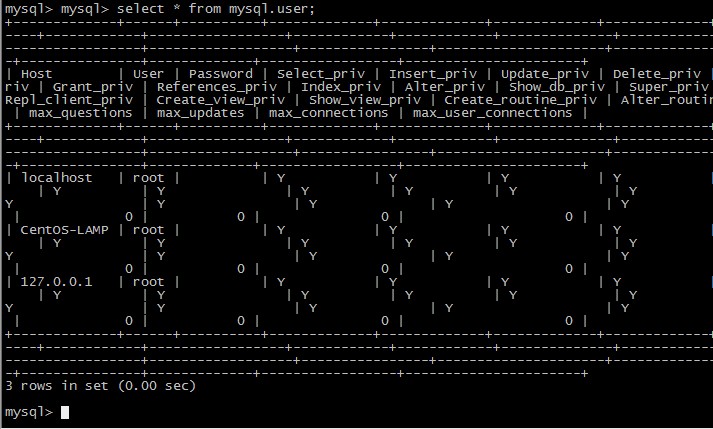
刪除非localhost的主機
mysql> delete from mysql.user where host='localhost' and user='';
刷新授權表
mysql> flush privileges;
為root用戶添加密碼
mysql> set password for 'root'@'localhost' = password('abc123');
再次進入mysql客戶端
# /usr/local/mysql/bin/mysql -u root -h localhost -p
關閉mysql數據庫
# /usr/local/mysql/bin/mysqladmin -u root -p shutdown
14、安裝php
# cd /usr/local/src/php-5.2.6
# ./configure \
--prefix=/usr/local/php \
--with-config-file-path=/usr/local/php/etc \
--with-apxs2=/usr/local/apache2/bin/apxs \
--with-mysql=/usr/local/mysql/ \
--with-libxml-dir=/usr/local/libxml2/ \
--with-png-dir=/usr/local/libpng/ \
--with-jpeg-dir=/usr/local/jpeg6/ \
--with-freetype-dir=/usr/local/freetype/ \
--with-gd=/usr/local/gd2/ \
--with-zlib-dir=/usr/local/zlib/ \
--with-mcrypt=/usr/local/libmcrypt/ \
--with-mysqli=/usr/local/mysql/bin/mysql_config \
--enable-soap \
--enable-mbstring=all \
--enable-sockets
# make && make install
15、配置php
創建配置文件
# cp php.ini-dist /usr/local/php/etc/php.ini
使用vi編輯apache配置文件
# vi /etc/httpd/httpd.conf
添加這一條代碼
addtype application/x-httpd-php .php .phtml
重啟apache
# /usr/local/apache2/bin/apachectl restart
以上安裝步驟可以寫成一個shell script,詳細參考
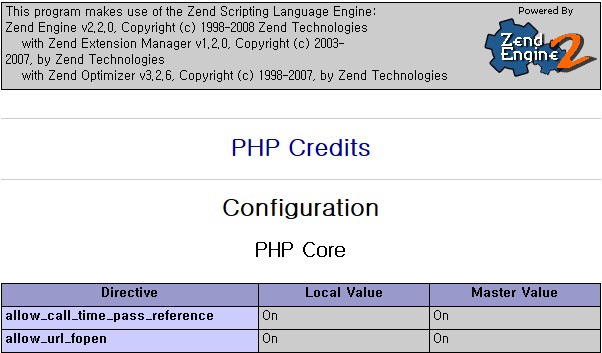
16、安裝zend加速器
# cd /usr/local/src/zendoptimizer-3.2.6-linux-glibc21-i386/
# ./install.sh


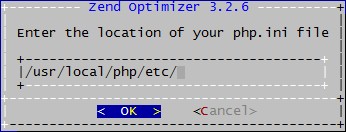


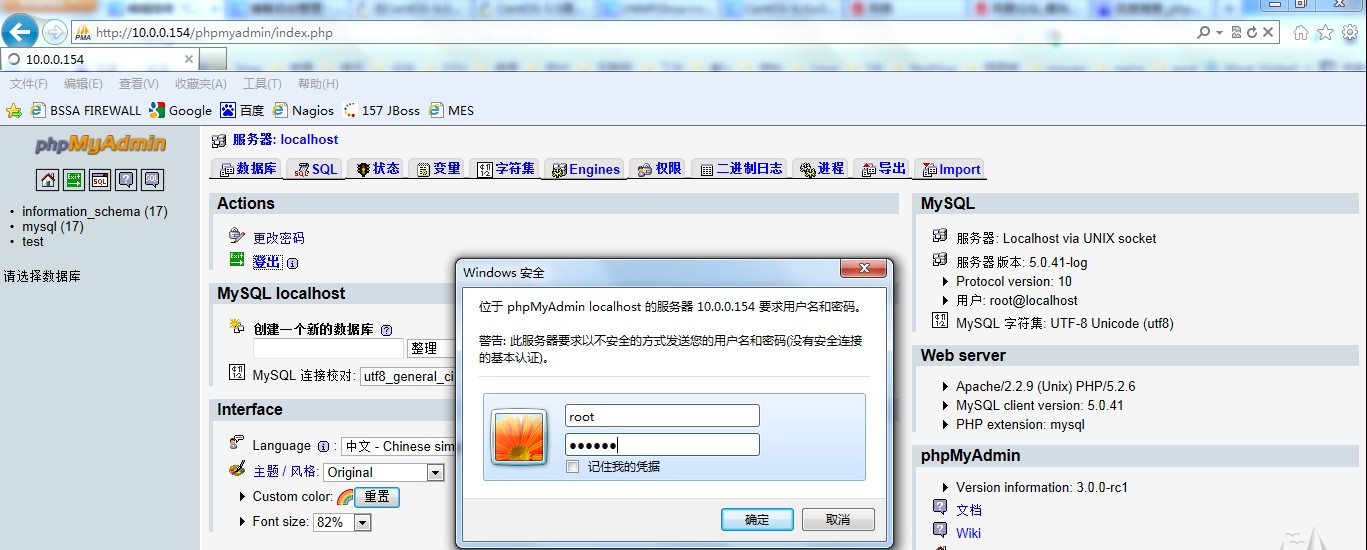
17、安裝phpmyadmin
拷貝目錄到指定位置并改名為phpmyadmin
# cp -a phpmyadmin-3.0.0-rc1-all-languages /usr/local/apache2/htdocs/phpmyadmin
# cd /usr/local/apache2/htdocs/phpmyadmin/
# cp config.sample.inc.php config.inc.php
18、配置phpmyadmin
# vi /usr/local/apache2/htdocs/phpmyadmin/config.inc.php
將auth_type 改為http
$cfg['servers'][$i]['auth_type'] = 'http';
五、測試
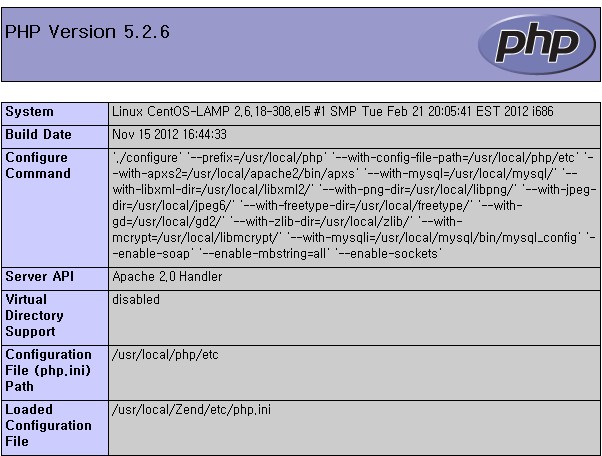
1、編寫info.php文件,查看php配置詳細
# vi /usr/local/apache2/htdocs/info.php
<?phpphpinfo();?>
通過瀏覽器訪問http://10.0.0.154/info.php,獲得php的詳細配置信息
2、zend加速器信息
3、訪問phpmyadmin
以上就是關于“CentOS6.3下源碼安裝LAMP運行環境的方法”這篇文章的內容,相信大家都有了一定的了解,希望小編分享的內容對大家有幫助,若想了解更多相關的知識內容,請關注億速云行業資訊頻道。
免責聲明:本站發布的內容(圖片、視頻和文字)以原創、轉載和分享為主,文章觀點不代表本網站立場,如果涉及侵權請聯系站長郵箱:is@yisu.com進行舉報,并提供相關證據,一經查實,將立刻刪除涉嫌侵權內容。