您好,登錄后才能下訂單哦!
您好,登錄后才能下訂單哦!
這篇文章主要為大家展示了“如何配置本地的cloud9開發環境”,內容簡而易懂,條理清晰,希望能夠幫助大家解決疑惑,下面讓小編帶領大家一起研究并學習一下“如何配置本地的cloud9開發環境”這篇文章吧。
環境:cent OS 7.4 64位
#首先將線上的代碼使用git克隆到本地(漫長的等待,期間retry了好幾次):
yum install git
git clone git://github.com/c9/core.git c9sdk
#進入目錄
cd c9sdk/
#安裝依賴
yum install npm
# 如出現錯誤PTY is not supported,安裝tmux以使在線IDE開發環境的控制臺可用
yum install tmux
yum groupinstall -y development
yum install gcc
yum install glibc-static
# Ubuntu系統如下:
sudo apt install tmux
# Mac系統如下:
brew install tmux
源碼中也提供了安裝腳本,執行scripts/install-sdk.sh 即可(因為國外網絡問題,又是漫長的等待和不斷的retry)。
(shell退出,程序會被終止)使用nodejs的forever模塊 以達到后臺永久運行的效果。
$ sudo npm install forever -g   #安裝
$ forever start app.js          #啟動
$ forever stop app.js           #關閉
開啟服務:start server.js
永久開啟服務:forever start server.js
帶參數開啟服務:node server.js -p 端口號 -l IP地址 -a 用戶名:密碼
在SDK中啟動Cloud9,如下所示:
./server.js -p 8080 -l 0.0.0.0 -a : #全網段訪問,包括外網哦
可以使用以下選項:
--settings       Settings file to use
--help           Show command line options.
-t               Start in test mode
-k               Kill tmux server in test mode
-b               Start the bridge server - to receive commands from the cli  [default: false]
-w               Workspace directory
--port           Port
--debug          Turn debugging on
--listen         IP address of the server
--readonly       Run in read only mode
--packed         Whether to use the packed version.
--auth           Basic Auth username:password
--collab         Whether to enable collab.
--no-cache       Don't use the cached version of CSS
SDK開始后,在瀏覽器中導航到http:// localhost:8080以加載IDE。
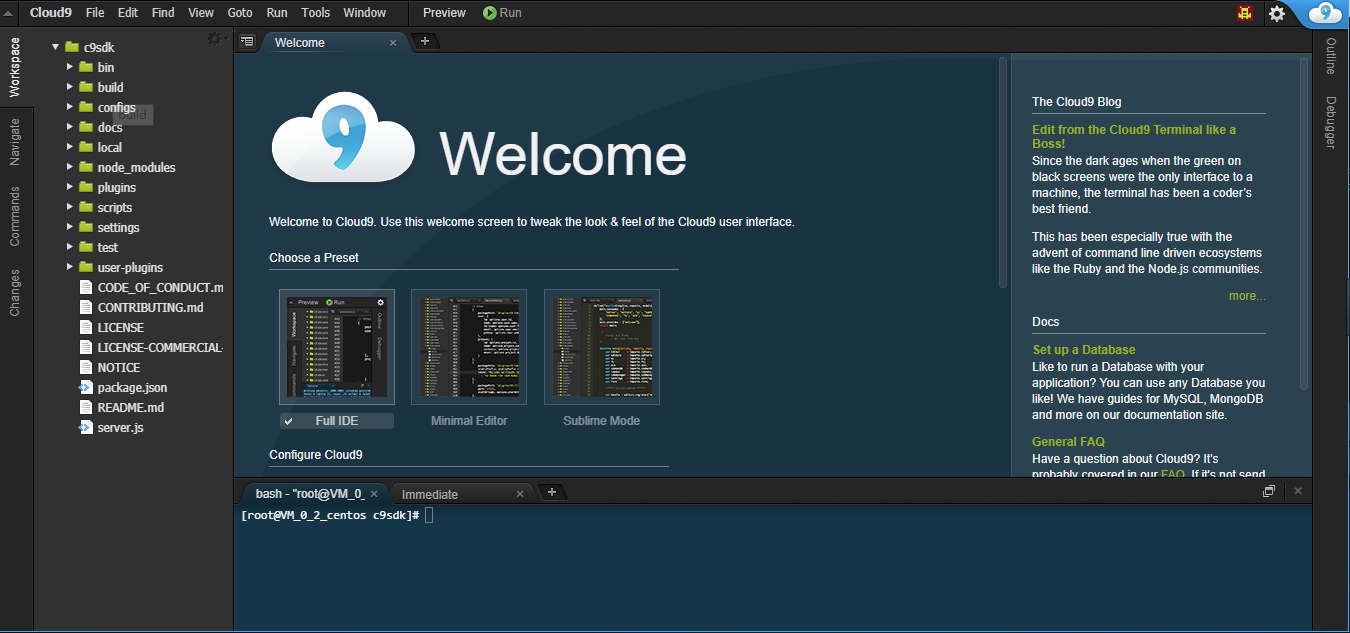
應用默認開啟的是8181端口,所以在我們正常啟動后,訪問http://127.0.0.1:8181即可。運行cloud9的瀏覽器推薦Chrome,配置后的效果如下:

PS:
ctrl+c 結束當前任務并退出
ctrl+z 暫停當前任務并后臺掛起
jobs 當前所有任務
fg 進程號 前臺掛起任務,不加進程號默認掛起最后一個
bg 進程號 后臺掛起任務,不加進程號默認掛起最后一個
以上是“如何配置本地的cloud9開發環境”這篇文章的所有內容,感謝各位的閱讀!相信大家都有了一定的了解,希望分享的內容對大家有所幫助,如果還想學習更多知識,歡迎關注億速云行業資訊頻道!
免責聲明:本站發布的內容(圖片、視頻和文字)以原創、轉載和分享為主,文章觀點不代表本網站立場,如果涉及侵權請聯系站長郵箱:is@yisu.com進行舉報,并提供相關證據,一經查實,將立刻刪除涉嫌侵權內容。