您好,登錄后才能下訂單哦!
您好,登錄后才能下訂單哦!
如何進行第二代網關GateWay的搭建,很多新手對此不是很清楚,為了幫助大家解決這個難題,下面小編將為大家詳細講解,有這方面需求的人可以來學習下,希望你能有所收獲。
Spring Cloud第二代網關GateWay是由純Netty開發,底層為Reactor,WebFlux構建,不依賴任何Servlet容器,它不同于Zuul,使用的是異步IO,性能較Zuul提升1.6倍。搭建過程如下(本次搭建的為子項目,主項目可以參考Nacos搭建流程 )
pom
<dependency> <groupId>org.springframework.cloud</groupId> <artifactId>spring-cloud-starter-gateway</artifactId></dependency><dependency> <groupId>com.alibaba.cloud</groupId> <artifactId>spring-cloud-starter-alibaba-nacos-discovery</artifactId></dependency>
配置文件
server: port: 8040spring: application: name: gateway cloud: nacos: discovery: server-addr: 127.0.0.1:8848gateway: discovery: locator: enabled: true
以上的意思不僅是把自己給注冊到nacos,并且獲取nacos的所有注冊服務。
啟動網關項目,現在就可以進行網絡路由了。訪問格式為 ip:端口/服務注冊名/restfulapi-url
比方說我們現在有兩個微服務項目,一個為user(端口8082),一個為nacos(端口8081).


三大核心概念
Route(路由) Spring Cloud Gateway的基礎元素,可簡單理解成一條轉發的規則。包含:ID,目標的URL,Predicate集合以及Filter集合。
Predicate(謂詞) 即java.util.function.Predicate,Spring Cloud Gateway使用Predicate實現路由的匹配條件。這是一個可以進行條件判斷的函數式接口,具體可以參考本人博客Java函數式編程整理
Filter(過濾器) 修改請求以及響應。
由于我們使用了nacos來進行服務發現,所以我們使用了之前的配置文件,但如果不使用服務發現,只做常規的轉發如下
spring:
  cloud:gateway:  routes:        - id: some_route          uri: http://www.baidu.com          predicates:            - Path=/user/1          filtes:            - AddRequestHeader=X-Request-Foo, Bar
這段配置的意思是說,當我們請求/user/1的url的時候,會添加AddRequestHeader=X-Request-Foo, Bar過濾器做一些處理,然后路由到http://www.baidu.com。
路由謂詞配置工廠
路由謂詞配置工廠由一整套謂詞來進行配置轉發的不同情況。
| 謂詞工廠 | 備注 |
|---|---|
| After | 此謂詞匹配當前日期時間之后發生的請求。 |
| Before | 此謂詞匹配在當前日期時間之前發生的請求。 |
| Between | 此謂詞匹配datetime1之后和datetime2之前發生的請求。 datetime2參數必須在datetime1之后。 |
| Cookie | Cookie Route Predicate Factory有兩個參數,cookie名稱和正則表達式。此謂詞匹配具有給定名稱且值與正則表達式匹配的cookie。 |
| Header | Header Route Predicate Factory有兩個參數,標題名稱和正則表達式。與具有給定名稱且值與正則表達式匹配的標頭匹配。 |
| Host | Host Route Predicate Factory采用一個參數:主機名模式。該模式是一種Ant樣式模式“.”作為分隔符。此謂詞匹配與模式匹配的Host標頭。 |
| Method | Method Route Predicate Factory采用一個參數:要匹配的HTTP方法。 |
| Path | 匹配請求的path |
| Query | Query Route Predicate Factory有兩個參數:一個必需的參數和一個可選的正則表達式。 |
| RemoteAddr | RemoteAddr Route Predicate Factory采用CIDR符號(IPv4或IPv6)字符串的列表(最小值為1),例如, 192.168.0.1/16(其中192.168.0.1是IP地址,16是子網掩碼)。 |
路由到指定URL
通配
現在我們去掉nacos的配置,不由nacos來發現
spring: application: name: gateway cloud: gateway: routes: - id: gateuri: http://127.0.0.1:8082predicates: #由/user來匹配跳轉 - Path=/user/**filters: #跳轉后省略第一個通配 - StripPrefix=1
此時訪問

將跳轉到

謂詞After
spring: application: name: gateway cloud: gateway: routes: - id: gateuri: http://127.0.0.1:8082predicates: #由/user來匹配跳轉 - Path=/user/**#在2019-12-14日20:26后允許該轉發 - After=2019-12-14T20:26:15.667+08:00[Asia/Shanghai]filters: #跳轉后省略第一個通配 - StripPrefix=1
這里表示在該時間后允許轉發,如果我們將該時間設置為
spring: application: name: gateway cloud: gateway: routes: - id: gateuri: http://127.0.0.1:8082predicates: #由/user來匹配跳轉 - Path=/user/**#在2019-12-15日20:26后允許該轉發 - After=2019-12-15T20:26:15.667+08:00[Asia/Shanghai]filters: #跳轉后省略第一個通配 - StripPrefix=1
則轉發失敗,返回404

我們可以通過以下方法來獲取這里的時間設置
public class TimeTest {public static void main(String[] args) {
        System.out.println(ZonedDateTime.now());    }
}
運行結果
2019-12-14T20:43:34.755+08:00[Asia/Shanghai]
謂詞Before
現在我們將上面的15號改為Before
spring: application: name: gateway cloud: gateway: routes: - id: gateuri: http://127.0.0.1:8082predicates: #由/user來匹配跳轉 - Path=/user/**#在2019-12-15日20:26前允許該轉發 - Before=2019-12-15T20:26:15.667+08:00[Asia/Shanghai]filters: #跳轉后省略第一個通配 - StripPrefix=1
此時就可以正常轉發,而改成14號則會失敗。
謂詞Between
spring: application: name: gateway cloud: gateway: routes: - id: gateuri: http://127.0.0.1:8082predicates: #由/user來匹配跳轉 - Path=/user/**#在2019-12-14日20:26到2019-12-15日20:26之間允許該轉發 - Between=2019-12-14T20:26:15.667+08:00[Asia/Shanghai],2019-12-15T20:26:15.667+08:00[Asia/Shanghai]filters: #跳轉后省略第一個通配 - StripPrefix=1
謂詞Cookie
我們在user模塊增加一個帶cookie的Controller
@Slf4j@RestControllerpublic class CookieController {@GetMapping("/welcome")public Boolean handle(HttpServletRequest request,                               HttpServletResponse response) throws Exception {
        Cookie cookie = new Cookie("test","value");        cookie.setMaxAge(Integer.MAX_VALUE);        response.addCookie(cookie);        log.info("welcome");        return true;    }
}
此時我們訪問該Controller為

此時網關這邊配置為
spring: application: name: gateway cloud: gateway: routes: - id: gateuri: http://127.0.0.1:8082predicates: #由/user來匹配跳轉 - Path=/user/**#只有帶上Cookie名為test,并且值符合正則value的cookie時,才允許被轉發 - Cookie=test,valuefilters: #跳轉后省略第一個通配 - StripPrefix=1

謂詞Header
現在我們給user模塊添加一個Controller的方法
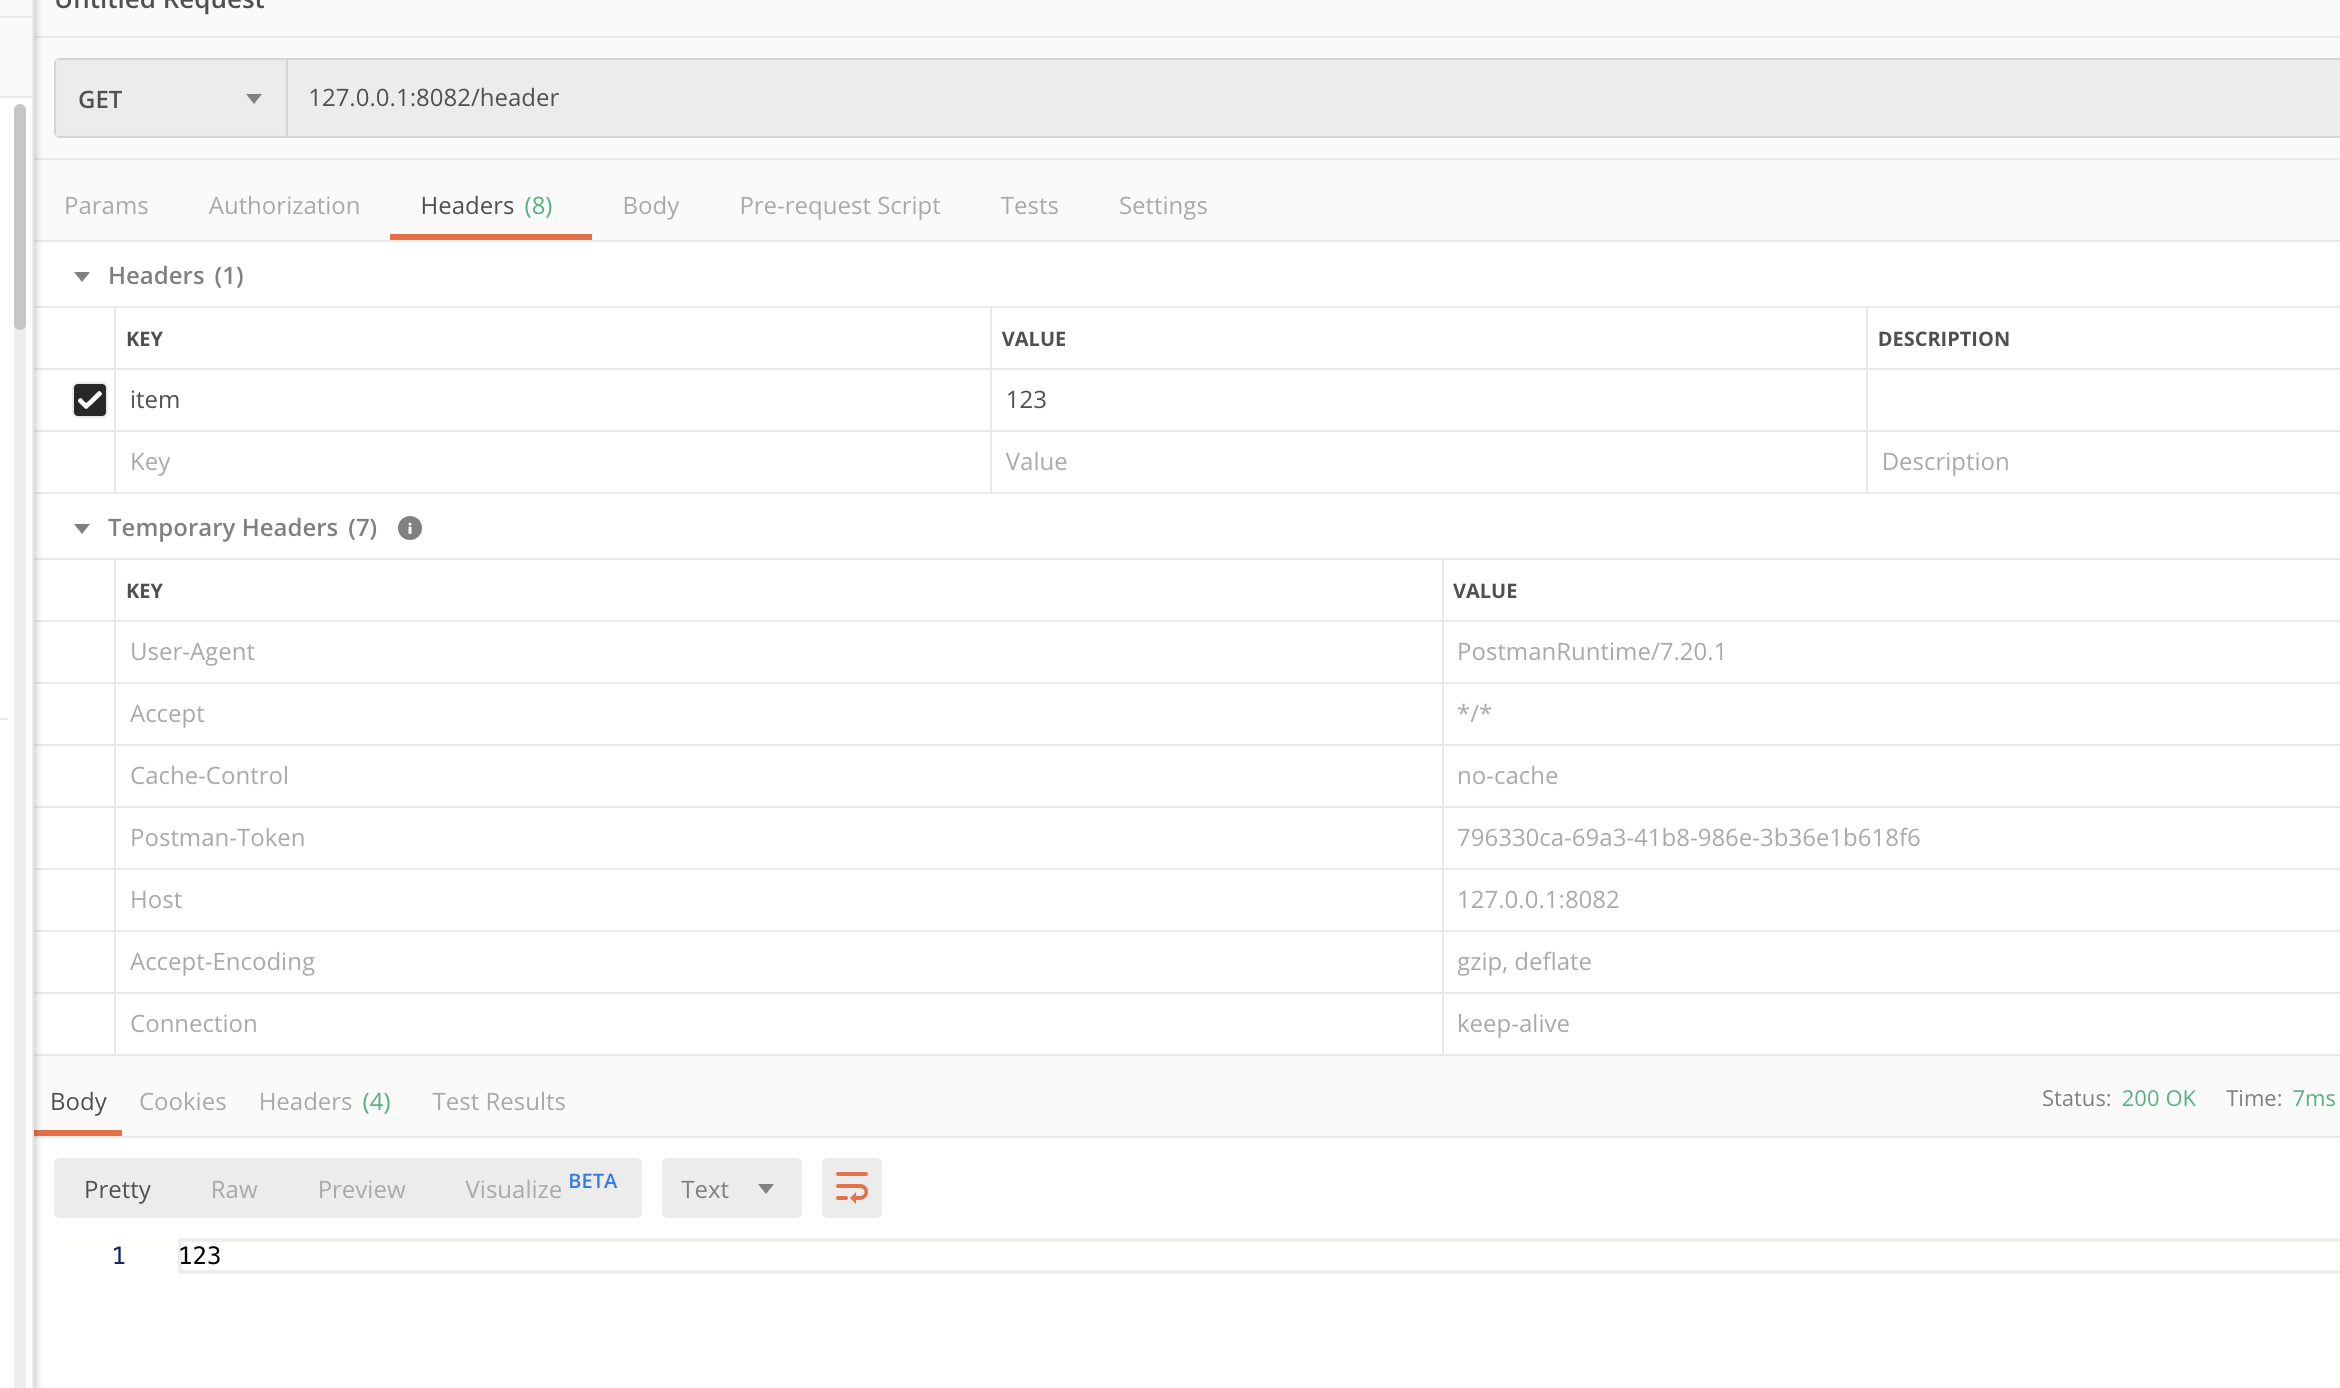
@GetMapping("/header")public String header(@RequestHeader("item") String item) {return item;}我們通過postman給該方法的訪問添加請求頭

在網關中的配置為
spring: application: name: gateway cloud: gateway: routes: - id: gateuri: http://127.0.0.1:8082predicates: #由/user來匹配跳轉 - Path=/user/**#只有帶上請求頭名為item,并且值符合正則123.p,才會轉發 - Header=item,123.pfilters: #跳轉后省略第一個通配 - StripPrefix=1

這里正則.可以匹配一個單字符
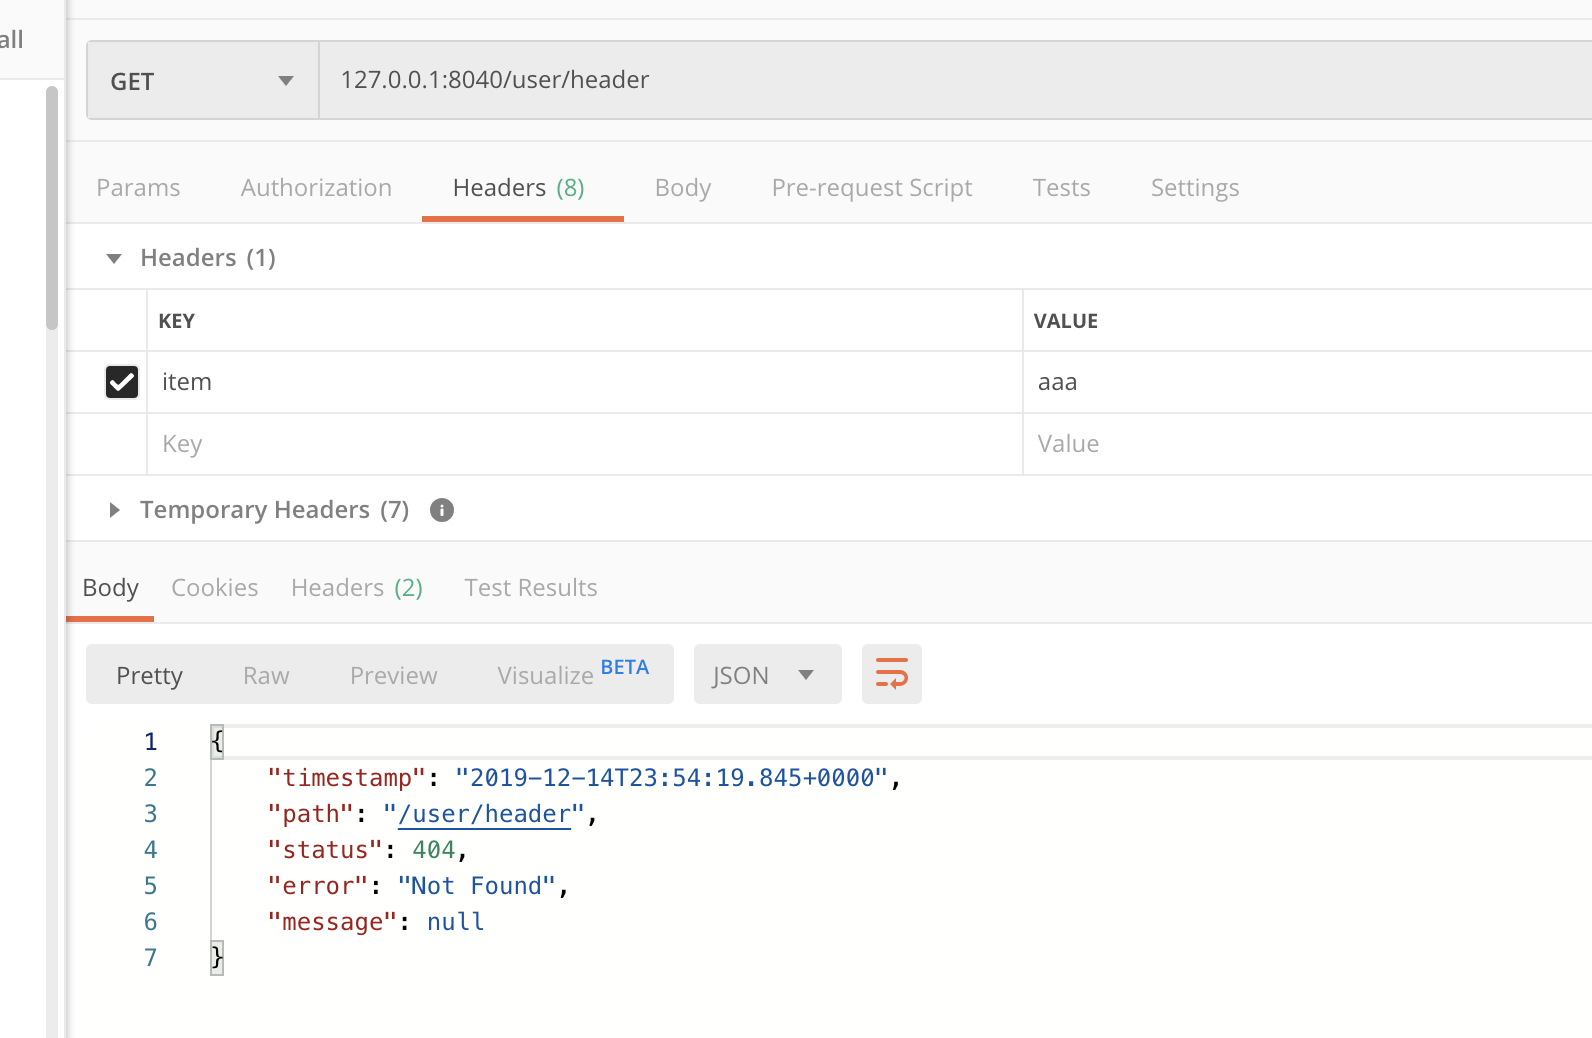
如果我們在請求頭item中設置錯誤的字符則無法轉發

謂詞Host
要配置Host,我們需要給服務器的hosts文件添加一個域名映射,當然在互聯網上需要一個域名來做DNS解析。
我這里給自己的域名添加為local.register.com
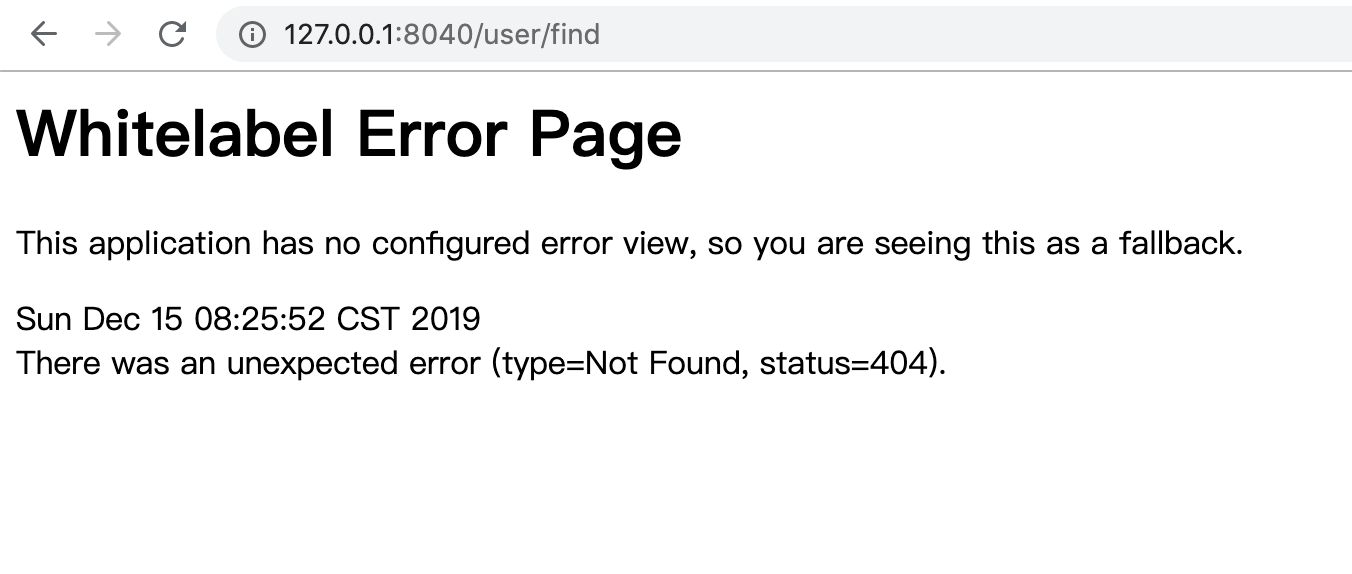
訪問user的find方法

給網關添加配置
spring: application: name: gateway cloud: gateway: routes: - id: gateuri: http://127.0.0.1:8082predicates: #由/user來匹配跳轉 - Path=/user/**#只有帶上請求頭Host,且值匹配**.register.com:8040才能通過轉發 - Host=**.register.com:8040filters: #跳轉后省略第一個通配 - StripPrefix=1
此時我們通過網關訪問如下

謂詞Method
spring: application: name: gateway cloud: gateway: routes: - id: gateuri: http://127.0.0.1:8082predicates: #由/user來匹配跳轉 - Path=/user/**#只有當HTTP請求方法是GET時才能轉發 - Method=GETfilters: #跳轉后省略第一個通配 - StripPrefix=1
謂詞Query
現在我們給user模塊增加一個Controller方法
@GetMapping("/query")public String query(@RequestParam("name") String name) {return name;}訪問如下

網關配置如下
spring: application: name: gateway cloud: gateway: routes: - id: gateuri: http://127.0.0.1:8082predicates: #由/user來匹配跳轉 - Path=/user/**#只有當請求帶上參數名稱為name時才能通過轉發 - Query=namefilters: #跳轉后省略第一個通配 - StripPrefix=1

如果不帶上該參數則無法轉發,如

謂詞RemoteAddr
spring: application: name: gateway cloud: gateway: routes: - id: gateuri: http://127.0.0.1:8082predicates: #由/user來匹配跳轉 - Path=/user/**#只有當請求為192.168.20.1/24網段(IP地址從192.168.20.1到192.168.20.254)才會轉發 - RemoteAddr=192.168.20.1/24filters: #跳轉后省略第一個通配 - StripPrefix=1
例如

但是使用127.0.0.1卻無法訪問

現在我們恢復nacos的服務發現
spring: application: name: gateway cloud: nacos: discovery: server-addr: 127.0.0.1:8848gateway: routes: - id: gateuri: lb://userpredicates: #由/user-center來匹配跳轉 - Path=/user-center/**filters: #跳轉后省略第一個通配 - StripPrefix=1
為了跟不做任何配置相區別,我們這里謂詞Path寫了user-center

自定義路由謂詞工廠
假設現在我們的一個API只有在上午9點到下午5點允許轉發
配置的文件如下
spring:  application:    name: gateway  cloud:    nacos:      discovery:        server-addr: 127.0.0.1:8848gateway:      routes:      - id: gateuri: lb://userpredicates:        #由/user-center來匹配跳轉        - Path=/user-center/**
        - TimeBetween=上午9:00,下午5:00filters:        #跳轉后省略第一個通配        - StripPrefix=1
由于這個TimeBetween并不是gateway默認的謂詞工廠,所以我們需要自己來實現一個謂詞工廠,我們先定義一個時間的配置類
@Datapublic class TimeBetweenConfig {private LocalTime start; private LocalTime end;}然后自定義一個謂詞工廠類,該工廠類名稱必須以自定義謂詞開頭(這里是TimeBetween),以RoutePredicateFactory結尾,并繼承AbstractRoutePredicateFactory抽象類
@Componentpublic class TimeBetweenRoutePredicateFactory extends AbstractRoutePredicateFactory<TimeBetweenConfig>{public TimeBetweenRoutePredicateFactory() {super(TimeBetweenConfig.class);    }@Override    public Predicate<ServerWebExchange> apply(TimeBetweenConfig config) {
        LocalTime start = config.getStart();        LocalTime end = config.getEnd();        return exchange -> {
            LocalTime now = LocalTime.now();            return now.isAfter(start) && now.isBefore(end);        };    }@Override    public List<String> shortcutFieldOrder() {return Arrays.asList("start","end");    }
}
內置過濾器工廠
1 AddRequestHeader GatewayFilter Factory
2 AddRequestParameter GatewayFilter Factory
3 AddResponseHeader GatewayFilter Factory
4 DedupeResponseHeader GatewayFilter Factory
5 Hystrix GatewayFilter Factory
6 FallbackHeaders GatewayFilter Factory
7 PrefixPath GatewayFilter Factory
8 PreserveHostHeader GatewayFilter Factory
9 RequestRateLimiter GatewayFilter Factory
10 RedirectTo GatewayFilter Factory
11 RemoveHopByHopHeadersFilter GatewayFilter Factory
12 RemoveRequestHeader GatewayFilter Factory
13 RemoveResponseHeader GatewayFilter Factory
14 RewritePath GatewayFilter Factory
15 RewriteResponseHeader GatewayFilter Factory
16 SaveSession GatewayFilter Factory
17 SecureHeaders GatewayFilter Factory
18 SetPath GatewayFilter Factory
19 SetResponseHeader GatewayFilter Factory
20 SetStatus GatewayFilter Factory
21 StripPrefix GatewayFilter Factory
22 Retry GatewayFilter Factory
23 RequestSize GatewayFilter Factory
24 Modify Request Body GatewayFilter Factory
25 Modify Response Body GatewayFilter Factory
26 Default Filters
AddRequestHeader
spring: application: name: gateway cloud: nacos: discovery: server-addr: 192.168.10.172:8848gateway: routes: - id: gateuri: lb://userpredicates: #由/user-center來匹配跳轉 - Path=/user-center/**filters: #跳轉后省略第一個通配 - StripPrefix=1#增加一個名稱為X-Request-Foo,值為Bar的請求頭 - AddRequestHeader=X-Request-Foo,Bar
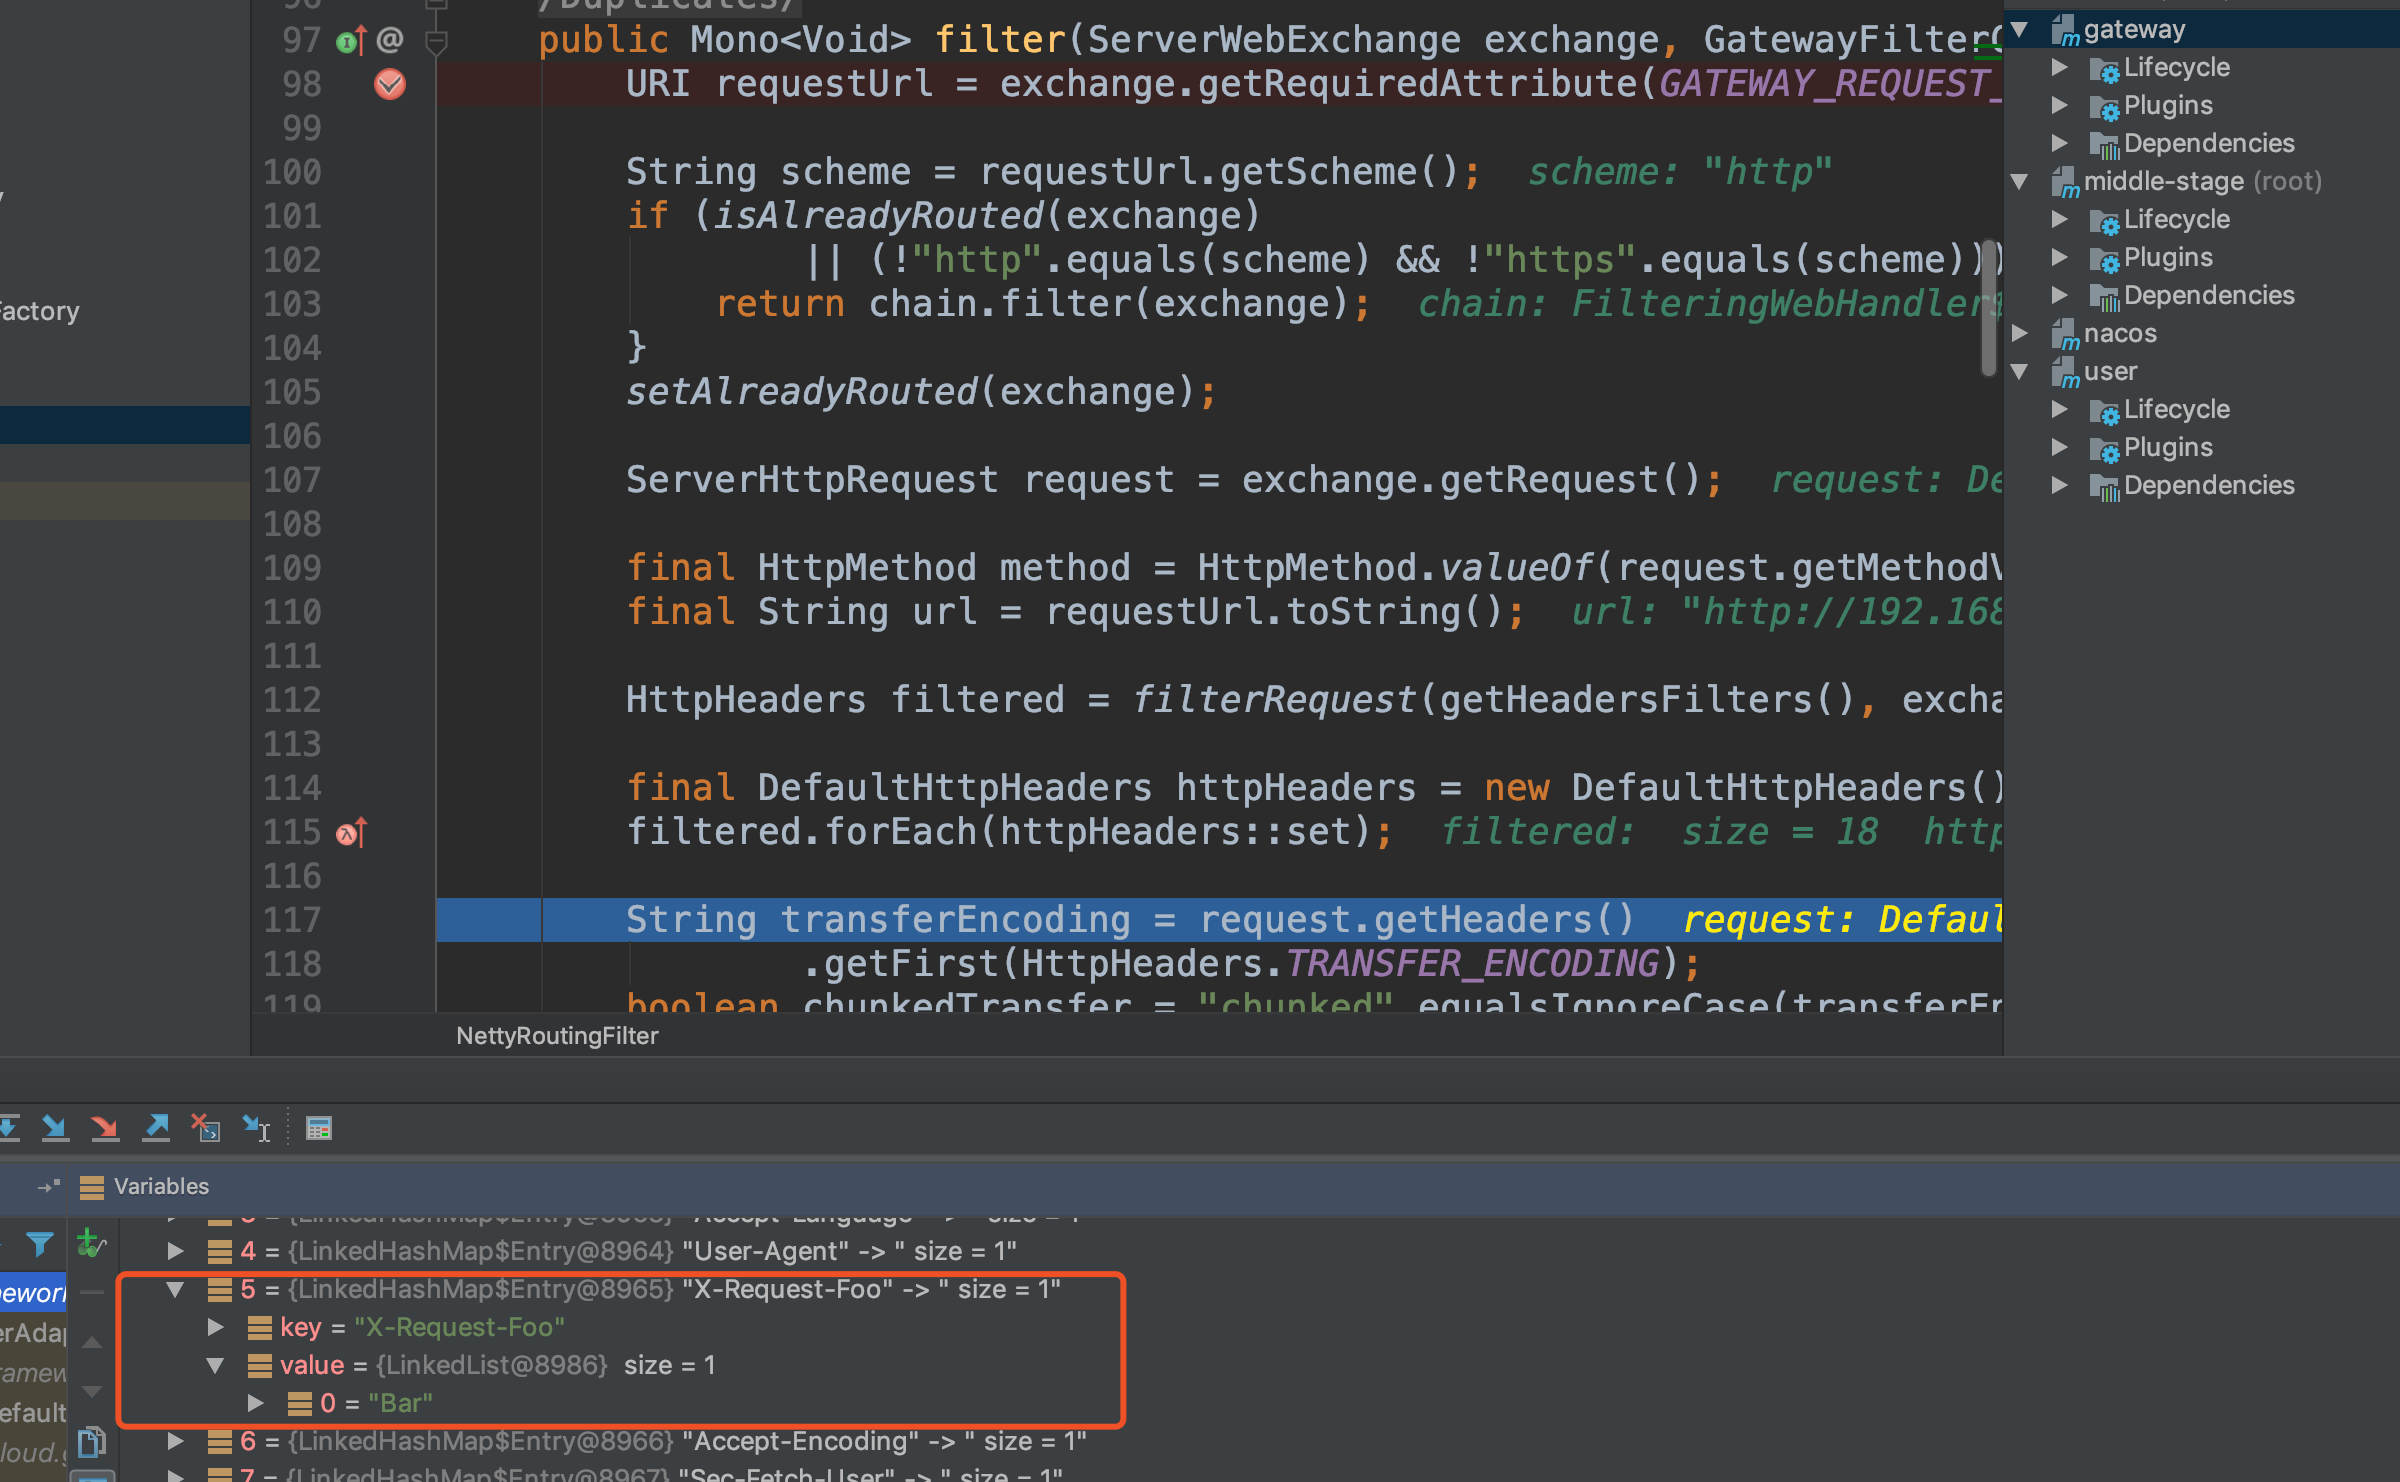
這里需要注意的是新增的這個請求頭是轉發以后添加進去的,所以我們請求網關的時候在瀏覽器中是找不到的,我們可以使用command+N(Windows中idea為Ctrl+N)來查找NettyRoutingFilter類,并且在filter方法中設置斷點,由以下圖中可以看到它是被添加進去了。

AddRequestParameter
由于在user模塊中有這么一個方法
@GetMapping("/query")public String query(@RequestParam("name") String name) {return name;}所以我們在網關配置時
spring: application: name: gateway cloud: nacos: discovery: server-addr: 127.0.0.1:8848gateway: routes: - id: gateuri: lb://userpredicates: #由/user-center來匹配跳轉 - Path=/user-center/**filters: #跳轉后省略第一個通配 - StripPrefix=1#增加一個名稱為name,值為locky的請求參數 - AddRequestParameter=name,locky
所以我們在網關中請求就可以不寫參數,直接訪問

AddResponseHeader
spring: application: name: gateway cloud: nacos: discovery: server-addr: 127.0.0.1:8848gateway: routes: - id: gateuri: lb://userpredicates: #由/user-center來匹配跳轉 - Path=/user-center/**filters: #跳轉后省略第一個通配 - StripPrefix=1#增加一個名稱為X-Response-Foo,值為Bar的響應頭 - AddResponseHeader=X-Response-Foo, Bar

DedupeResponseHeader
Spring Cloud Greenwich SR2提供的新特性,低于這個版本無法使用。
它的主要作用是去重,例如
spring:  application:    name: gateway  cloud:    nacos:      discovery:        server-addr: 127.0.0.1:8848gateway:      routes:      - id: gateuri: lb://userpredicates:        #由/user-center來匹配跳轉        - Path=/user-center/**
        - Cookie=test,valuefilters:        #跳轉后省略第一個通配        - StripPrefix=1#在Http響應報文頭中進行去重,去重目標為跨域請求        - DedupeResponseHeader=Access-Control-Allow-Credentials Access-Control-Allow-Origin
Hystrix
Hystrix是Spring Cloud第一代中的容錯組件,不過已經進入維護模式。未來,Hystrix會被Spring Cloud移除掉,取而代之的是Alibaba Sentinel/Resilience4J。
此處不做具體設置了
FallbackHeaders
也是對Hystrix的支持,不做具體設置了
PrefixPath
為匹配的路由添加前綴,我們在user模塊的find添加一層訪問路徑
@GetMapping("/test/find")@SuppressWarnings("unchecked")public Result<User> findStr() {log.info("訪問成功"); return Result.success(new User(1,"張三",23));}網關配置
spring: application: name: gateway cloud: nacos: discovery: server-addr: 127.0.0.1:8848gateway: routes: - id: gateuri: lb://userpredicates: #由/user-center來匹配跳轉 - Path=/user-center/**filters: #跳轉后省略第一個通配 - StripPrefix=1#跳轉后添加前綴/test - PrefixPath=/test
則

與

一致。
PreserveHostHeader
如果不設置,那么名為 Host 的Header由Http Client控制;如果設置了,那么會設置一個請求屬性(preserveHostHeader=true),路由過濾器會檢查從而去判斷是否要發送原始的、名為Host的Header。這里主要是通過網關是否向代理服務器轉發請求頭中的Host屬性。
spring: application: name: gateway cloud: nacos: discovery: server-addr: 127.0.0.1:8848gateway: routes: - id: gateuri: lb://userpredicates: #由/user-center來匹配跳轉 - Path=/user-center/**filters: #跳轉后省略第一個通配 - StripPrefix=1#轉發客戶端的請求報文頭Host給后端代理服務器 - PreserveHostHeader
RequestRateLimiter
Gateway自帶的限流服務,但后續我們會整合Gateway和Sentinel來進行限流和熔斷。
RedirectTo
轉發到后端服務后再重定向到一個url.
spring: application: name: gateway cloud: nacos: discovery: server-addr: 127.0.0.1:8848gateway: routes: - id: gateuri: lb://userpredicates: #由/user-center來匹配跳轉 - Path=/user-center/**filters: #跳轉后省略第一個通配 - StripPrefix=1#轉發到Path,并且攜帶一個http://www.baidu.com到Location的響應頭 - RedirectTo=302,http://www.baidu.com


從以上圖中可以看出,其實我們請求的是http://127.0.0.1:8040/user-center/find,但是被重定向到了百度。這里HTTP狀態碼應該是HTTP狀態碼300序列,例如301.302,具體狀態碼可以參考HTTP協議整理
RemoveHopByHopHeadersFilter
移除轉發請求的Header,多個用","分隔。默認情況下移除如下Header。
Connection
Keep-Alive
Proxy-Authenticate
Proxy-Authorization
TE
Trailer
Transfer-Encoding
Upgrade
spring: application: name: gateway cloud: nacos: discovery: server-addr: 127.0.0.1:8848gateway: routes: - id: gateuri: lb://userpredicates: #由/user-center來匹配跳轉 - Path=/user-center/**filters: #跳轉后省略第一個通配 - StripPrefix=1 filter: #移除轉發請求 remove-hop-by-hop: headers: Keep-Alive,Connection
RemoveRequestHeader
移除原始請求頭
spring: application: name: gateway cloud: nacos: discovery: server-addr: 127.0.0.1:8848gateway: routes: - id: gateuri: lb://userpredicates: #由/user-center來匹配跳轉 - Path=/user-center/**filters: #跳轉后省略第一個通配 - StripPrefix=1#移除原始請求頭X-Request-Foo - RemoveRequestHeader=X-Request-Foo
由spring cloud zuul網關的作用 可知,在跨域轉發中,我們需要移除這些請求頭
spring: application: name: gateway cloud: nacos: discovery: server-addr: 127.0.0.1:8848gateway: routes: - id: gateuri: lb://userpredicates: #由/user-center來匹配跳轉 - Path=/user-center/**filters: #跳轉后省略第一個通配 - StripPrefix=1#移除原始跨域請求頭 - RemoveRequestHeader=Access-Control-Allow-Origin filter: #移除轉發請求 remove-hop-by-hop: headers: Access-Control-Allow-Credentials,Access-Control-Allow-Origin,Vary,X-Frame-Options,token
RemoveResponseHeader
移除響應頭
我們在user中添加一個Controller方法
@GetMapping("/addhead")public String addHeader(HttpServletRequest request, HttpServletResponse response) {
    response.addHeader("X-Response-Foo","Foo");    return "header";}
網關配置
spring: application: name: gateway cloud: nacos: discovery: server-addr: 127.0.0.1:8848gateway: routes: - id: gateuri: lb://userpredicates: #由/user-center來匹配跳轉 - Path=/user-center/**filters: #跳轉后省略第一個通配 - StripPrefix=1#移除響應頭X-Response-Foo - RemoveResponseHeader=X-Response-Foo

通過網關轉發,我們可以看到無此X-Response-Foo的響應頭。
RewritePath
重寫請求路徑
spring: application: name: gateway cloud: nacos: discovery: server-addr: 127.0.0.1:8848gateway: routes: - id: gateuri: lb://userpredicates: #由/user-center來匹配跳轉 - Path=/user-center/**filters: #配置成原始路徑正則, 重寫后的路徑的正則 - RewritePath=/user-center/(?<segment>.*), /$\{segment}以上配置會將/user-center/find變成/find再轉發
直接訪問user

網關請求的

RewriteResponseHeader
重寫響應頭部分內容,根據正則來修改
之前在user中有一個Controller方法
@GetMapping("/addhead")public String addHeader(HttpServletRequest request, HttpServletResponse response) {
    response.addHeader("X-Response-Foo","Foo");    return "header";}
spring: application: name: gateway cloud: nacos: discovery: server-addr: 127.0.0.1:8848gateway: routes: - id: gateuri: lb://userpredicates: #由/user-center來匹配跳轉 - Path=/user-center/**filters: #跳轉后省略第一個通配 - StripPrefix=1#重寫響應頭X-Response-Foo的值Foo為dee,內容可根據正則匹配 - RewriteResponseHeader=X-Response-Foo,Foo,dee
訪問user的/addhead,X-Response-Foo響應頭的值為Foo.

通過網關訪問/addhead,X-Response-Foo響應頭的值為dee

SaveSession
在轉發到后端微服務請求之前,強制執行 WebSession::save 操作。用在那種像 Spring Session 延遲數據存儲(數據不是立刻持久化)的,并希望在請求轉發前確保session狀態保存情況。
現在我們對user進行共享Session的配置,添加依賴
<dependency> <groupId>org.springframework.boot</groupId> <artifactId>spring-boot-starter-data-redis</artifactId></dependency><dependency> <groupId>org.springframework.session</groupId> <artifactId>spring-session-data-redis</artifactId></dependency><dependency> <groupId>redis.clients</groupId> <artifactId>jedis</artifactId> <version>2.9.0</version></dependency>
添加配置
spring:
  redis:
    host: 127.0.0.1
    port: 6379
    password: xxxxx
    timeout: 10000
    lettuce:
      pool:
        min-idle: 0
        max-idle: 8
        max-active: 8
        max-wait: -1
在SpringBoot開啟共享Session
@EnableRedisHttpSession@SpringBootApplicationpublic class UserApplication {   public static void main(String[] args) {
      SpringApplication.run(UserApplication.class, args);   }

}
在user中添加如下Controller
@RestControllerpublic class SessionController {@GetMapping("/first")public Map<String,Object> firstResp(HttpServletRequest request, HttpServletResponse response) {
        Map<String,Object> map = new HashMap<>();        request.getSession().setAttribute("request Url",request.getRequestURL());        map.put("request Url",request.getRequestURL());        return map;    }@GetMapping("/sessions")public Object sessions(HttpServletRequest request,HttpServletResponse response) {
        Map<String,Object> map = new HashMap<>();        map.put("SessionId",request.getSession().getId());        map.put("message",request.getSession().getAttribute("request Url"));        return map;    }
}
我們啟動兩個user實例,一個端口號為8082,一個為8083,訪問如下


我們可以看到除了存入Session的RequestURL不同以外,他們的SessionId是相同的,說明這里是一個共享的Session。
我們不對網關配置做修改,則我們通過網關訪問


在訪問first的時候,它會負載均衡這兩個實例,但我們可以看到他在Session中存儲的是內網的IP,而不是127.0.0.1。

在網關做如下配置
spring: application: name: gateway cloud: nacos: discovery: server-addr: 127.0.0.1:8848gateway: routes: - id: gateuri: lb://userpredicates: #由/user-center來匹配跳轉 - Path=/user-center/**filters: #跳轉后省略第一個通配 - StripPrefix=1#請求轉發前保存Session - SaveSession
目前未測出有什么太大的作用。反而會破壞Session的數據。所以不建議增加該設置。
SecureHeaders
添加一系列起安全作用的響應頭。
默認會添加如下Header(包括值):
X-Xss-Protection:1; mode=block 防XSS攻擊設置,0: 表示關閉瀏覽器的XSS防護機制;1:刪除檢測到的惡意代碼, 如果響應報文中沒有看到X-XSS-Protection 字段,那么瀏覽器就認為X-XSS-Protection配置為1,這是瀏覽器的默認設置.1; mode=block:如果檢測到惡意代碼,在不渲染惡意代碼.
Strict-Transport-Security:max-age=631138519 一個網站接受一個HTTP的請求,然后跳轉到HTTPS,用戶可能在開始跳轉前,通過沒有加密的方式和服務器對話,比如,用戶輸入http://foo.com或者直接foo.com。這樣存在中間人攻擊潛在威脅,跳轉過程可能被惡意網站利用來直接接觸用戶信息,而不是原來的加密信息。網站通過HTTP Strict Transport Security通知瀏覽器,這個網站禁止使用HTTP方式加載,瀏覽器應該自動把所有嘗試使用HTTP的請求自動替換為HTTPS請求。
X-Frame-Options:DENY 點擊劫持(ClickJacking)是一種視覺上的欺騙手段。攻擊者使用一個透明的iframe,覆蓋在一個網頁上,然后誘使用戶在網頁上進行操作,此時用戶將在不知情的情況下點擊透明的iframe頁面。通過調整iframe頁面的位置,可以誘使用戶恰好點擊在iframe頁面的一些功能性按鈕上。
HTTP響應頭信息中的X-Frame-Options,可以指示瀏覽器是否應該加載一個iframe中的頁面。如果服務器響應頭信息中沒有X-Frame-Options,則該網站存在ClickJacking攻擊風險。網站可以通過設置X-Frame-Options阻止站點內的頁面被其他頁面嵌入從而防止點擊劫持。
解決方案:
修改web服務器配置,添加X-Frame-Options響應頭。賦值有如下三種:
1、DENY:不能被嵌入到任何iframe或者frame中。
2、SAMEORIGIN:頁面只能被本站頁面嵌入到iframe或者frame中
3、ALLOW-FROM uri:只能被嵌入到指定域名的框架中
X-Content-Type-Options:nosniff
如果服務器發送響應頭 "X-Content-Type-Options: nosniff",則 script 和 styleSheet 元素會拒絕包含錯誤的 MIME 類型的響應。這是一種安全功能,有助于防止基于 MIME 類型混淆的攻擊。
簡單理解為:通過設置"X-Content-Type-Options: nosniff"響應標頭,對 script 和 styleSheet 在執行是通過MIME 類型來過濾掉不安全的文件
服務器發送含有 "X-Content-Type-Options: nosniff" 標頭的響應時,此更改會影響瀏覽器的行為。
Referrer-Policy:no-referrer
referrer是HTTP請求header的報文頭,用于指明當前流量的來源參考頁面。通過這個信息,我們可以知道訪客是怎么來到當前頁面的。這對于Web Analytics非常重要,可以用于分析不同渠道流量分布、用戶搜索的關鍵詞等。
但是,這個字段同時會造成用戶敏感信息泄漏(如:帶有敏感信息的重置密碼URL,若被Web Analytics收集,則存在密碼被重置的危險)。
新的Referrer規定了五種策略:
No Referrer:任何情況下都不發送Referrer信息
No Referrer When Downgrade:僅當協議降級(如HTTPS頁面引入HTTP資源)時不發送Referrer信息。是大部分瀏覽器默認策略。
Origin Only:發送只包含host部分的referrer.
Origin When Cross-origin:僅在發生跨域訪問時發送只包含host的Referer,同域下還是完整的。與Origin Only的區別是多判斷了是否Cross-origin。協議、域名和端口都一致,瀏覽器才認為是同域。
Unsafe URL:全部都發送Referrer信息。最寬松最不安全的策略。
Content-Security-Policy:default-src 'self' https:; font-src 'self' https: data:; img-src 'self' https: data:; object-src 'none'; script-src https:; style-src 'self' https: 'unsafe-inline' 內容安全策略(CSP),其核心思想十分簡單:網站通過發送一個 CSP 頭部,來告訴瀏覽器什么是被授權執行的與什么是需要被禁止的。其被譽為專門為解決XSS攻擊而生的神器。具體參考https://blog.csdn.net/u014465934/article/details/84199171
X-Download-Options:noopen
用于放置直接打開用戶下載文件。
X-Download-Options: noopen
noopen 用于指定IE 8以上版本的用戶不打開文件而直接保存文件。在下載對話框中不顯示“打開”選項。
X-Permitted-Cross-Domain-Policies:none
用于指定當不能將"crossdomain.xml"文件(當需要從別的域名中的某個文件中讀取 Flash 內容時用于進行必要設置的策略文件)放置在網站根目錄等場合時采取的替代策略。
X-Permitted-Cross-Domain-Policies: master-only
master-only 只允許使用主策略文件(/crossdomain.xml)
如果你想修改這些Header的值,可使用如下配置:
spring: application: name: gateway cloud: nacos: discovery: server-addr: 127.0.0.1:8848gateway: routes: - id: gateuri: lb://userpredicates: #由/user-center來匹配跳轉 - Path=/user-center/**filters: #跳轉后省略第一個通配 - StripPrefix=1 filter: secure-headers: xss-protection-header: 1;mode=block
上面的header對應的后綴:
xss-protection-header
strict-transport-security
frame-options
content-type-options
referrer-policy
content-security-policy
download-options
permitted-cross-domain-policies
如果想禁用某些Header,可使用如下配置:spring.cloud.gateway.filter.secure-headers.disable ,多個用 , 分隔。例如:
spring: application: name: gateway cloud: nacos: discovery: server-addr: 127.0.0.1:8848gateway: routes: - id: gateuri: lb://userpredicates: #由/user-center來匹配跳轉 - Path=/user-center/**filters: #跳轉后省略第一個通配 - StripPrefix=1 filter: secure-headers: disable: frame-options,download-options
SetPath
spring: application: name: gateway cloud: nacos: discovery: server-addr: 127.0.0.1:8848gateway: routes: - id: gateuri: lb://userpredicates: #由/user-center來匹配跳轉 - Path=/user-center/{segment}filters: #使用/{segment}來代替/user-center/{segment}后轉發 - SetPath=/{segment}
用意跟之前差不多。
SetResponseHeader
在User項目中有這樣一個Controller方法
@GetMapping("/addhead")public String addHeader(HttpServletRequest request, HttpServletResponse response) {
    response.addHeader("X-Response-Foo","Foo");    return "header";}
spring: application: name: gateway cloud: nacos: discovery: server-addr: 127.0.0.1:8848gateway: routes: - id: gateuri: lb://userpredicates: #由/user-center來匹配跳轉 - Path=/user-center/**filters: #跳轉后省略第一個通配 - StripPrefix=1#將響應頭X-Response-Foo的值更改為dee - SetResponseHeader=X-Response-Foo,dee

SetStatus
修改響應的狀態碼,值可以是數字,也可以是字符串。但一定要是Spring HttpStatus 枚舉類中的值。
spring: application: name: gateway cloud: nacos: discovery: server-addr: 127.0.0.1:8848gateway: routes: - id: gateuri: lb://userpredicates: #由/user-center來匹配跳轉 - Path=/user-center/**filters: #跳轉后省略第一個通配 - StripPrefix=1#修改返回狀態碼為401 - SetStatus=401

這里是可以正常返回結果的,只不過狀態碼被修改為401
StripPrefix
數字表示要截斷的路徑的數量。
Retry
針對不同的響應做重試,可配置如下參數:
retries: 重試次數
statuses: 需要重試的狀態碼,取值在 org.springframework.http.HttpStatus 中
methods: 需要重試的請求方法,取值在 org.springframework.http.HttpMethod 中
series: HTTP狀態碼系列,取值在 org.springframework.http.HttpStatus.Series 中
spring: application: name: gateway cloud: nacos: discovery: server-addr: 127.0.0.1:8848gateway: routes: - id: gateuri: lb://userpredicates: #由/user-center來匹配跳轉 - Path=/user-center/**filters: #跳轉后省略第一個通配 - StripPrefix=1#如果方法未找到,重試3次 - name: Retry args: retries: 3statuses: NOT_FOUND
RequestSize
為后端服務設置收到的最大請求包大小。如果請求大小超過設置的值,則返回 413 Payload Too Large 。默認值是5M
不過這里我設置了1字節,好像不起作用。
spring: application: name: gateway cloud: nacos: discovery: server-addr: 127.0.0.1:8848gateway: routes: - id: gateuri: lb://userpredicates: #由/user-center來匹配跳轉 - Path=/user-center/**filters: #跳轉后省略第一個通配 - StripPrefix=1#如果請求包超過1字節,返回413 - name: RequestSize args: maxSize: 1
經測試無效
Modify Request Body
可用于在Gateway將請求發送給后端微服務之前,修改請求體內容。該過濾器工廠目前處于BETA狀態,不建議使用。
Modify Response Body
可用于修改響應體內容。該過濾器工廠目前處于BETA狀態,不建議使用。
Default
如果你想為所有路由添加過濾器,可使用該屬性。
spring: application: name: gateway cloud: nacos: discovery: server-addr: 127.0.0.1:8848gateway: routes: - id: gateuri: lb://userpredicates: #由/user-center來匹配跳轉 - Path=/user-center/** #該配置對所有的routes.id均有效 default-filters: #跳轉后省略第一個通配 - StripPrefix=1
自定義過濾器工廠
過濾器生命周期
pre: Gateway轉發請求之前
post: Gateway轉發請求之后
自定義過濾器工廠的方式
繼承: AbstractGatewayFilterFactory
繼承: AbstractNameValueGatewayFilterFactory
核心API
exchange.getRequest().mutate().xxx //修改request
exchange.mutate().xxx //修改exchange
chain.filter(exchange) //傳遞給下一個過濾器處理
exchange.getResponse //拿到響應
編寫一個過濾器工廠
現在我們來寫一個打印日志的過濾器工廠,該自定義過濾器工廠必須以GatewayFilterFactory結尾
@Slf4j@Componentpublic class PreLogGatewayFilterFactory extends AbstractNameValueGatewayFilterFactory {@Override    public GatewayFilter apply(NameValueConfig config) {return (((exchange, chain) -> {log.info("請求進來了...{},{}",config.getName(),config.getValue());            //獲取請求            ServerHttpRequest modifiedRequest = exchange.getRequest()
                    .mutate()
                    .build();            //獲取exchange            ServerWebExchange modifiedExchange = exchange.mutate()
                    .request(modifiedRequest)
                    .build();            //傳遞給下一個過濾器            return chain.filter(modifiedExchange);        }));    }
}
配置文件
spring: application: name: gateway cloud: nacos: discovery: server-addr: 127.0.0.1:8848gateway: routes: - id: gateuri: lb://userpredicates: #由/user-center來匹配跳轉 - Path=/user-center/**filters: #跳轉后省略第一個通配 - StripPrefix=1#打印a,b日志 - PreLog=a,b
運行后,我們通過網關訪問API后,打印日志如下
2019-12-20 14:09:48.066 INFO 2702 --- [ctor-http-nio-2] c.c.c.m.g.c.PreLogGatewayFilterFactory : 請求進來了...a,b
全局過濾器
1 Combined Global Filter and GatewayFilter Ordering
2 Forward Routing Filter
3 LoadBalancerClient Filter
4 Netty Routing Filter
5 Netty Write Response Filter
6 RouteToRequestUrl Filter
7 Websocket Routing Filter
8 Gateway Metrics Filter
9 Marking An Exchange As Routed
Global Filter and GatewayFilter Ordering
當請求到來時,Filtering Web Handler 處理器會添加所有 GlobalFilter 實例和匹配的 GatewayFilter 實例到過濾器鏈中。
過濾器鏈會使用 org.springframework.core.Ordered 注解所指定的順序,進行排序。Spring Cloud Gateway區分了過濾器邏輯執行的”pre”和”post”階段,所以優先級高的過濾器將會在pre階段最先執行,優先級最低的過濾器則在post階段最后執行。數值越小越靠前執行。
@Slf4j@Configurationpublic class GlobleFilters {@Bean    @Order(-1)public GlobalFilter a() {return ((exchange, chain) -> {log.info("first pre filter");            return chain.filter(exchange).then(Mono.fromRunnable(
                    () -> log.info("third post filter")));        });    }@Bean    @Order(0)public GlobalFilter b() {return ((exchange, chain) -> {log.info("second pre filter");            return chain.filter(exchange).then(Mono.fromRunnable(
                    () -> log.info("second post filter")));        });    }@Bean    @Order(1)public GlobalFilter c() {return ((exchange, chain) -> {log.info("third pre filter");            return chain.filter(exchange).then(Mono.fromRunnable(
                    () -> log.info("first post filter")));        });    }
}
當有網關轉發請求時
2019-12-20 15:03:34.263 INFO 3380 --- [ctor-http-nio-2] c.c.c.m.gateway.config.GlobleFilters : first pre filter
2019-12-20 15:03:34.263 INFO 3380 --- [ctor-http-nio-2] c.c.c.m.gateway.config.GlobleFilters : second pre filter
2019-12-20 15:03:34.263 INFO 3380 --- [ctor-http-nio-2] c.c.c.m.gateway.config.GlobleFilters : third pre filter
2019-12-20 15:03:34.302 INFO 3380 --- [ctor-http-nio-7] c.c.c.m.gateway.config.GlobleFilters : first post filter
2019-12-20 15:03:34.302 INFO 3380 --- [ctor-http-nio-7] c.c.c.m.gateway.config.GlobleFilters : second post filter
2019-12-20 15:03:34.302 INFO 3380 --- [ctor-http-nio-7] c.c.c.m.gateway.config.GlobleFilters : third post filter
Forward Routing Filter
整合Sentinel限流
Sentinel的版本必須在1.6及以上,我們這里為1.7
pom
<dependency> <groupId>com.alibaba.csp</groupId> <artifactId>sentinel-spring-cloud-gateway-adapter</artifactId></dependency>
添加配置類
@Configurationpublic class GatewayConfig {private final List<ViewResolver> viewResolvers;    private final ServerCodecConfigurer serverCodecConfigurer;    public GatewayConfig(ObjectProvider<List<ViewResolver>> viewResolverProvider,                         ServerCodecConfigurer serverCodecConfigurer) {this.viewResolvers = viewResolverProvider.getIfAvailable(Collections::emptyList);        this.serverCodecConfigurer = serverCodecConfigurer;    }@Bean    @Order(Ordered.HIGHEST_PRECEDENCE)public SentinelGatewayBlockExceptionHandler sentinelGatewayBlockExceptionHandler() {return new SentinelGatewayBlockExceptionHandler(viewResolvers,serverCodecConfigurer);    }@Bean    @Order(Ordered.HIGHEST_PRECEDENCE)public GlobalFilter sentinelGatewayFilter() {return new SentinelGatewayFilter();    }@PostConstruct    public void doInit() {
        initGatewayRules();    }/**     * 配置限流規則     */    private void initGatewayRules() {
        Set<GatewayFlowRule> rules = new HashSet<>();        rules.add(new GatewayFlowRule("gate")
                    .setCount(1) //限流閾值                    .setIntervalSec(1)); //統計時間窗口,單位是秒,默認是1秒        GatewayRuleManager.loadRules(rules);    }
}
我們這里設置的為1秒鐘只能通過一個請求。

如果我們在1秒鐘內請求兩次或以上,就會產生限流提示。
網關跨域設置
import org.springframework.context.annotation.Bean;import org.springframework.context.annotation.Configuration;import org.springframework.web.cors.CorsConfiguration;import org.springframework.web.cors.reactive.CorsWebFilter;import org.springframework.web.cors.reactive.UrlBasedCorsConfigurationSource;import org.springframework.web.util.pattern.PathPatternParser;/** * 跨域配置 */@Configurationpublic class CrossDomainConfig {@Bean    public CorsWebFilter corsFilter() {
        CorsConfiguration config = new CorsConfiguration();        config.addAllowedMethod("*");        config.addAllowedOrigin("*");        config.addAllowedHeader("*");        UrlBasedCorsConfigurationSource source = new UrlBasedCorsConfigurationSource(new PathPatternParser());        source.registerCorsConfiguration("/**", config);        return new CorsWebFilter(source);    }
}
或配置文件配置
spring:  application:    name: gateway  cloud:    nacos:      discovery:        server-addr: xxx.xxx.xxx.xxx:8848gateway:      discovery:        locator:          enabled: true      # 跨域      globalcors:        corsConfigurations:          '[/**]':          allowedHeaders: "*"          allowedOrigins: "*"          allowedMethods:          - GET
            POST
            DELETE
            PUT
            OPTION
看完上述內容是否對您有幫助呢?如果還想對相關知識有進一步的了解或閱讀更多相關文章,請關注億速云行業資訊頻道,感謝您對億速云的支持。
免責聲明:本站發布的內容(圖片、視頻和文字)以原創、轉載和分享為主,文章觀點不代表本網站立場,如果涉及侵權請聯系站長郵箱:is@yisu.com進行舉報,并提供相關證據,一經查實,將立刻刪除涉嫌侵權內容。