您好,登錄后才能下訂單哦!
您好,登錄后才能下訂單哦!
這篇文章主要為大家展示了“如何使用HTML5 Canvas創建動態粒子網格動畫”,內容簡而易懂,條理清晰,希望能夠幫助大家解決疑惑,下面讓小編帶領大家一起研究并學習一下“如何使用HTML5 Canvas創建動態粒子網格動畫”這篇文章吧。
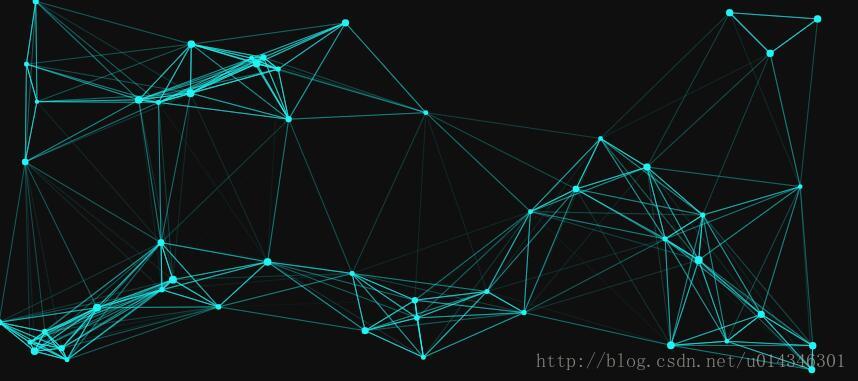
最近看到一個粒子網格動畫挺炫的,自己也就做了一個,當背景挺不錯的。CSDN不能上傳超過2M的圖片,所以就簡單截了一個靜態圖片:
下面就開始說怎么實現這個效果吧:

首先當然是添加一個canvas了:
<canvas id="canvas"></canvas>
下面是樣式:
<style>
    #canvas{
        position: absolute;
        display: block;
        left:0;
        top:0;
        background: #0f0f0f;
        z-index: -1;
     }
</style>
上面canvas的z-index: -1的作用是可以放在一些元素的下面當做背景。
為了確保canvas能夠充滿整個瀏覽器,所以要將canvas的寬高設置成和瀏覽器一樣:
function getSize(){
    w = canvas.width = window.innerWidth;
    h = canvas.height = window.innerHeight;
}
上面w和h分別代表瀏覽器的寬高。
獲得了瀏覽器的寬高,接下來就是在里面畫粒子了,這里我們需要提前定義一些粒子的參數:
var opt = {
    particleAmount: 50,         //粒子個數
    defaultSpeed: 1,            //粒子運動速度
    variantSpeed: 1,            //粒子運動速度的變量
    particleColor: "rgb(32,245,245)",       //粒子的顏色
    lineColor:"rgb(32,245,245)",            //網格連線的顏色
    defaultRadius: 2,           //粒子半徑
    variantRadius: 2,           //粒子半徑的變量
    minDistance: 200            //粒子之間連線的最小距離
};
上面的速度變量和半徑變量都是為了保證粒子的大小和速度不是一模一樣。
然后我們再創建一個類用來初始化粒子,代碼比較長,我都加了注釋:
function Partical(){
    this.x = Math.random()*w;           //粒子的x軸坐標
    this.y = Math.random()*h;           //粒子的y軸坐標
    this.speed = opt.defaultSpeed + opt.variantSpeed*Math.random();     //粒子的運動速度
    this.directionAngle = Math.floor(Math.random()*360);                //粒子運動的方向
    this.color = opt.particleColor ;                                    //粒子的顏色
    this.radius = opt.defaultRadius+Math.random()*opt.variantRadius;    //粒子的半徑大小
    this.vector = {
        x:this.speed * Math.cos(this.directionAngle),       //粒子在x軸的速度
        y:this.speed * Math.sin(this.directionAngle)        //粒子在y軸的速度
    }
    this.update = function(){                   //粒子的更新函數
        this.border();                           //判斷粒子是否到了邊界
        this.x += this.vector.x;                //粒子下一時刻在x軸的坐標
        this.y += this.vector.y;                //粒子下一時刻在y軸的坐標
    }
    this.border = function(){               //判斷粒子是都到達邊界
        if(this.x >= w || this.x<= 0){      //如果到達左右邊界,就讓x軸的速度變為原來的負數
            this.vector.x *= -1;
        }
        if(this.y >= h || this.y <= 0){     //如果到達上下邊界,就讓y軸的速度變為原來的負數
            this.vector.y *= -1;
        }
        if(this.x > w){                     //下面是改變瀏覽器窗口大小時的操作,改變窗口大小后有的粒子會被隱藏,讓他顯示出來即可
            this.x = w;
        }
        if(this.y > h){
            this.y = h;
        }
        if(this.x < 0){
            this.x = 0;
        }
        if(this.y < 0){
            this.y = 0;
        }
    }
    this.draw = function(){                 //繪制粒子的函數
        ctx.beginPath();
        ctx.arc(this.x, this.y, this.radius ,0 ,Math.PI * 2);
        ctx.closePath();
        ctx.fillStyle = this.color;
        ctx.fill();
    }
}
1、每個粒子的初始速度和角度是隨機生成的,粒子的顏色通過相關的設置選項來確定。
2、this.vector用來存儲粒子的移動方向:如果this.vector.x為1,則粒子向右運動;如果是-1,則粒子向左移動。同樣,如果this.vector.y為負,則粒子向上移動,如果為正,則粒子向下移動。
this.update用來更新每個粒子下一個位置的坐標。首先,進行邊緣檢測;如果粒子的移動超出了canvas的尺寸,則將方向向量乘以-1產生反向的運動方向。
3、窗口縮放可能會引起粒子超出邊界,如此一來邊緣檢測函數就捕捉不到了,所以就需要一系列的if語句來檢測這種情況,將粒子的位置重置為當前canvas的邊界。
4、最后一步,將這些點繪制到畫布上。
粒子的類已經寫好了,下面就把他繪制出來:
function init(){
   getSize();
   for(let i = 0;i<opt.particleAmount; i++){
        particle.push(new Partical());
   }
   loop();
}
上面初始化了opt.particleAmount個粒子對象,初始化了對象但是并沒有繪制出來,下面是loop函數:
function loop(){
    ctx.clearRect(0,0,w,h);
    for(let i = 0;i<particle.length; i++){
        particle[i].update();
        particle[i].draw();
    }
    window.requestAnimationFrame(loop);
}
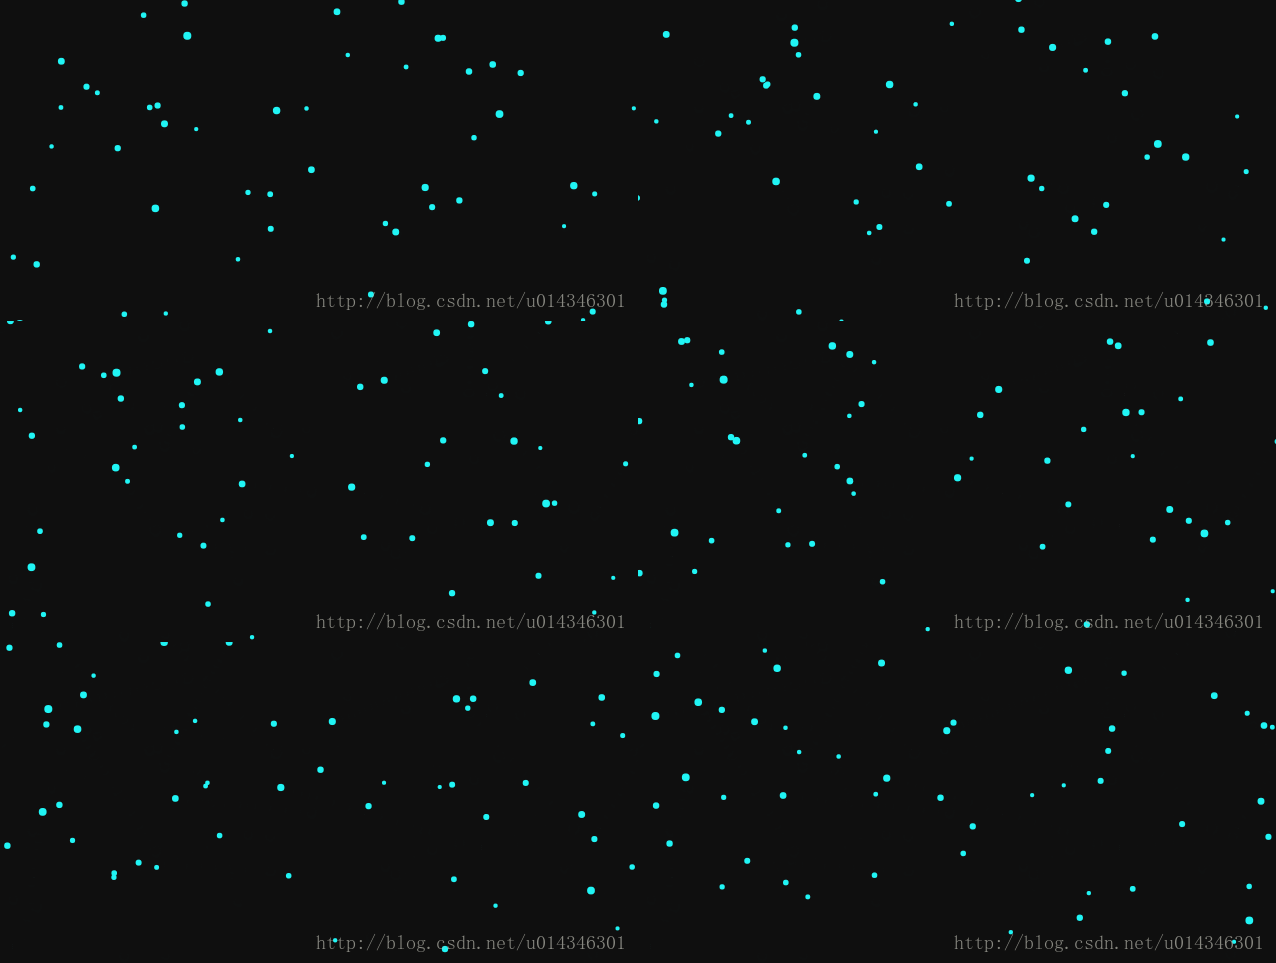
loop()函數每執行一次,都會清除canvas上的內容,然后通過粒子對象的update()函數重新計算粒子的坐標,最后通過粒子對象的draw()函數來繪制粒子。下面是這個時候的效果:

但是在瀏覽器窗口大小改變以后有些粒子就會消失不見,這個時候需要添加一個事件來監聽瀏覽器大小是否改變:
window.addEventListener("resize",function(){
    winResize()
},false);
然后需要來寫winResize()函數,這里需要注意一下,瀏覽器改變的時候觸發resize事件的次數會特別頻繁,稍微移動一下瀏覽器的邊緣就是觸發幾十次resize事件,那么也就會重新計算幾十次瀏覽器大小,比較消耗性能,這個大家可以測試一下,這里就直接說解決方法吧,其實我們要的只是瀏覽器改變后的最后的大小,至于中間到底改變了多少次和我們沒有關系,所以我們可以在瀏覽器窗口改變的時候延緩200毫秒后執行計算瀏覽器大小的事件,如果在這期間一直觸發resize事件,那就一直往后延緩200毫秒,聽起來挺復雜,其實代碼很簡單:
var particle = [], w,h;     //粒子數組,瀏覽器寬高
var delay = 200,tid;        //延緩執行事件和setTimeout事件引用
function winResize(){
    clearTimeout(tid);
    tid = setTimeout(function(){
        getSize();          //獲取瀏覽器寬高,在文章最上面有介紹
    },delay)
}
這樣所有的粒子動畫都完成了,接下來就可以在粒子之間畫線了,我們上面定義的opt對象里面有一個minDistance變量,當兩個粒子之間的連線小于這個值的時候,我們就給他們之間畫上線。
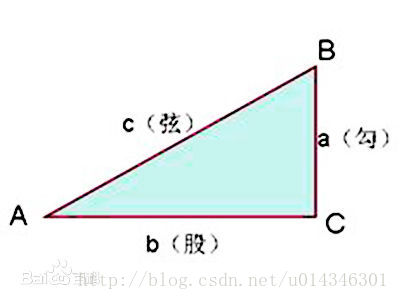
那么如何計算兩個粒子之間的距離呢,大家可以回想一下初中數學第一課,勾股定理,直角三角形兩個直角邊的平方和等于第三條變的平方,看下面:

我們現在知道每個粒子的x軸和y軸的坐標,那么我們就可以計算出兩個點之間的距離了,寫一個函數,傳入兩個點,如下:
function getDistance(point1,point2){
        return Math.sqrt(Math.pow(point1.x-point2.x,2) + Math.pow(point1.y - point2.y ,2));
    }
現在我們可以計算出兩個點的距離,那么我們就計算出所有每個粒子同其他所有粒子的距離,來確定它們之間是否需要連線,當然如果所有粒子的顏色深度都一模一樣,那就有點丑了,所以我們這里可以根據兩個粒子之間的距離來決定連線的透明度,兩個粒子距離越近,越不透明,距離越遠,越透明,超過一定距離就不顯示了。
function linePoint(point,hub){
    for(let i = 0;i<hub.length;i++){
        let distance = getDistance(point,hub[i]);
        let opacity = 1 -distance/opt.minDistance;
        if(opacity > 0){
            ctx.lineWidth = 0.5;
            ctx.strokeStyle = "rgba("+line[0]+","+line[1]+","+line[2]+","+opacity+")";
            ctx.beginPath();
            ctx.moveTo(point.x,point.y);
            ctx.lineTo(hub[i].x,hub[i].y);
            ctx.closePath();
            ctx.stroke();
        }
    }
}
上面傳入的兩個參數分別是一個點和整個點的數組,let opacity = 1 -distance/opt.minDistance;用于判斷連線之間的透明度同時也判斷了距離,距離大于opt.minDistance時,opacity為負,下面判斷時就過濾掉了,上面的顏色用到了正則表達式,需要先解析最上面opt對象里給出的顏色,然后再加上透明度,這段代碼如下:
var line = opt.lineColor.match(/\d+/g);
最后在loop()函數里面不斷循環計算距離就可以了,在loop()中加入代碼后如下:
function loop(){
        ctx.clearRect(0,0,w,h);
        for(let i = 0;i<particle.length; i++){
            particle[i].update();
            particle[i].draw();
        }
        for(let i = 0;i<particle.length; i++){   //添加的是這個循環
            linePoint(particle[i],particle)
        }
        window.requestAnimationFrame(loop);
    }
需要指出的是:如果添加過多的點和/或過多的連接距離(連接距離會創建過多的線條),動畫也會扛不住。當視口變窄時最好降低粒子的運動速度:粒子的尺寸越小,在愈加狹窄空間內的移動速度貌似會越快。
顯示整段代碼:
<!DOCTYPE html>
<html lang="en">
<head>
    <meta charset="UTF-8">
    <title>canvas粒子動畫</title>
    <style>
        #canvas{
            position: absolute;
            display: block;
            left:0;
            top:0;
            background: #0f0f0f;
            z-index: -1;
        }
    </style>
</head>
<body>
<canvas id="canvas"></canvas>
<script>
    var canvas = document.getElementById("canvas");
    var ctx = canvas.getContext("2d");
    var opt = {
        particleAmount: 50,     //粒子個數
        defaultSpeed: 1,        //粒子運動速度
        variantSpeed: 1,        //粒子運動速度的變量
        particleColor: "rgb(32,245,245)",       //粒子的顏色
        lineColor:"rgb(32,245,245)",            //網格連線的顏色
        defaultRadius: 2,           //粒子半徑
        variantRadius: 2,           //粒子半徑的變量
        minDistance: 200            //粒子之間連線的最小距離
    };
    var line = opt.lineColor.match(/\d+/g);
    console.log(line);
    var particle = [], w,h;
    var delay = 200,tid;
    init();
    window.addEventListener("resize",function(){
        winResize()
    },false);

    function winResize(){
        clearTimeout(tid);
        tid = setTimeout(function(){
            getSize();
        },delay)
    }

    function init(){
        getSize();
        for(let i = 0;i<opt.particleAmount; i++){
            particle.push(new Partical());
        }
        loop();
    }

    function loop(){
        ctx.clearRect(0,0,w,h);
        for(let i = 0;i<particle.length; i++){
            particle[i].update();
            particle[i].draw();
        }
        for(let i = 0;i<particle.length; i++){
            linePoint(particle[i],particle)
        }
        window.requestAnimationFrame(loop);
    }

    function linePoint(point,hub){
        for(let i = 0;i<hub.length;i++){
            let distance = getDistance(point,hub[i]);
            let opacity = 1 -distance/opt.minDistance;
            if(opacity > 0){
                ctx.lineWidth = 0.5;
                ctx.strokeStyle = "rgba("+line[0]+","+line[1]+","+line[2]+","+opacity+")";
                ctx.beginPath();
                ctx.moveTo(point.x,point.y);
                ctx.lineTo(hub[i].x,hub[i].y);
                ctx.closePath();
                ctx.stroke();
            }
        }
    }

    function getDistance(point1,point2){
        return Math.sqrt(Math.pow(point1.x-point2.x,2) + Math.pow(point1.y - point2.y ,2));
    }

    function getSize(){
        w = canvas.width = window.innerWidth;
        h = canvas.height = window.innerHeight;
    }
    function Partical(){
        this.x = Math.random()*w;           //粒子的x軸坐標
        this.y = Math.random()*h;           //粒子的y軸坐標
        this.speed = opt.defaultSpeed + opt.variantSpeed*Math.random();     //粒子的運動速度
        this.directionAngle = Math.floor(Math.random()*360);                //粒子運動的方向
        this.color = opt.particleColor ;                                    //粒子的顏色
        this.radius = opt.defaultRadius+Math.random()*opt.variantRadius;    //粒子的半徑大小
        this.vector = {
            x:this.speed * Math.cos(this.directionAngle),       //粒子在x軸的速度
            y:this.speed * Math.sin(this.directionAngle)        //粒子在y軸的速度
        }
        this.update = function(){                   //粒子的更新函數
            this.border();                           //判斷粒子是否到了邊界
            this.x += this.vector.x;                //粒子下一時刻在x軸的坐標
            this.y += this.vector.y;                //粒子下一時刻在y軸的坐標
        }
        this.border = function(){               //判斷粒子是都到達邊界
            if(this.x >= w || this.x<= 0){      //如果到達左右邊界,就讓x軸的速度變為原來的負數
                this.vector.x *= -1;
            }
            if(this.y >= h || this.y <= 0){     //如果到達上下邊界,就讓y軸的速度變為原來的負數
                this.vector.y *= -1;
            }
            if(this.x > w){                     //下面是改變瀏覽器窗口大小時的操作,改變窗口大小后有的粒子會被隱藏,讓他顯示出來即可
                this.x = w;
            }
            if(this.y > h){
                this.y = h;
            }
            if(this.x < 0){
                this.x = 0;
            }
            if(this.y < 0){
                this.y = 0;
            }
        }
        this.draw = function(){                 //繪制粒子的函數
            ctx.beginPath();
            ctx.arc(this.x, this.y, this.radius ,0 ,Math.PI * 2);
            ctx.closePath();
            ctx.fillStyle = this.color;
            ctx.fill();
        }
    }
</script>
</body>
</html>
以上是“如何使用HTML5 Canvas創建動態粒子網格動畫”這篇文章的所有內容,感謝各位的閱讀!相信大家都有了一定的了解,希望分享的內容對大家有所幫助,如果還想學習更多知識,歡迎關注億速云行業資訊頻道!
免責聲明:本站發布的內容(圖片、視頻和文字)以原創、轉載和分享為主,文章觀點不代表本網站立場,如果涉及侵權請聯系站長郵箱:is@yisu.com進行舉報,并提供相關證據,一經查實,將立刻刪除涉嫌侵權內容。