您好,登錄后才能下訂單哦!
您好,登錄后才能下訂單哦!
這篇文章主要講解了“如何實現PostgreSQL數據庫服務端監聽設置及客戶端連接”,文中的講解內容簡單清晰,易于學習與理解,下面請大家跟著小編的思路慢慢深入,一起來研究和學習“如何實現PostgreSQL數據庫服務端監聽設置及客戶端連接”吧!
一、背景介紹:
本文所述PostgreSQL服務端運行在RedHat Linux上,IP為:192.168.230.128
客戶端安裝在Windows XP上, IP為:192.168.230.1
二、配置方法:
1.修改服務端/opt/postgresql/data/postgresql.conf文件,將:
#listen_address='localhost'
改成
listen_address='*'
2.修改/opt/postgresql/data/gp_hba.conf文件:
在其中增加客戶端的ip,如下,注意最后一行:
# TYPE DATABASE  USER    CIDR-ADDRESS     METHOD

# "local" is for Unix domain socket connections only
local  all     all                trust
# IPv4 local connections:
host  all     all     127.0.0.1/32     trust
# IPv6 local connections:
host  all     all     ::1/128        trust

#kevin add
# IPv4 local connections:
host  all     all     192.168.230.1/32     trust
3.重啟PG服務:
[postgres@localhost data]$ pg_ctl restart
waiting for server to shut down....LOG: received smart shutdown request
LOG: autovacuum launcher shutting down
LOG: shutting down
LOG: database system is shut down
 done
server stopped
server starting
[postgres@localhost data]$ LOG: database system was shut down at 2011-07-09 14:54:29 CST
LOG: autovacuum launcher started
LOG: database system is ready to accept connections

[postgres@localhost data]$
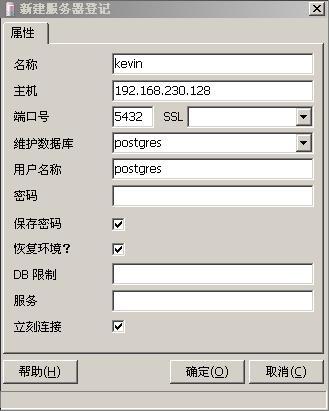
4. 使用客戶端連接,配置如下:

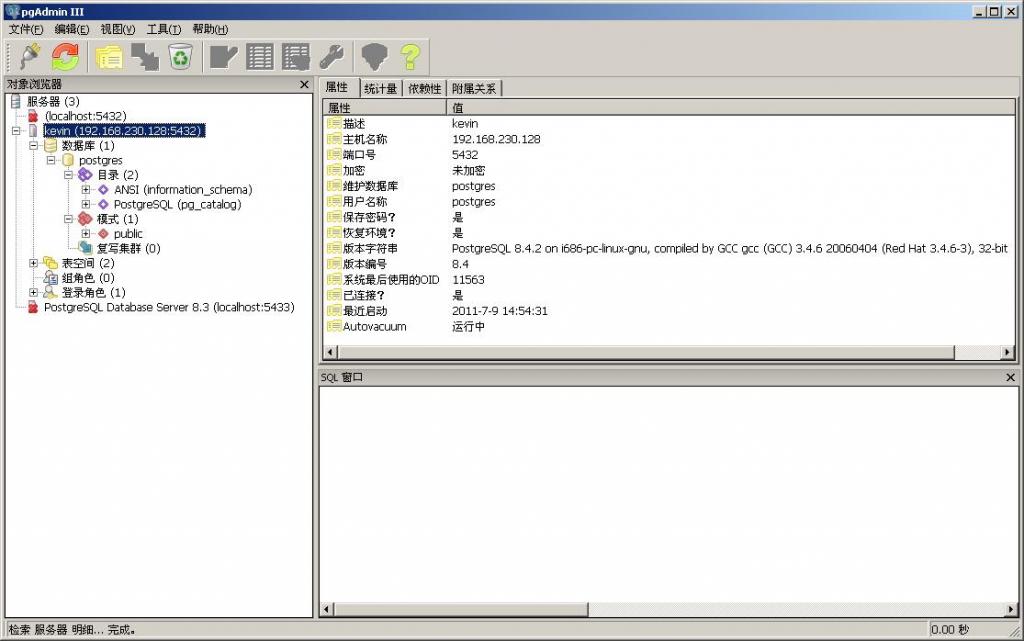
5.點擊“確定”進行連接,成功后,如下:

感謝各位的閱讀,以上就是“如何實現PostgreSQL數據庫服務端監聽設置及客戶端連接”的內容了,經過本文的學習后,相信大家對如何實現PostgreSQL數據庫服務端監聽設置及客戶端連接這一問題有了更深刻的體會,具體使用情況還需要大家實踐驗證。這里是億速云,小編將為大家推送更多相關知識點的文章,歡迎關注!
免責聲明:本站發布的內容(圖片、視頻和文字)以原創、轉載和分享為主,文章觀點不代表本網站立場,如果涉及侵權請聯系站長郵箱:is@yisu.com進行舉報,并提供相關證據,一經查實,將立刻刪除涉嫌侵權內容。