溫馨提示×
您好,登錄后才能下訂單哦!
點擊 登錄注冊 即表示同意《億速云用戶服務條款》
您好,登錄后才能下訂單哦!
這篇文章主要介紹python爬取簡書網文章的方法,文中示例代碼介紹的非常詳細,具有一定的參考價值,感興趣的小伙伴們一定要看完!
python爬取簡書網文章的步驟:
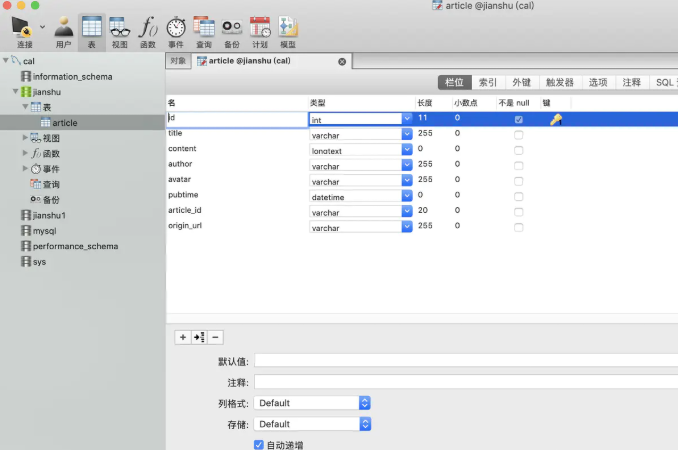
1、準備工作,創建scrapy爬蟲,建立數據庫和表
# 打開 CMD 或者終端到一個指定目錄
# 新建一個項目
scrapy startproject jianshu_spider
cd jianshu_spider
# 創建一個爬蟲
scrapy genspider -t crawl jianshu "jianshu.com"

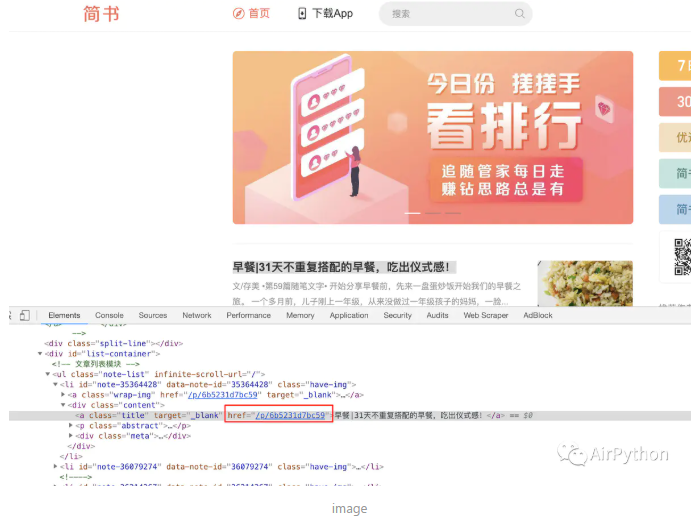
2、爬取思路,檢查網頁的所有href屬性,獲取文章鏈接地址

3、代碼實現,解析主頁網址獲取文章鏈接,構建item模型保存數據,將獲取的數據保存到數據庫中
第一步是指定開始爬取的地址和爬取規則。
allowed_domains = ['jianshu.com']
start_urls = ['https://www.jianshu.com/']
rules = (        # 文章id是有12位小寫字母或者數字0-9構成
Rule(LinkExtractor(allow=r'.*/p/[0-9a-z]{12}.*'), callback='parse_detail', follow=True),    )
第二步是拿到下載器下載后的數據 Response,利用 Xpath 語法獲取有用的數據。這里可以使用「 Scrapy shell url 」去測試數據是否獲取正確。
# 獲取需要的數據
title = response.xpath('//h2[@class="title"]/text()').get()
author = response.xpath('//div[@class="info"]/span/a/text()').get()
avatar = self.HTTPS + response.xpath('//div[@class="author"]/a/img/@src').get()
pub_time = response.xpath('//span[@class="publish-time"]/text()').get().replace("*", "")
current_url = response.url real_url = current_url.split(r"?")[0]
article_id = real_url.split(r'/')[-1]
content = response.xpath('//div[@class="show-content"]').get()
然后構建 Item 模型用來保存數據。
import scrapy
# 文章詳情Itemclass ArticleItem(scrapy.Item):
title = scrapy.Field()
content = scrapy.Field()
# 文章id
article_id = scrapy.Field()
# 原始的url
origin_url = scrapy.Field()
# 作者
author = scrapy.Field()
# 頭像
avatar = scrapy.Field()
# 發布時間
pubtime = scrapy.Field()
第三步是將獲取的數據通過 Pipline 保存到數據庫中。
# 數據庫連接屬性
db_params = {
'host': '127.0.0.1',
'port': 3306,
'user': 'root',
'password': 'root',
 'database': 'jianshu',
'charset': 'utf8'
}
# 數據庫【連接對象】
self.conn = pymysql.connect(**db_params)
# 執行 sql 語句 self.cursor.execute(self._sql,(item['title'],item['content'],item['author'],item['avatar'],item['pubtime'],item['article_id'],item['origin_url'])) # 插入到數據庫中 self.conn.commit() # 關閉游標資源 self.cursor.close()
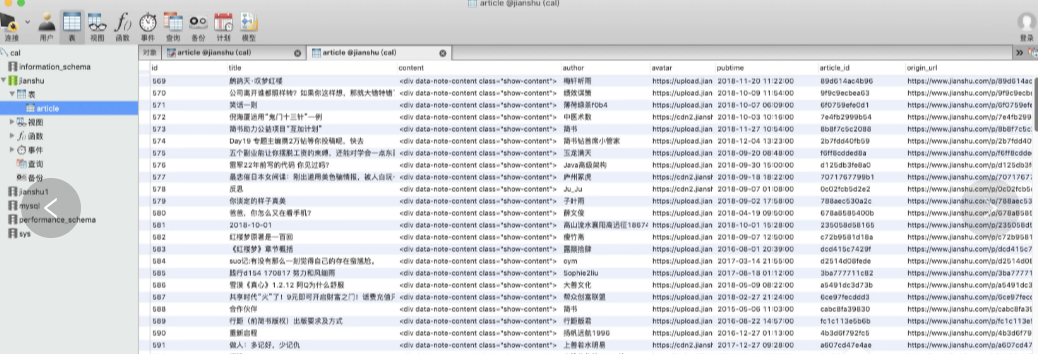
執行結果如下:

以上是python爬取簡書網文章的方法的所有內容,感謝各位的閱讀!希望分享的內容對大家有幫助,更多相關知識,歡迎關注億速云行業資訊頻道!
免責聲明:本站發布的內容(圖片、視頻和文字)以原創、轉載和分享為主,文章觀點不代表本網站立場,如果涉及侵權請聯系站長郵箱:is@yisu.com進行舉報,并提供相關證據,一經查實,將立刻刪除涉嫌侵權內容。