您好,登錄后才能下訂單哦!
您好,登錄后才能下訂單哦!
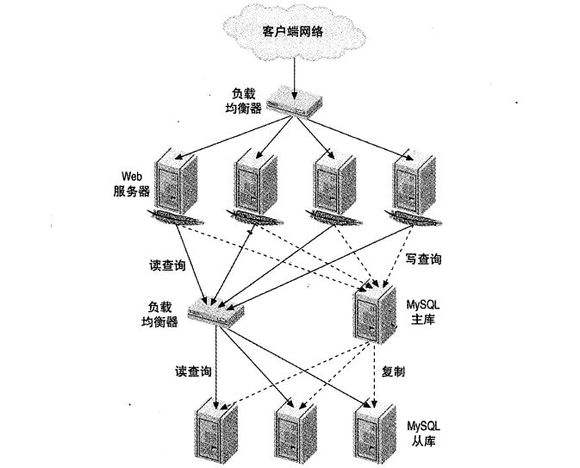
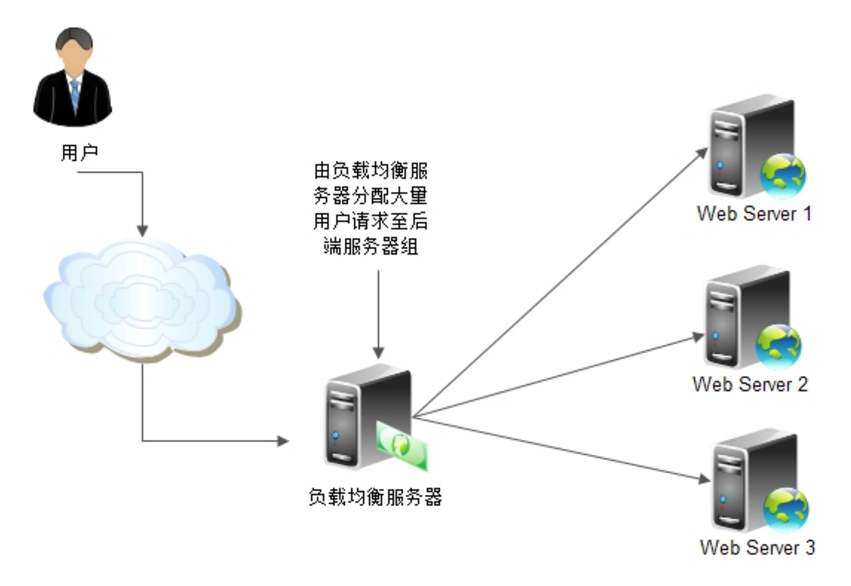
下文給大家帶來怎么樣實現nginx在http的負載均衡,希望能夠給大家在實際運用中帶來一定的幫助,負載均衡涉及的東西比較多,理論也不多,網上有很多書籍,今天我們就用億速云在行業內累計的經驗來做一個解答。
首先復習一下LB Cluster負載均衡集群
四層:
LVS
Nginx(stream)
Haproxy(mode_tcp)
七層
Http protocol
Nginx(http,upstream)
Haproxy(mode http)
Httpd/ats/perlbal/pound/…

接下來如何實現nginx在http的負載均衡
ngx_stream_proxy_module模塊能為http服務做調度,其中stream模塊中有
專門的server子命令,不同于其他server,其他server是用于定義虛擬主機的
而stream模塊中的server是用來定義組中的一臺云服務器的,server可以重復使用多次,
定義多臺服務器,因此可實現服務器的負載均衡。
#################################################################
1、實驗環境準備,至少準備三臺主機,其中一臺做為nginx調度服務器,裝備兩塊網卡
分別在三臺主機上配置nginx,httpd和httpd,并測試可以成功訪問頁面
[root@localhost nginx]# curl http://172.18.10.10:80/test1.html
Test Page 1 on UpStream Server 1 (172.18.10.10)
[root@localhost nginx]# curl http://172.18.10.11:80/test1.html
Test Page 1 on UpStream Server 2 (172.18.10.11)
將172.18.10.10和172.18.10.11做為動態站點(安裝httpd+php,即ap,listen 80)
將172.18.10.10和172.18.10.11做為靜態站點(其中10.11安裝nginx,監聽8080,10.10配置虛擬主機,監聽80和8080)
2、實驗目的。實現nginx對靜態內容和動態內容的負載均衡
3、開始配置操作
在172.18.10.10下編輯php頁面
[root@localhost ~]# vim /var/www/html/index.php
<h3>HTTPD listend on 80 Server1</h3>
<?php
phpinfo();
?>
將實驗頁面發至172.18.10.11的頁面文件存放路徑下
[root@localhost ~]# scp /var/www/html/index.php 172.18.10.11:/var/www/html/
修改Server1為Server2
<h3>HTTPD listend on 80 Server2</h3>
<?php
phpinfo();
?>
4、常識使用谷歌瀏覽器請求兩個地址,看看是否測試頁面能夠正常顯示--------經測試發現能夠正常顯示
5、配置靜態站點的nginx
將準備好的nginx安裝包分別scp到兩臺主機上
[root@localhost ~]# scp nginx-1.6.2-1.el6.ngx.x86_64.rpm 172.18.10.10:/root/
6、安裝nginx
[root@localhost ~]# yum install nginx-1.6.2-1.el6.ngx.x86_64.rpm
7、配置靜態站點的虛擬服務
172.18.10.10上:
注釋DocumentRoot路徑
#DocumentRoot "/var/www/html"
添加新的監聽端口
#Listen 12.34.56.78:80
Listen 80
Listen 8080
添加虛擬主機,分別監聽在80和8080端口上
<VirtualHost *:80>
DocumentRoot /var/www/shope
ServerName www.magedu.com
</VirtualHost>
<VirtualHost *:8080>
DocumentRoot /var/www/html
ServerName imgs.magedu.com
</VirtualHost>
保存退出
創建目錄
[root@localhost ~]# mkdir /var/www/shope
將index.php移至該目錄下
[root@localhost ~]# mv /var/www/html/index.php /var/www/shope/
檢查語法
[root@localhost ~]# httpd -t
重啟httpd服務
[root@localhost ~]# service httpd restart
Stopping httpd: [ OK ]
Starting httpd: httpd: Could not reliably determine the server's fully qualified domain name, using localhost.localdomain for ServerName
[ OK ]
在瀏覽器端分別訪問測試80和8080端口
結果正常

172.18.10.11上:
[root@localhost ~]# vim /etc/nginx/conf.d/default.conf
將虛擬主機監聽端口改為8080
listen 80———————------》 listen 8080;
更改root路徑
root /usr/share/nginx/html;—————》root /data/html;
創建虛擬主機目錄路徑
[root@localhost ~]# mkdir /data/html -pv
mkdir: created directory `/data'
mkdir: created directory `/data/html'
將所有test文件移至/data/html目錄下
[root@localhost ~]# mv /var/www/html/test* /data/html/
啟動nginx服務,并且查看是否端口監聽
[root@localhost ~]# nginx
[root@localhost ~]# ss -tnl
State Recv-Q Send-Q Local Address:Port Peer Address:Port
LISTEN 0 128 *:8080 *:*
LISTEN 0 128 :::80 :::*
LISTEN 0 128 :::22 :::*
LISTEN 0 128 *:22 *:*
LISTEN 0 100 ::1:25 :::*
LISTEN 0 100 127.0.0.1:25
訪問頁面。看看是否能夠正常訪問
8、配置nginx調度端的nginx服務在172.18.200.100上
[root@localhost ~]# vim /etc/nginx/nginx.conf
#使用默認的加權輪詢算法,進行會發綁定
upstream websrvs {
server 172.18.10.10:80 weight=2 max_fails=2 fail_timeout=2;
server 172.18.10.11:80 weight=3;
}
upstream staticsrvs {
server 172.18.10.10:8080 weight=1;
server 172.18.10.11:8080 weight=1;
}
9、編輯調度的方法
[root@localhost ~]# vim /etc/nginx/conf.d/default.conf
index index.php index.html; ####全局定義,先后順序
location / {
proxy_pass http://websrvs; ####動態資源加載路徑定義
root /usr/share/nginx/html;
index index.php index.html index.htm;
}
location ~* \.(jpg|jpeg|png|gif|html)$ {
proxy_pass http://staticsrvs; #####靜態資源加載路徑定義
index index.php;
}
10、從新加載測試
[root@localhost ~]# nginx -t
nginx: the configuration file /etc/nginx/nginx.conf syntax is ok
nginx: configuration file /etc/nginx/nginx.conf test is successful
[root@localhost ~]# nginx -s reload
打開谷歌瀏覽器,輸入http://172.18.200.100/刷新頁面發現會有如下的頁面內容來回切換
HTTPD listend on 80 Server2
HTTPD listend on 80 Server1
請求http://172.18.200.100/index.php,發現也是如下頁面內容來回切換
HTTPD listend on 80 Server2
HTTPD listend on 80 Server1
從其他客戶端使用curl來測試
[root@localhost ~]# for ((i=1;i<=10;i++));do curl http://172.18.200.100/index.php; done
測試結果:實現動態內容的負載均衡
接下來請求靜態文件:http://172.18.200.100/test1.html,不斷刷新,發現得到如下內容來回切換
Test Page 1 on UpStream Server 1 (172.18.10.10)
Test Page 1 on UpStream Server 2 (172.18.10.11)
從其他客戶端使用curl來測試
[root@localhost ~]# for ((i=1;i<=10;i++));do curl http://172.18.200.100/test1.html; done
Test Page 1 on UpStream Server 1 (172.18.10.10)
Test Page 1 on UpStream Server 2 (172.18.10.11)
Test Page 1 on UpStream Server 1 (172.18.10.10)
Test Page 1 on UpStream Server 2 (172.18.10.11)
Test Page 1 on UpStream Server 1 (172.18.10.10)
Test Page 1 on UpStream Server 2 (172.18.10.11)
Test Page 1 on UpStream Server 1 (172.18.10.10)
Test Page 1 on UpStream Server 2 (172.18.10.11)
Test Page 1 on UpStream Server 1 (172.18.10.10)
Test Page 1 on UpStream Server 2 (172.18.10.11)
測試結果:實現動態內容的負責均衡
最終實現動靜分離,而在靜態內容上面我們還可以定義緩存,提升效率。
看了以上關于怎么樣實現nginx在http的負載均衡,如果大家還有什么地方需要了解的可以在億速云行業資訊里查找自己感興趣的或者找我們的專業技術工程師解答的,億速云技術工程師在行業內擁有十幾年的經驗了。億速云官網鏈接www.5655pk.com
免責聲明:本站發布的內容(圖片、視頻和文字)以原創、轉載和分享為主,文章觀點不代表本網站立場,如果涉及侵權請聯系站長郵箱:is@yisu.com進行舉報,并提供相關證據,一經查實,將立刻刪除涉嫌侵權內容。