您好,登錄后才能下訂單哦!
您好,登錄后才能下訂單哦!
如何在spring-boot中利用Admin對應用進行監控?針對這個問題,這篇文章詳細介紹了相對應的分析和解答,希望可以幫助更多想解決這個問題的小伙伴找到更簡單易行的方法。
一、創建spring-boot-admin服務
首先使用Spring Tool Suite(簡稱STS)創建一個簡單的admin工程:
New > Spring Starter Project,按下面步驟填寫各項,一步步完成項目創建:
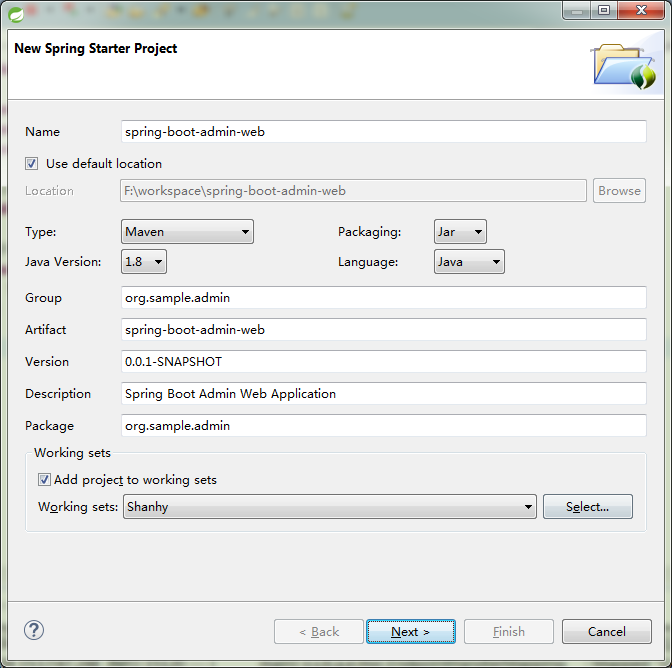

打開項目下的pom.xml文件,添加內容:
    <dependency>
      <groupId>de.codecentric</groupId>
      <artifactId>spring-boot-admin-server</artifactId>
      <version>1.3.2</version>
    </dependency>
    <dependency>
      <groupId>de.codecentric</groupId>
      <artifactId>spring-boot-admin-server-ui</artifactId>
      <version>1.3.2</version>
    </dependency>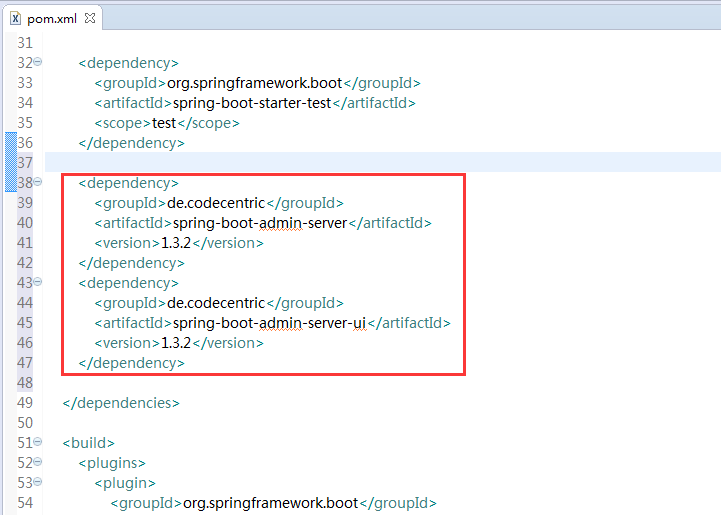
在SpringBootAdminWebApplication上面添加注解“@EnableAdminServer”
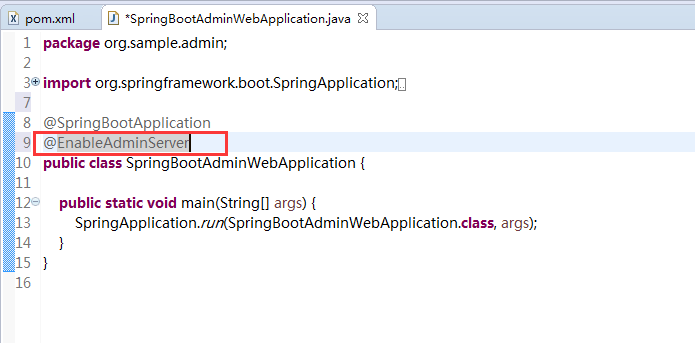
在application.properties中添加內容:
server.port=8090
spring.application.name=Spring Boot Admin Web
spring.boot.admin.url=http://localhost:${server.port}
spring.jackson.serialization.indent_output=true
endpoints.health.sensitive=false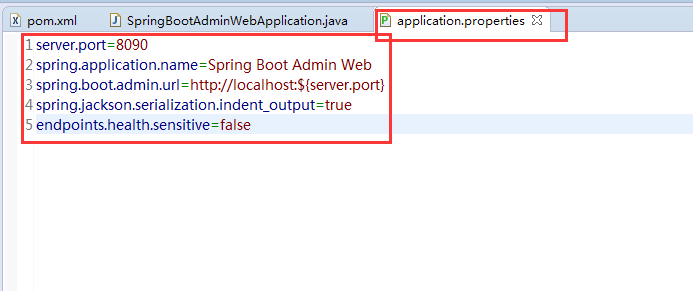
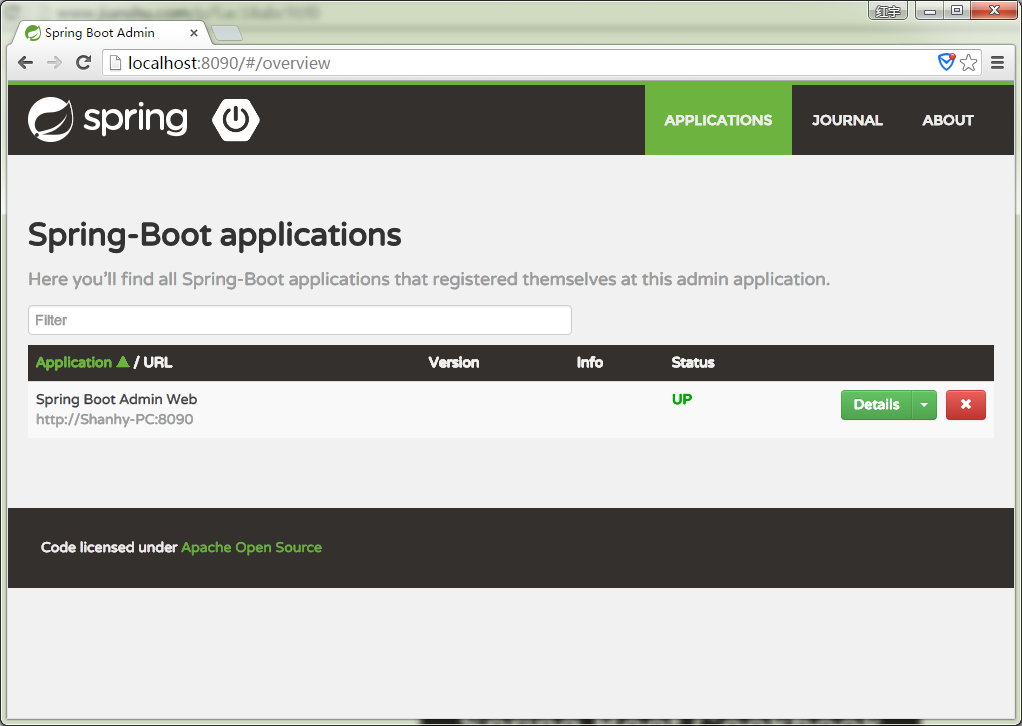
運行該應用,然后在瀏覽器中輸入:http://localhost:8090/ 如下圖所示表示成功。
二、添加其他項目被監控
我們找到我們需要被監控的一個spring-boot項目
打開pom.xml,添加依賴:
    <dependency>
      <groupId>de.codecentric</groupId>
      <artifactId>spring-boot-admin-starter-client</artifactId>
      <version>1.3.2</version>
    </dependency>
然后在application.properties中添加:
spring.application.name=@project.description@
server.port=8080
spring.boot.admin.url=http://localhost:8090
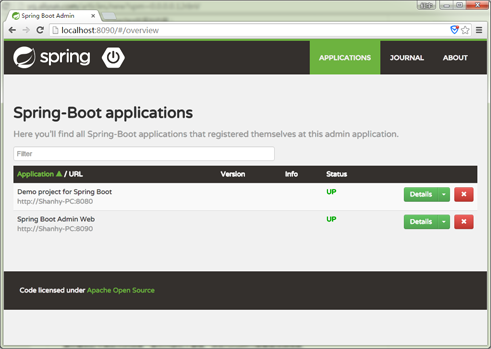
此時啟動要被監控的Spring-Boot項目,然后在瀏覽器中訪問我們上面的admin項目地址 http://localhost:8090/
便可看到如下圖所示的結果,表示已被加入管理。點擊Detail可以查看其詳細信息。
關于如何在spring-boot中利用Admin對應用進行監控問題的解答就分享到這里了,希望以上內容可以對大家有一定的幫助,如果你還有很多疑惑沒有解開,可以關注億速云行業資訊頻道了解更多相關知識。
免責聲明:本站發布的內容(圖片、視頻和文字)以原創、轉載和分享為主,文章觀點不代表本網站立場,如果涉及侵權請聯系站長郵箱:is@yisu.com進行舉報,并提供相關證據,一經查實,將立刻刪除涉嫌侵權內容。