溫馨提示×
您好,登錄后才能下訂單哦!
點擊 登錄注冊 即表示同意《億速云用戶服務條款》
您好,登錄后才能下訂單哦!
這篇文章給大家分享的是有關Android UI控件之Gallery如何實現拖動式圖片瀏覽效果的內容。小編覺得挺實用的,因此分享給大家做個參考,一起跟隨小編過來看看吧。
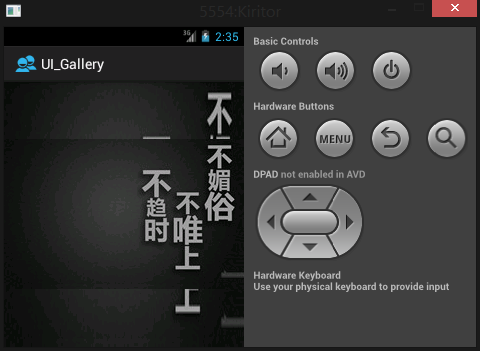
首先看看其簡單實現吧!本次實例是通過選取圖片實現類似設置背景的功能!
不過需要說明的是:圖片不宜過大,否則容易內存溢出,android對大圖片的支持不好!

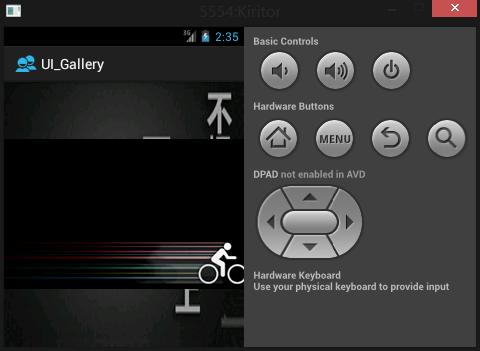
我們來看看切換之后的效果吧

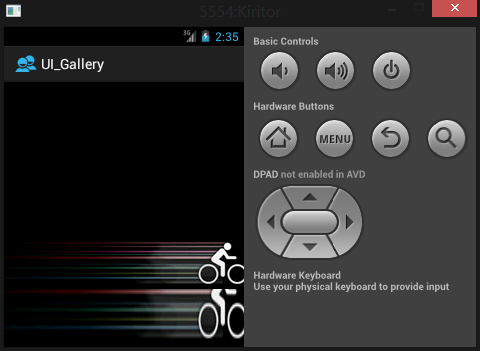
看看重新設置一幅背景圖片!

怎么樣一個簡單的效果就出來了吧!
下面是具體的實現方法:
xml文件:
<?xml version="1.0" encoding="utf-8"?>
<LinearLayout xmlns:android="http://schemas.android.com/apk/res/android"
  android:orientation="vertical"
  android:layout_width="fill_parent"
  android:layout_height="fill_parent"
  >
 <Gallery
 android:id="@+id/gallery1"
 android:layout_height="fill_parent"
 android:layout_width="fill_parent"
 android:spacing="3px"
 >
 </Gallery>
</LinearLayout>
MainActivity文件:
package com.kiritor.ui_gallery;

import android.app.Activity;
import android.graphics.Color;
import android.os.Bundle;
import android.view.View;
import android.widget.AdapterView;
import android.widget.AdapterView.OnItemClickListener;
import android.widget.Gallery;
import android.widget.Toast;

/**
 * @author 記憶的永恒
 *
 */
public class MainActivity extends Activity {
  @Override
  public void onCreate(Bundle savedInstanceState) {
    super.onCreate(savedInstanceState);
    setContentView(R.layout.activity_main);

    final Gallery gallery = (Gallery) findViewById(R.id.gallery1);
    // 將存放圖片的ImageAdapter給gallery對象
    gallery.setAdapter(new ImageAdapter(this));

    // 設置gallery 的背景圖片
    gallery.setBackgroundResource(R.drawable.first);

    // 設置Gallery的監聽事件
    gallery.setOnItemClickListener(new OnItemClickListener() {
      @Override
      public void onItemClick(AdapterView<?> arg0, View arg1, int arg2,
          long arg3) {
        switch (arg2) {
        case 0:
          gallery.setBackgroundResource(R.drawable.first);
          break;
        case 1:
          gallery.setBackgroundResource(R.drawable.second);
          break;
        case 2:
          gallery.setBackgroundResource(R.drawable.third);
          break;
        case 3:
          gallery.setBackgroundResource(R.drawable.forth);
          break;
        case 4:
          gallery.setBackgroundResource(R.drawable.fifth);
          break;
        default:
          break;
        }
      }
    });
  }
}
自己實現一個ImageAdapter繼承與BaseAdapter實現適配器
package com.kiritor.ui_gallery;

import android.content.Context;
import android.view.View;
import android.view.ViewGroup;
import android.widget.BaseAdapter;
import android.widget.Gallery;
import android.widget.ImageView;

public class ImageAdapter extends BaseAdapter{

//定義Content
private Context mContext;
//定義一個數組,存放圖片資源
private Integer[] mImageIds = {
  R.drawable.first,
  R.drawable.second,
  R.drawable.third,
  R.drawable.forth,
  R.drawable.fifth,

};

 //構造
 public ImageAdapter(Context c){
  mContext = c;
 }

 //獲取圖片的個數
 public int getCount() {
  // TODO Auto-generated method stub
  return mImageIds.length;
 }

 //獲取圖片在庫中的位置
 public Object getItem(int position) {
  // TODO Auto-generated method stub
  return position;
 }

 //獲取圖片在庫中的ID
 public long getItemId(int position) {
  // TODO Auto-generated method stub
  return position;
 }

 //將圖片取出來
 public View getView(int position, View convertView, ViewGroup parent) {
  //要取出圖片,即要定義一個ImageView來存
  ImageView imageView = new ImageView(mContext);
  imageView.setImageResource(mImageIds[position]);
  //設置顯示比例類型


  //設置布局圖片以105*150顯示 (簡單解釋——設置數字不一樣,圖片的顯示大小不一樣)
  imageView.setLayoutParams(new Gallery.LayoutParams(240, 200));


  imageView.setScaleType(ImageView.ScaleType.FIT_CENTER);
  return imageView;
 }

}
Over!一個簡單的圖片拖動展示外加設置背景圖片的小功能就實現了。
感謝各位的閱讀!關于“Android UI控件之Gallery如何實現拖動式圖片瀏覽效果”這篇文章就分享到這里了,希望以上內容可以對大家有一定的幫助,讓大家可以學到更多知識,如果覺得文章不錯,可以把它分享出去讓更多的人看到吧!
免責聲明:本站發布的內容(圖片、視頻和文字)以原創、轉載和分享為主,文章觀點不代表本網站立場,如果涉及侵權請聯系站長郵箱:is@yisu.com進行舉報,并提供相關證據,一經查實,將立刻刪除涉嫌侵權內容。