您好,登錄后才能下訂單哦!
您好,登錄后才能下訂單哦!
如何快速構建一個spring boot項目?針對這個問題,這篇文章詳細介紹了相對應的分析和解答,希望可以幫助更多想解決這個問題的小伙伴找到更簡單易行的方法。
1. 問題描述
springboot的面世,成為Java開發者的一大福音,大大提升了開發的效率,其實springboot只是在maven的基礎上,對已有的maven gav進行了封裝而已,今天用最簡單的代碼快速入門springboot。
2. 解決方案
強烈推薦大家使用Idea的付費版(破解感謝下藍宇),Idea對maven、git等插件支持的更加好。
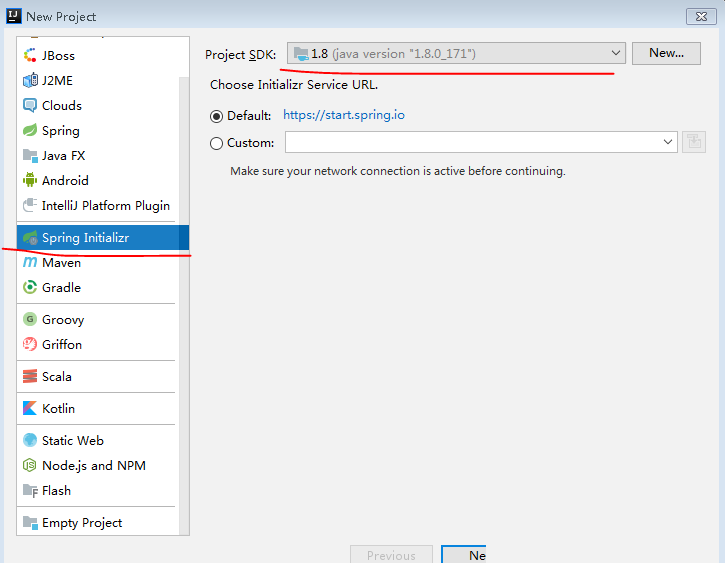
使用idea自帶的spring Initializr(實際調用的是springboot的官網上的initializr),快速新建springboot項目。
2.1 新建Springboot項目
(1)file->new->project

(2)點擊next(第一個)
創建springboot項目(因為連接的國外的網站,next有時會幾秒的延遲),將兩個值改成自己的配置,Group:com.laowang ,Artifact:sptest,其他可以不用動,點擊ok

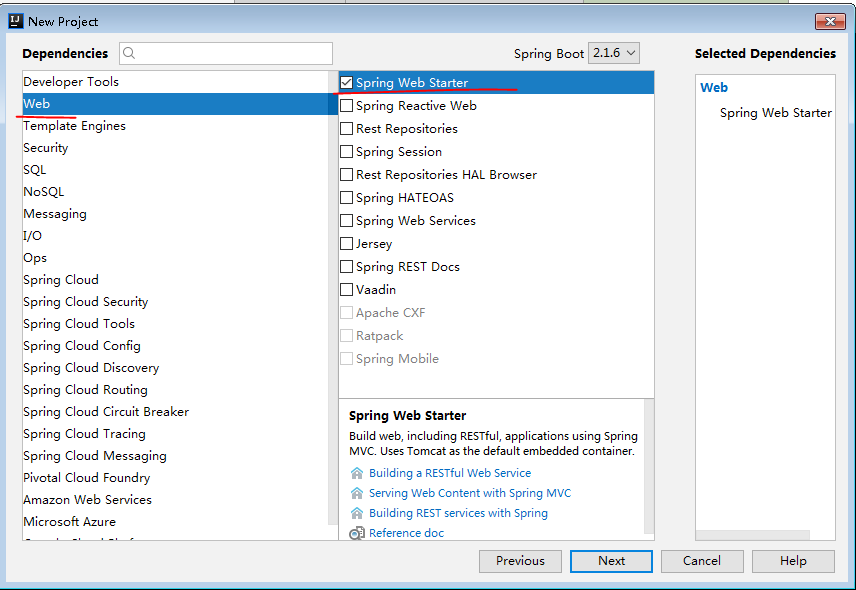
(3)點擊next(第二個)
選擇web-》spring web starter

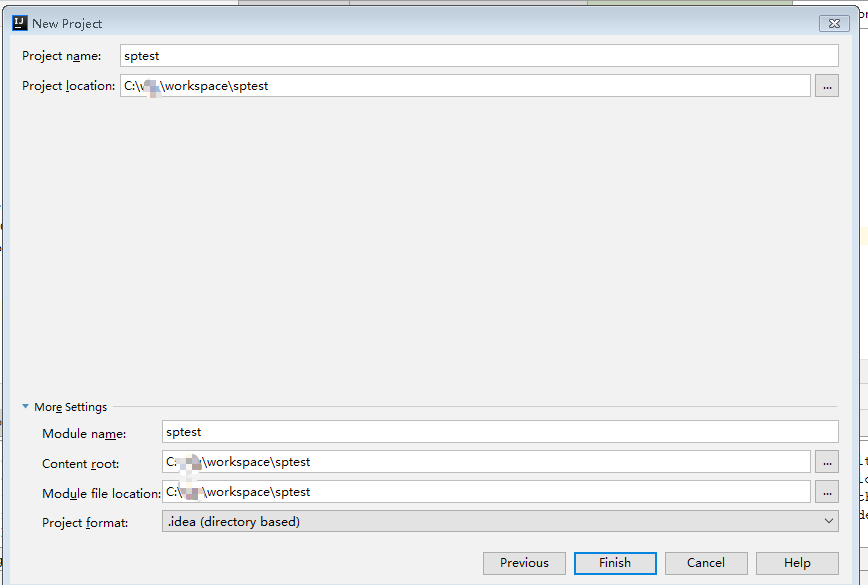
(4)點擊next(第三個)
不用做修改,直接finish

新建springboot項目已經完成。
2.2 springboot默認生成三個文件
默認生成的三個文件
2.2.1. pom.xml
<?xml version="1.0" encoding="UTF-8"?>
<project xmlns="http://maven.apache.org/POM/4.0.0" xmlns:xsi="http://www.w3.org/2001/XMLSchema-instance"
   xsi:schemaLocation="http://maven.apache.org/POM/4.0.0 http://maven.apache.org/xsd/maven-4.0.0.xsd">
 <modelVersion>4.0.0</modelVersion>
 <parent>
  <groupId>org.springframework.boot</groupId>
  <artifactId>spring-boot-starter-parent</artifactId>
  <version>2.1.4.RELEASE</version>
  <relativePath/> <!-- lookup parent from repository -->
 </parent>
 <groupId>com.laowang</groupId>
 <artifactId>sptest</artifactId>
 <version>0.0.1-SNAPSHOT</version>
 <name>sptest</name>
 <description>Demo project for Spring Boot</description>

 <properties>
  <java.version>1.8</java.version>
 </properties>

 <dependencies>
  <dependency>
   <groupId>org.springframework.boot</groupId>
   <artifactId>spring-boot-starter-web</artifactId>
  </dependency>
  <dependency>
   <groupId>org.springframework.boot</groupId>
   <artifactId>spring-boot-starter-test</artifactId>
   <scope>test</scope>
  </dependency>
 </dependencies>

 <build>
  <plugins>
   <plugin>
    <groupId>org.springframework.boot</groupId>
    <artifactId>spring-boot-maven-plugin</artifactId>
   </plugin>
  </plugins>
 </build>

</project>
重點就一個gav:spring-boot-starter-web,其他可以刪除。
2.2.2 application.properties
該文件默認為空,springboot的默認啟動端口號:8080,可以在改文件修改。
2.2.3 啟動類文件(SptestApplication.java)
package com.laowang.sptest;

import org.springframework.boot.SpringApplication;
import org.springframework.boot.autoconfigure.SpringBootApplication;

@SpringBootApplication
public class SptestApplication {

 public static void main(String[] args) {
  SpringApplication.run(SptestApplication.class, args);
 }

}
重點是標簽:@SpringBootApplication
2.3 驗證springboot
在com.laowang.sptest報下新建ctroller包,并新建類:HelloController
package com.laowang.sptest.controller;

import org.springframework.stereotype.Controller;
import org.springframework.web.bind.annotation.RequestMapping;
import org.springframework.web.bind.annotation.ResponseBody;

import java.util.HashMap;

@Controller
public class HelloController {

 @RequestMapping("/")
 @ResponseBody
 public String getHello() {
  return "hello";
 }
}
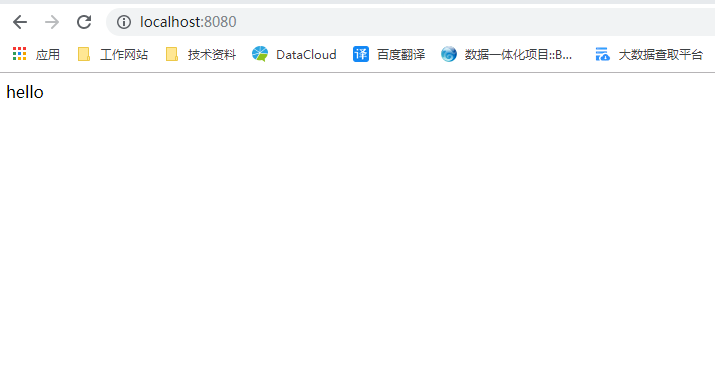
執行效果:

服務正常啟動。
2.4 重點說明
需要說明兩點:
(1)類文件要放在跟啟動類同級或者下一目錄下,本項目為:com.laowang.sptest包下面。因為springboot默認掃描加載啟動類同級或者下級目錄的標簽類(@RestController,@Service ,@Configuraion,@Component等),假如真需要加載其他目錄的標簽類,可以通過在啟動上配置標簽@ComponentScan(具體包)來進行掃描加載。
(2)資源文件默認放到resources下面,templates默認放的是動態文件,比如:html文件,不過要搭配thymeleaf 使用(pom文件中需新加gav)。
其他也沒什么了,springboot主要是通過spring提供的多個starter和一些默認約定,實現項目的快速搭建。
關于如何快速構建一個spring boot項目問題的解答就分享到這里了,希望以上內容可以對大家有一定的幫助,如果你還有很多疑惑沒有解開,可以關注億速云行業資訊頻道了解更多相關知識。
免責聲明:本站發布的內容(圖片、視頻和文字)以原創、轉載和分享為主,文章觀點不代表本網站立場,如果涉及侵權請聯系站長郵箱:is@yisu.com進行舉報,并提供相關證據,一經查實,將立刻刪除涉嫌侵權內容。