溫馨提示×
您好,登錄后才能下訂單哦!
點擊 登錄注冊 即表示同意《億速云用戶服務條款》
您好,登錄后才能下訂單哦!
這篇文章主要講解了Unity如何實現引導頁效果,內容清晰明了,對此有興趣的小伙伴可以學習一下,相信大家閱讀完之后會有幫助。
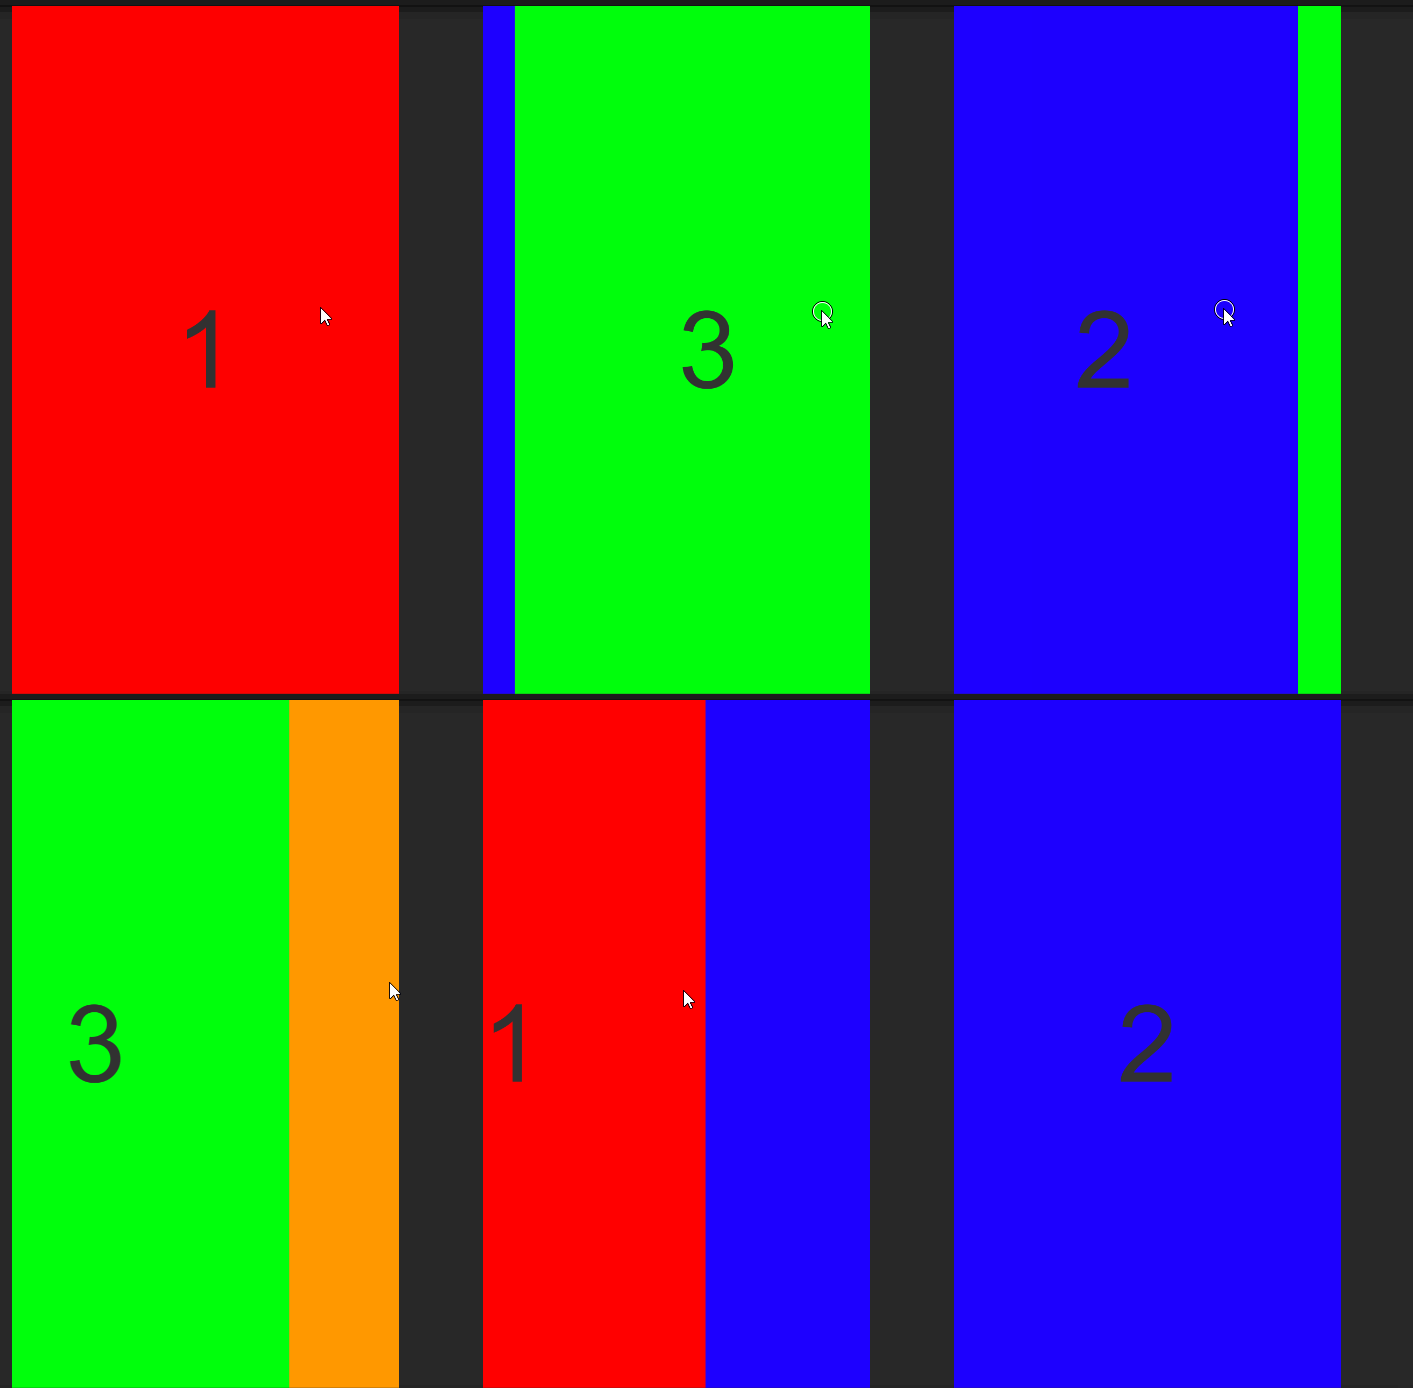
效果圖:

1、創建Canvas,設置RenderMode=ScreenSpace-Overlay,UIScaleMode = ScaleWithScreenSize,
ReferenceResolution(x=1080,y=1920)
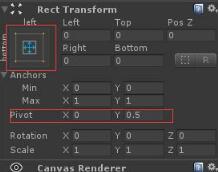
2、創建一個RawImage,命名為(parentGoImg),并做如下設置

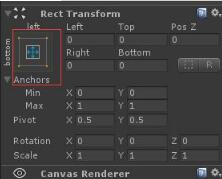
3、在parentGoImg下建幾個RawImage,賦予想展示的圖片,并做如下設置

4、添加如下腳本給parentGoImg
using System.Collections;
using System.Collections.Generic;
using UnityEngine;
using UnityEngine.EventSystems;
using DG.Tweening;
using UnityEngine.UI;

public class Asd : MonoBehaviour,IBeginDragHandler, IDragHandler,IEndDragHandler
{
  /// <summary>
  /// 可移動的最大最小X軸坐標
  /// </summary>
  private float minX, maxX;
  /// <summary>
  /// 開始觸摸時,算出偏移值,防止跳變
  /// </summary>
  private float offsetX;

  /// <summary>
  /// 靈敏度
  /// </summary>
  private float sensitivityX;
  /// <summary>
  /// 當前顯示第幾頁
  /// </summary>
  private int currentShowIndex = 1;

  private void Start()
  {
    (transform as RectTransform).pivot = new Vector2(0, 0.5f);
    Debug.Log(Screen.width + "  " + Screen.height);
    for (int i = 0; i < transform.childCount; i++)
    {
      (transform.GetChild(i) as RectTransform).sizeDelta = new Vector2(0, 0);
      //canvas的RenderMode要設置成Overlay形式
      //這里i*1080是因為canvas的UIScaleMode設置成了ScaleWithScreenSize,Resolution為x=1080,y=1920
      //如果canvas的UIScaleMode設置成ConstantPixelSize則吧這里的i*1080改成i*Screen.width
      (transform.GetChild(i) as RectTransform).anchoredPosition = new Vector2(i * 1080.0f, 0);
    }

    minX = -((transform.childCount - 1) * Screen.width);
    maxX = 0.0f;
    //如果移動超過頁面的五分之一,則切換頁面
    sensitivityX = Screen.width / 5;
  }

  public void OnBeginDrag(PointerEventData eventData)
  {
    offsetX = transform.position.x - Input.mousePosition.x;
  }

  public void OnDrag(PointerEventData eventData)
  {
    //將物體坐標限制在最大最小X軸坐標內
    transform.position = new Vector2(Input.mousePosition.x + offsetX, transform.position.y);
    if (transform.position.x <= minX)
    {
      transform.position = new Vector2(minX, transform.position.y);
    }
    else if (transform.position.x >= maxX)
    {
      transform.position = new Vector2(maxX, transform.position.y);
    }
  }

  public void OnEndDrag(PointerEventData eventData)
  {
    //判斷坐標,是否需要切換頁面
    if (transform.position.x > GetLeftX())
    {
      currentShowIndex--;
    }
    else if (transform.position.x < GetRightX())
    {
      currentShowIndex++;
    }
    transform.DOMoveX(-(currentShowIndex - 1) * Screen.width, 0.2f);
  }

  float GetLeftX() {
    return -((currentShowIndex - 1) * Screen.width - sensitivityX);
  }

  float GetRightX() {
    return -((currentShowIndex - 1) * Screen.width + sensitivityX);
  }
}
運行即可看到效果
看完上述內容,是不是對Unity如何實現引導頁效果有進一步的了解,如果還想學習更多內容,歡迎關注億速云行業資訊頻道。
免責聲明:本站發布的內容(圖片、視頻和文字)以原創、轉載和分享為主,文章觀點不代表本網站立場,如果涉及侵權請聯系站長郵箱:is@yisu.com進行舉報,并提供相關證據,一經查實,將立刻刪除涉嫌侵權內容。