您好,登錄后才能下訂單哦!
您好,登錄后才能下訂單哦!
這篇文章主要為大家展示了“python django框架中如何使用FastDFS分布式文件系統”,內容簡而易懂,條理清晰,希望能夠幫助大家解決疑惑,下面讓小編帶領大家一起研究并學習一下“python django框架中如何使用FastDFS分布式文件系統”這篇文章吧。
一、安裝FastDFS
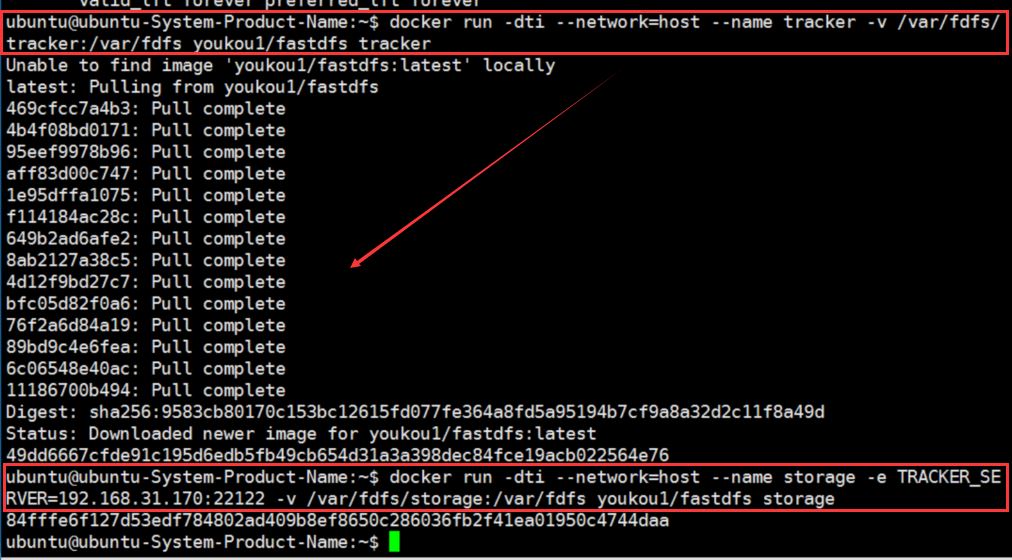
1-1:執行docker命令安裝
# 安裝tracker
docker run -dti --network=host --name tracker -v /var/fdfs/tracker:/var/fdfs youkou1/fastdfs tracker
# 安裝storage
docker run -dti --network=host --name storage -e TRACKER_SERVER=IP地址:22122 -v /var/fdfs/storage:/var/fdfs youkou1/fastdfs storage
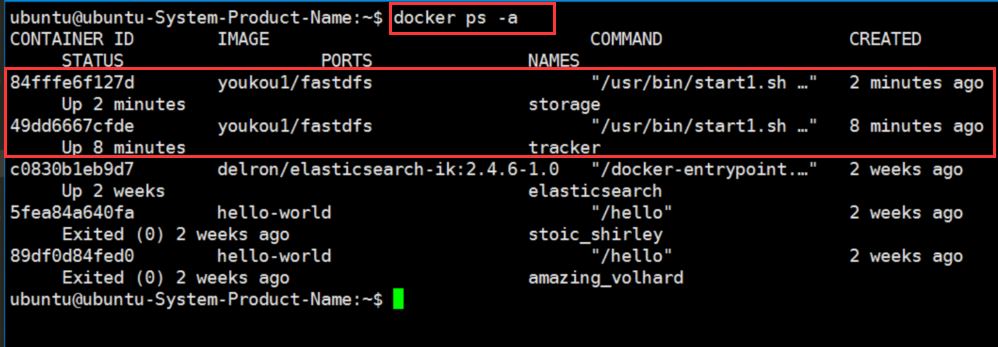
1-2 測試是否安裝成功:執行命令 docker ps -a
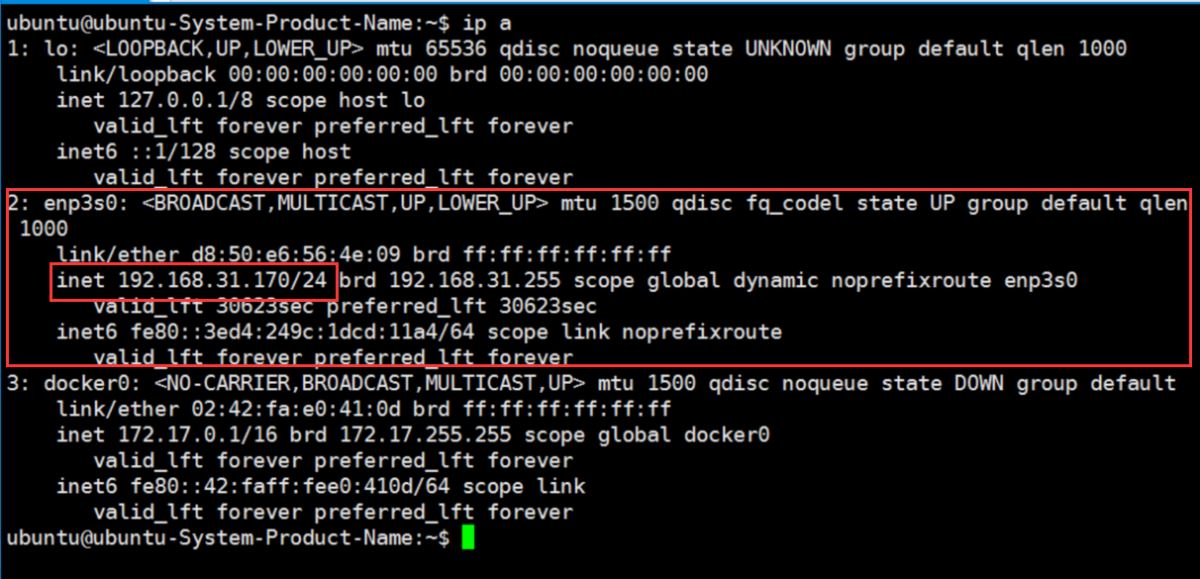
TRACKER_SERVER:IP地址說明不要使用lo 和docker下的IP地址因為在安裝鏡像中配的是enp3s0下面的IP地址。
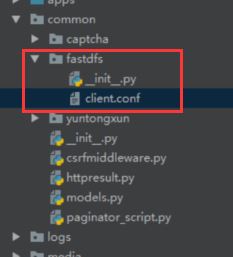
1-3、在項目中創建客戶端配置文件 fastdfs/client.conf
client.conf配置文件內容:注意tracker_serverIP地址。
# connect timeout in seconds
# default value is 30s
connect_timeout=30
# network timeout in seconds
# default value is 30s
network_timeout=60
# the base path to store log files
# base_path=utils/fastdfs/logs
# tracker_server can ocur more than once, and tracker_server format is
# "host:port", host can be hostname or ip address
tracker_server=192.168.31.170:22122
#standard log level as syslog, case insensitive, value list:
### emerg for emergency
### alert
### crit for critical
### error
### warn for warning
### notice
### info
### debug
log_level=info
# if use connection pool
# default value is false
use_connection_pool = false
# connections whose the idle time exceeds this time will be closed
# unit: second
# default value is 3600
connection_pool_max_idle_time = 3600
# if load FastDFS parameters from tracker server
# default value is false
load_fdfs_parameters_from_tracker=false
# if use storage ID instead of IP address
# same as tracker.conf
# valid only when load_fdfs_parameters_from_tracker is false
# default value is false
use_storage_id = false
# specify storage ids filename, can use relative or absolute path
# same as tracker.conf
# valid only when load_fdfs_parameters_from_tracker is false
storage_ids_filename = storage_ids.conf
#HTTP settings
http.tracker_server_port=80
1-4:在xhell中進入項目的虛擬環境安裝python相關包 (在虛擬環境中)
# 安裝相關包
pip install fdfs_client.zip
pip install mutagen
pip install requests
1-5:如果pip install fdfs_client.zip 安裝報錯

請執行如下命令
sudo apt-get install python3 python-dev python3-dev build-essential libssl-dev libffi-dev libxml2-dev libxslt1-dev zlib1g-dev python-pip
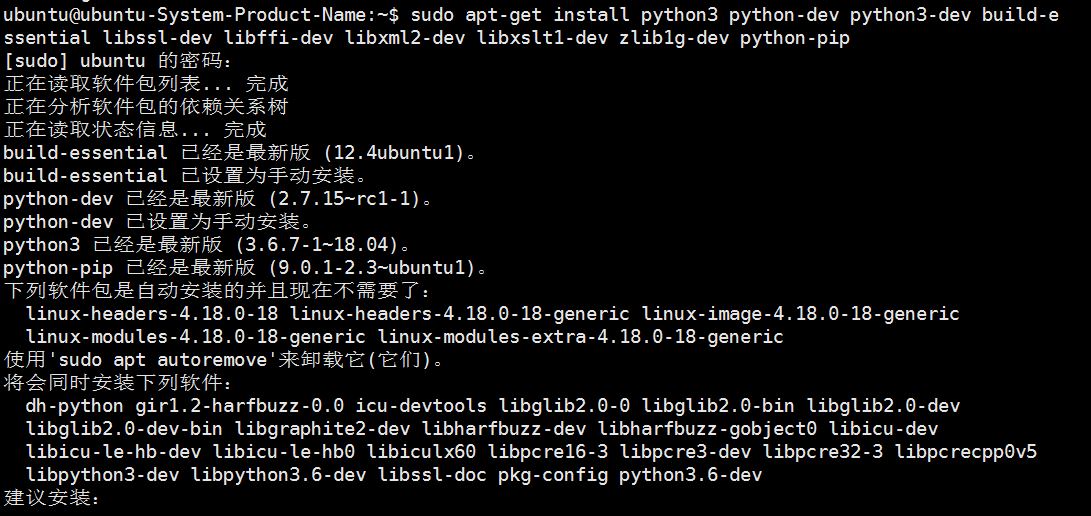
然后在執行安裝命令:

查看所安裝的包:
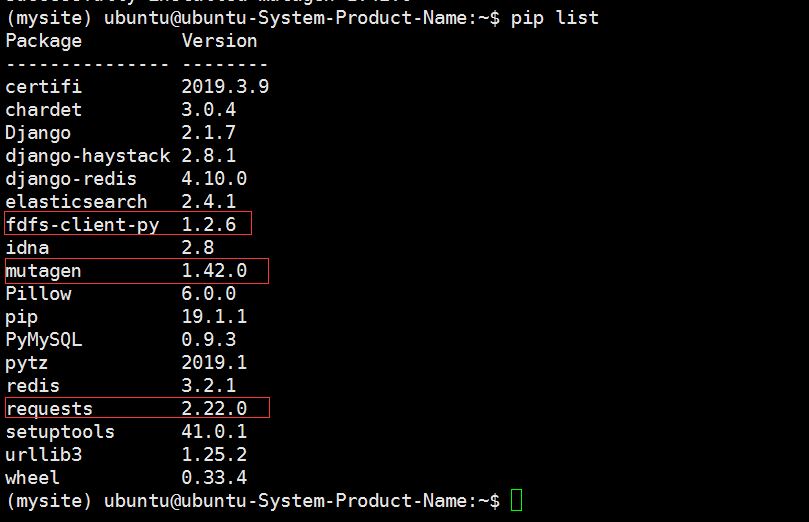
測試代碼:
from fdfs_client.client import Fdfs_client
FDFS_Client = Fdfs_client('/common/fastdfs/client.conf')
ret = FDFS_Client.upload_by_filename('/media/2018.png')
print(ret)
如果執行不報錯,返回結果如下說明就成功了:

1-6 如果進行測試 以下報的是語法錯誤,這個明顯是python2的語法,我現在用的是python3,進過查詢相關資料,決定換一個不用 pip install fdfs_client.zip

刪除 fdfs_client.zip 執行命令
pip uninstall fdfs_client-py
使用pip install py3Fdfs

再次測試:

在瀏覽器中查看:
http://192.168.31.170:8888/group1/M00/00/00/wKgfqlz5yYyAHe5nAAfh_rrm7jw601.png
注意:這里的端口8888也是在上面安裝環境中配好的。
以上是“python django框架中如何使用FastDFS分布式文件系統”這篇文章的所有內容,感謝各位的閱讀!相信大家都有了一定的了解,希望分享的內容對大家有所幫助,如果還想學習更多知識,歡迎關注億速云行業資訊頻道!
免責聲明:本站發布的內容(圖片、視頻和文字)以原創、轉載和分享為主,文章觀點不代表本網站立場,如果涉及侵權請聯系站長郵箱:is@yisu.com進行舉報,并提供相關證據,一經查實,將立刻刪除涉嫌侵權內容。