您好,登錄后才能下訂單哦!
您好,登錄后才能下訂單哦!
這篇文章主要介紹怎么使用Vue-Awesome-Swiper實現旋轉疊加輪播效果&平移輪播效果,文中介紹的非常詳細,具有一定的參考價值,感興趣的小伙伴們一定要看完!
Vue是一款友好的、多用途且高性能的JavaScript框架,使用vue可以創建可維護性和可測試性更強的代碼庫,Vue允許可以將一個網頁分割成可復用的組件,每個組件都包含屬于自己的HTML、CSS、JavaScript,以用來渲染網頁中相應的地方,所以越來越多的前端開發者使用vue。
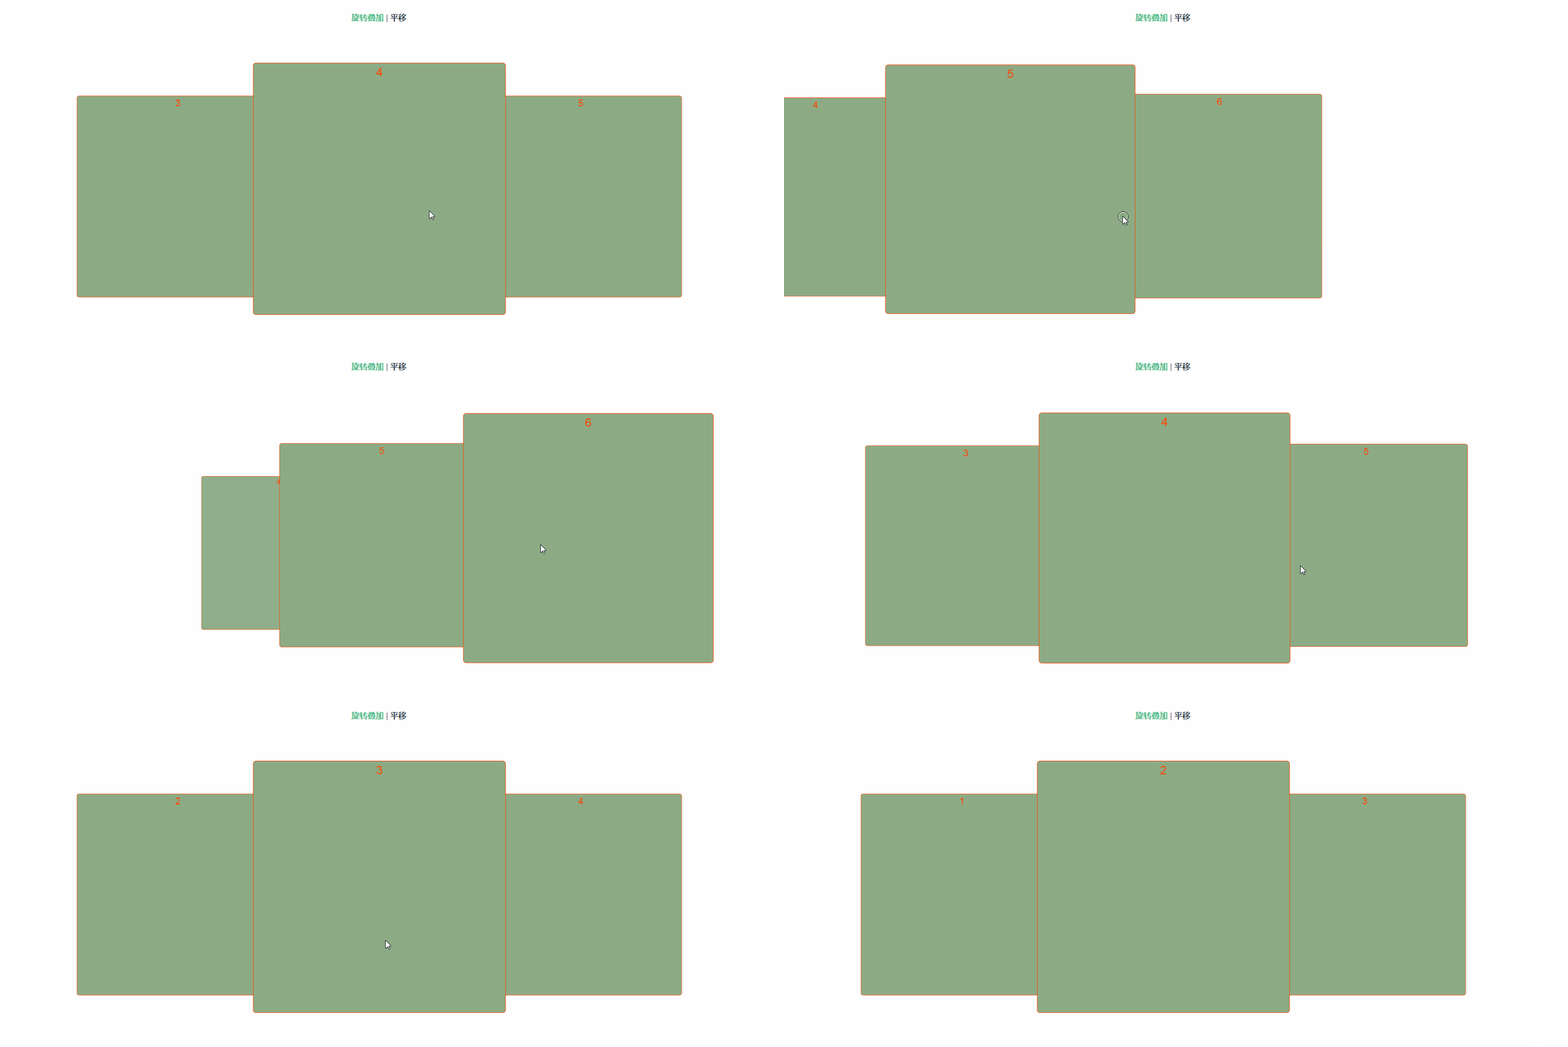
旋轉疊加

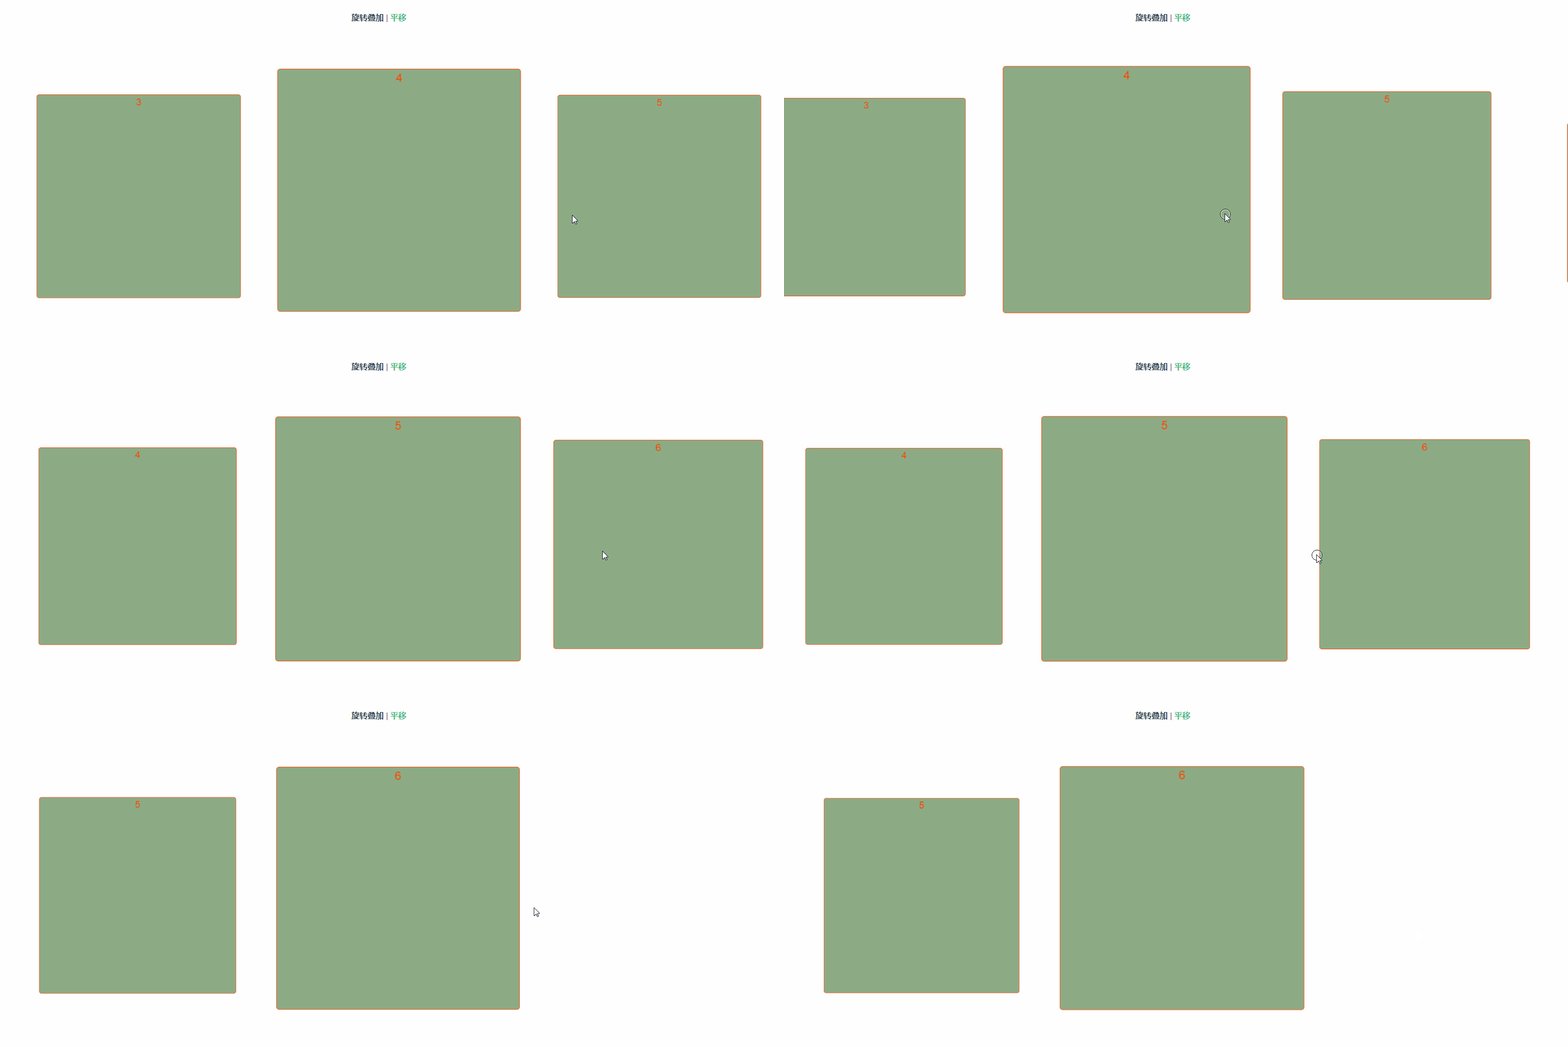
平移

前段時間做Hybrid App,UI設計濕要求某一個頁面的展示要實現滑動輪播效果,選中的內容卡片居中顯示,上一個內容卡片和下一個內容以小一倍的大小顯示在選中的卡片后頭,而且要高斯模糊等等。。最騷的是滑動特效要是一個個旋轉疊加。(摔!
當時用的是vue-cli-3 + ant-design-vue實現的頁面,發現ant-design-vue里頭有現成的Carousel組件可用,由于排期比較急,先暫時用這個實現了第一版,沒有特效沒有其他花里胡哨的展示。驗收完第一版后,發現ant-design-vue的坑是真的多啊。。Carousel在移動端也是十分的不流暢。總是就是體驗特別的不好。最后一氣之下,全部樣式自己寫,全部組件自己封裝,將ant-design-vue完完整整移出了項目。
輪播圖這塊想到了Swiper這一好東西,現在已經有了vue版,但是是沒有專門的vue版文檔的,可以找到的項目也比較少。無奈之下啃了Swiper4文檔,一頓猛操作,摸到了一點點門道。把需求實現了是也。簡單整理了一下,寫了個簡單的小demo,記錄一下,如果可以幫到你那是最好啦~
1.首先引入Vue-Awesome-Swiper
引入Vue-Awesome-Swiper有兩種方式,一種是全局引入,一種是組件內引入。如果你的項目里只有一個地方要用到這玩意,那就在用到的那個頁面引入就行,如果多個地方要用到,那就全局引入吧。
全局引入:
// main.js
import VueAwesomeSwiper from 'vue-awesome-swiper'
import 'swiper/dist/css/swiper.css'
Vue.use(VueAwesomeSwiper, /* { default global options } */)
組件內引入:
// xxx.vue
<script>
import 'swiper/dist/css/swiper.css'
import { swiper, swiperSlide } from 'vue-awesome-swiper'
export default {
 components: {
  swiper,
  swiperSlide
 }
}
</script>
2.在頁面使用
<template>
 <div class="swiper-content">
  <swiper ref="mySwiper" :options="swiperOption" class="show-swiper">
   <template v-for="(item, index) in list">
    <swiper-slide :key="index">
     <div class="swiper-item">
      <span>{{ item }}</span>
     </div>
    </swiper-slide>
   </template>
  </swiper>
 </div>
</template>
js部分
旋轉疊加
<script>
import { mapState } from 'vuex'
import store from '@/store'
export default {
 data() {
  return {
   list: [1, 2, 3, 4, 5, 6],
   swiperOption: {
    // 設置slider容器能夠同時顯示的slides數量,默認為1, 'auto'則自動根據slides的寬度來設定數量
    slidesPerView: 'auto',
    /*
    * 開啟這個參數來計算每個slide的progress(進度、進程)
    * 對于slide的progress屬性,活動的那個為0,其他的依次減1
    */
    watchSlidesProgress: true,
    // 默認active slide居左,設置為true后居中
    centeredSlides: true,
    // 當你創建一個Swiper實例時是否立即初始化,這里我們手動初始化
    init: false,
    on: {
     progress: function() {
      for (let i = 0; i < this.slides.length; i++) {
       const slide = this.slides.eq(i) // 指定匹配元素集縮減值
       const slideProgress = this.slides[i].progress // 當前元素集的progress值

       let modify = 0 // 偏移權重
       if (parseInt(Math.abs(slideProgress)) > 0) {
        modify = Math.abs(slideProgress) * 0.2 // 不一定要0.2,可自行調整
       }
       const translate = slideProgress * modify * 500 + 'px' // 500是swiper-slide的寬度
       const scale = 1 - Math.abs(slideProgress) / 5 // 縮放權重值,隨著progress由中向兩邊依次遞減,可自行調整
       const zIndex = 99 - Math.abs(Math.round(10 * slideProgress))
       slide.transform(`translateX(${translate}) scale(${scale})`)
       slide.css('zIndex', zIndex)
       slide.css('opacity', 1) // 是否可見
       if (parseInt(Math.abs(slideProgress)) > 1) { // 設置了只有選中的元素以及他兩遍的顯示,其他隱藏
        slide.css('opacity', 0)
       }
      }
     },
     slideChange: function() {
      store.commit('SET_ACTIVE_INDEX', this.activeIndex)
     }
    }
   }
  }
 },
 computed: {
  swiper() {
   return this.$refs.mySwiper.swiper
  },
  ...mapState({
   activeItemIndex: state => state.activeIndex
  })
 },
 mounted() {
  this.initSwiper()
 },
 methods: {
  initSwiper() {
   this.$nextTick(async() => {
    await this.swiper.init() // 現在才初始化
    await this.swiper.slideTo(this.activeItemIndex)
   })
  }
 }
}
</script>
平移
<script>
import { mapState } from 'vuex'
import store from '@/store'
export default {
 data() {
  return {
   list: [1, 2, 3, 4, 5, 6],
   swiperOption: {
    slidesPerView: 'auto',
    watchSlidesProgress: true,
    // 設定slide與左邊框的預設偏移量(單位px)
    slidesOffsetBefore: 37,
    // 設置slide之間的距離(單位px)
    spaceBetween: 17,
    centeredSlides: true,
    init: false,
    on: {
     progress: function() {
      for (let i = 0; i < this.slides.length; i++) {
       const slide = this.slides.eq(i)
       const slideProgress = this.slides[i].progress

       const scale = 1 - Math.abs(slideProgress) / 5 // 縮放權重值,隨著progress由中向兩邊依次遞減,可自行調整
       slide.transform(`scale3d(${scale}, ${scale}, 1)`)
      }
     },
     slideChange: function() {
      store.commit('SET_ACTIVE_INDEX', this.activeIndex)
     }
    }
   }
  }
 },
 computed: {
  swiper() {
   return this.$refs.mySwiper.swiper
  },
  ...mapState({
   activeItemIndex: state => state.activeIndex
  })
 },
 mounted() {
  this.initSwiper()
 },
 methods: {
  initSwiper() {
   this.$nextTick(async() => {
    await this.swiper.init() // 現在才初始化
    await this.swiper.slideTo(this.activeItemIndex)
   })
  }
 }
}
</script>
配置參數那里,init我是設置的false,我是想在項目掛載完成后,獲取到了接口數據之后,再用 this.swiper.init() 去初始化輪播組件的,然后我把激活項的索引存在了vuex里頭,這樣每次從其他頁面返回這個頁面,就可以用 this.swiper.slideTo(this.activeItemIndex) 去控制我要定位到哪一個內容卡片先。
3.樣式初始化方面
swiper-content {
 width: 100%;
 height: 100%;
 position: relative;
 overflow: hidden;
 margin: 0 auto;
 padding: 50px 0;

 .show-swiper {
  width: 100%;
  height: 100%;
  top: 0;
  left: 0;

  .swiper-slide {
   width: 500px;
   // 表示所有屬性都有動作效果,過度時間為0.4s,以慢速開始和結束的過渡效果
   transition: all .4s cubic-bezier(.4, 0, .2, 1);

   .swiper-item {
    width: 100%;
    height: 500px;
    background: rgb(140, 172, 134);
    border-radius: 6px;
    color: orangered;
    font-size: 24px;
    line-height: 1.5;
    border: 1px solid orangered;
   }
  }
 }
}
因為 slidesPerView: 'auto' ,所以swiper-slide我們要給他一個初始化的寬度,以便他自動計算容器寬度,然后這里我設置了動畫的效果 transition: all .4s cubic-bezier(.4, 0, .2, 1); 可以根據自己的需要作出改動
大概就是這些內容,是不是很簡單呢。我會把源碼地址貼出來,有需要的話就自行clone參考吧~,項目里我使用的是vue-cli3,可以自行調整。
以上是“怎么使用Vue-Awesome-Swiper實現旋轉疊加輪播效果&平移輪播效果”這篇文章的所有內容,感謝各位的閱讀!希望分享的內容對大家有幫助,更多相關知識,歡迎關注億速云行業資訊頻道!
免責聲明:本站發布的內容(圖片、視頻和文字)以原創、轉載和分享為主,文章觀點不代表本網站立場,如果涉及侵權請聯系站長郵箱:is@yisu.com進行舉報,并提供相關證據,一經查實,將立刻刪除涉嫌侵權內容。